

Kitchen Redo
Our 1960’s kitchen get’s a face lift!
Ok, it’s time for the big kitchen reveal. Below are a few pictures to wet your whistle of what our kitchen looked like when we bought the house. Painted cabinets, plastic laminate countertops and backsplash, lovely wallpaper, and white floors that were impossible to keep clean. Let’s not forget the popcorn ceilings and beautiful chandelier.
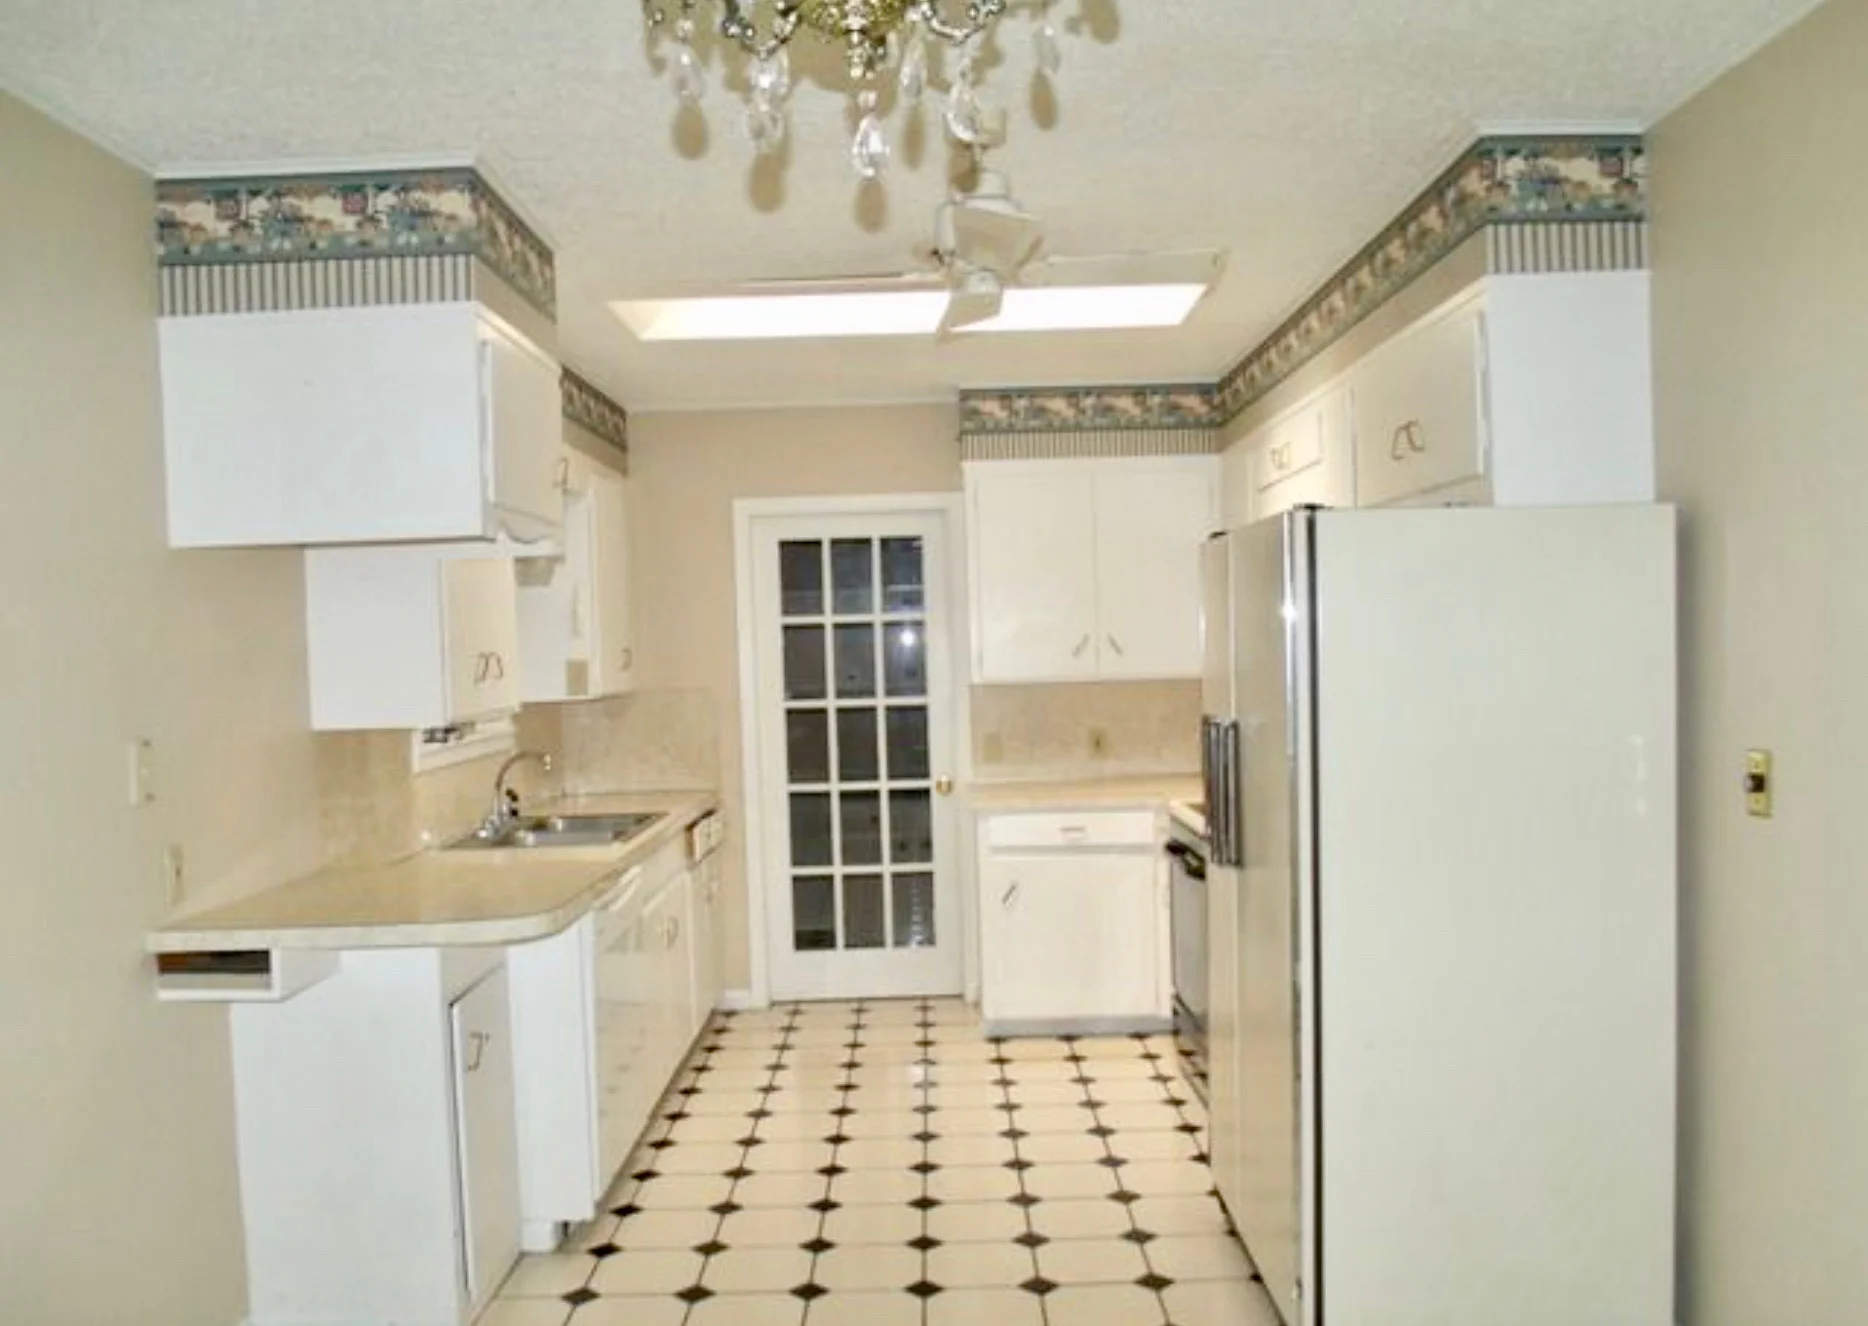
Kitchen when we bought the house.
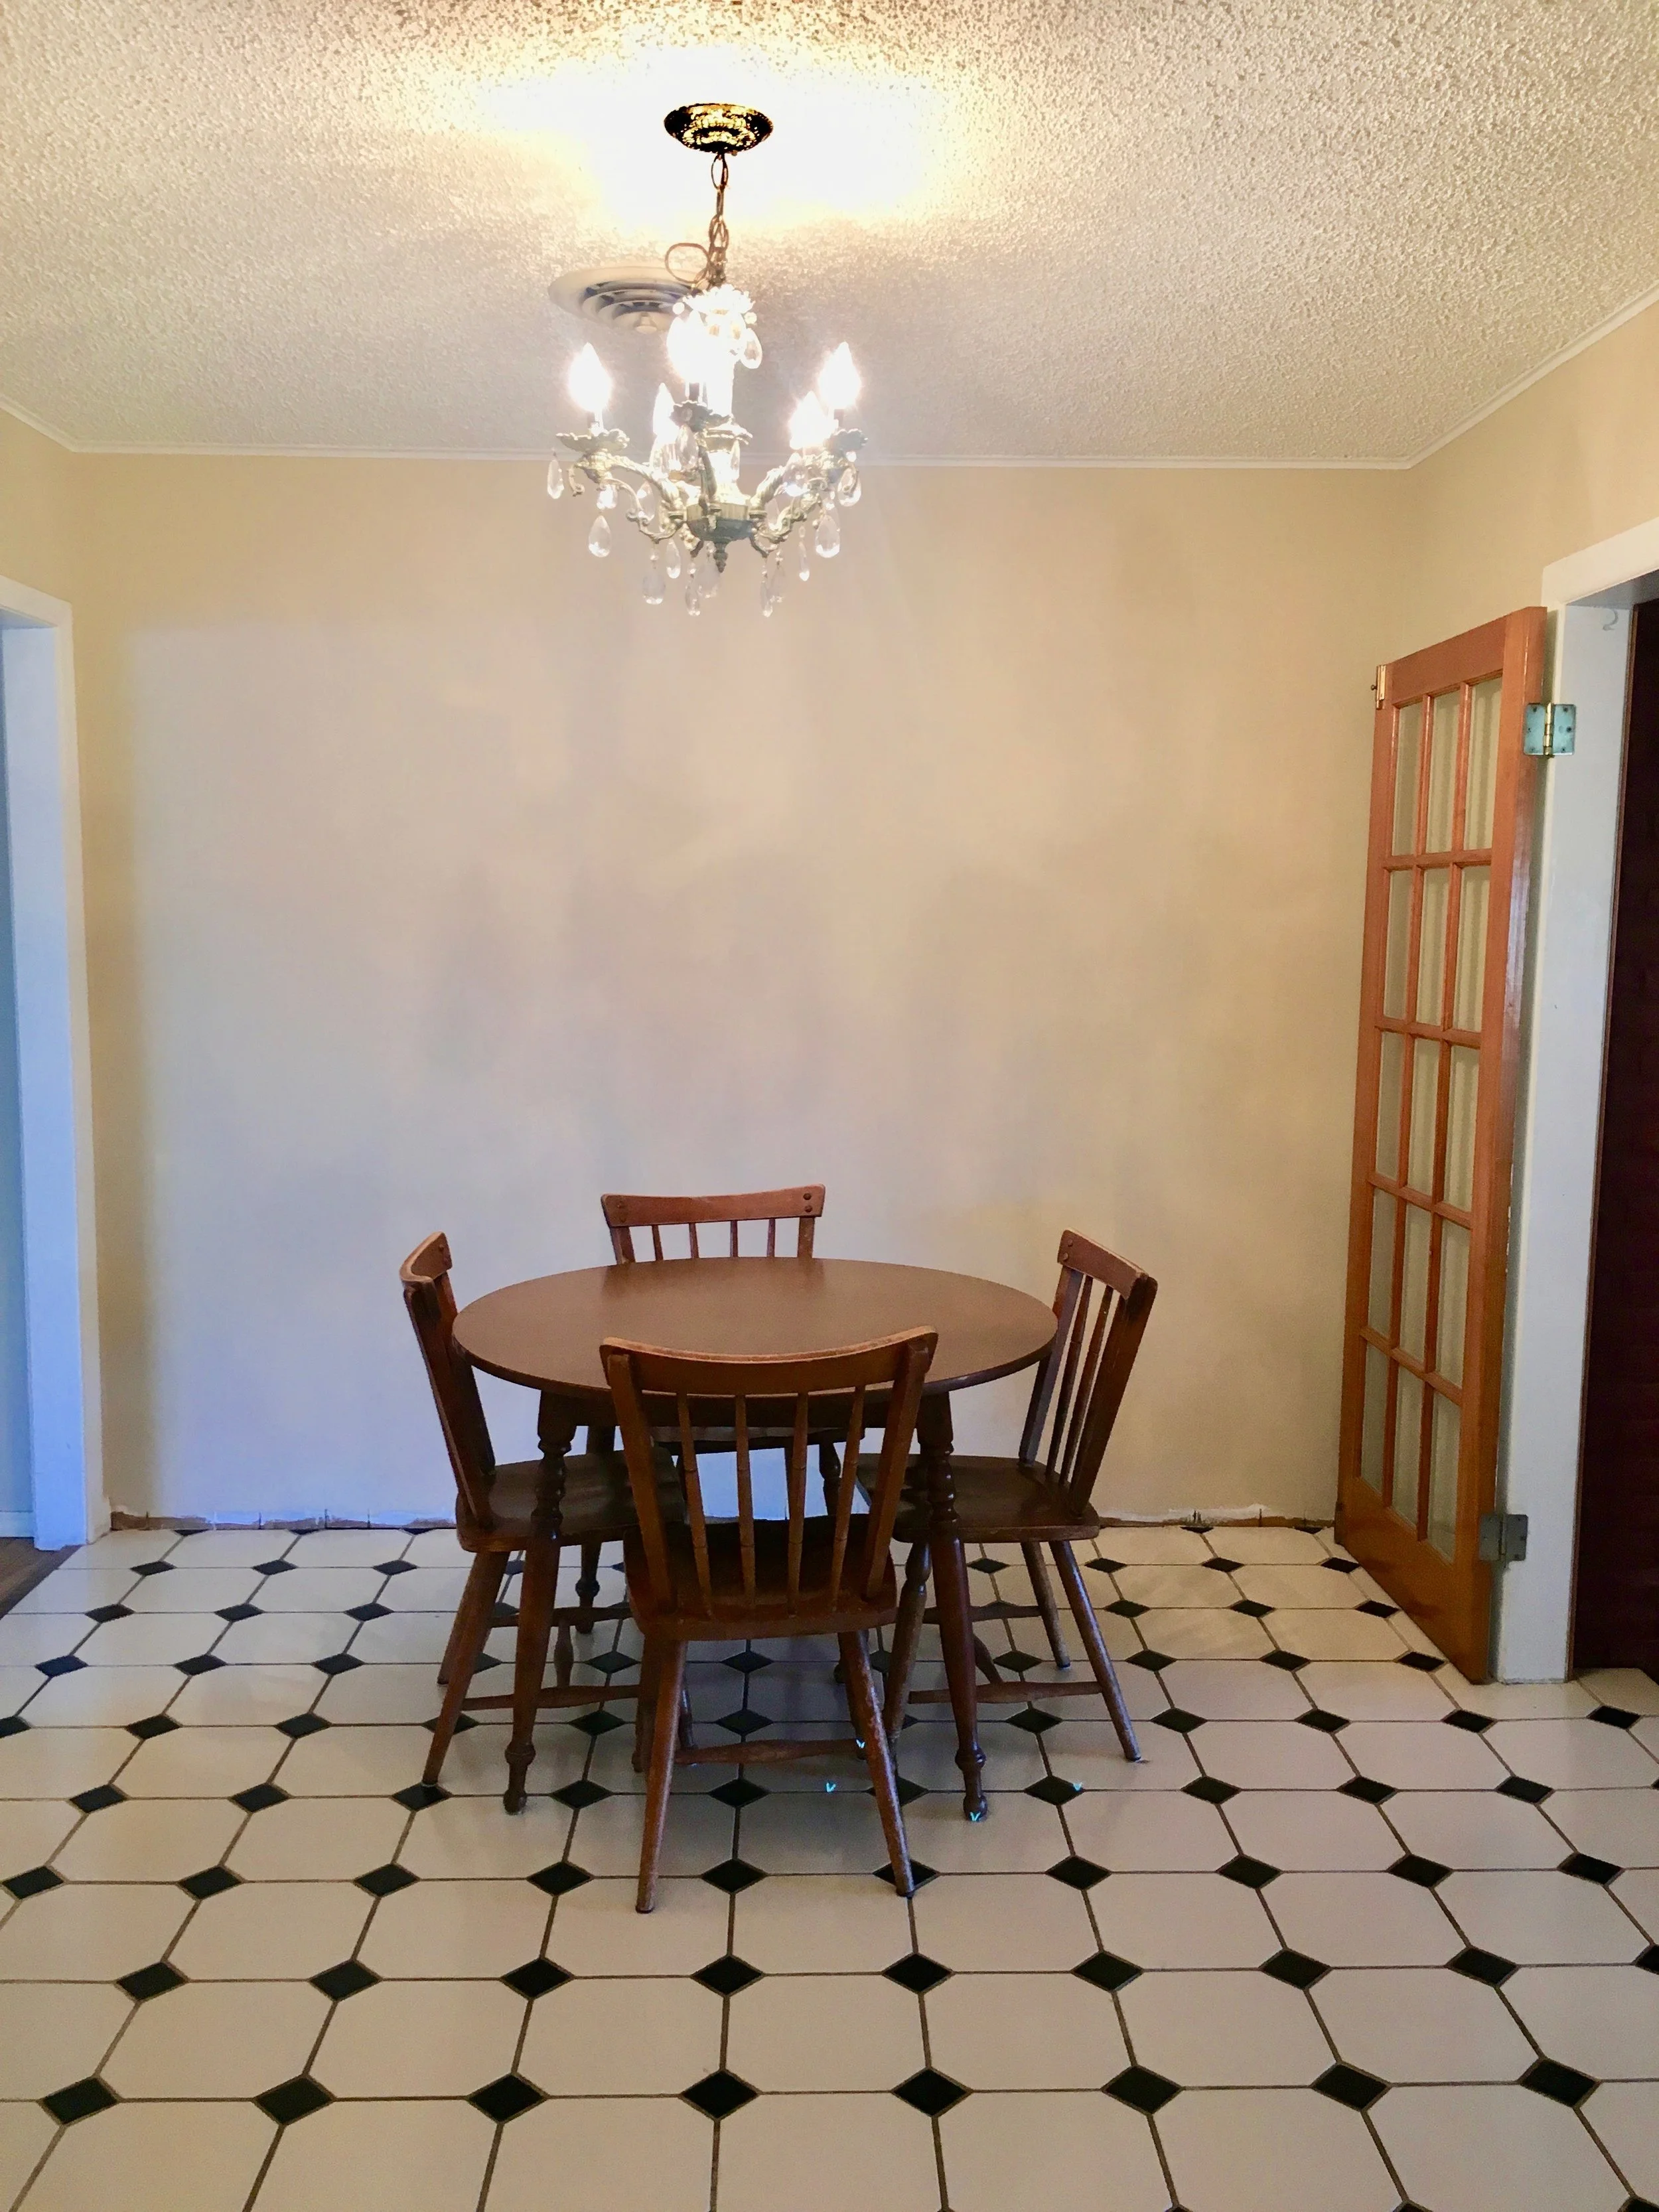
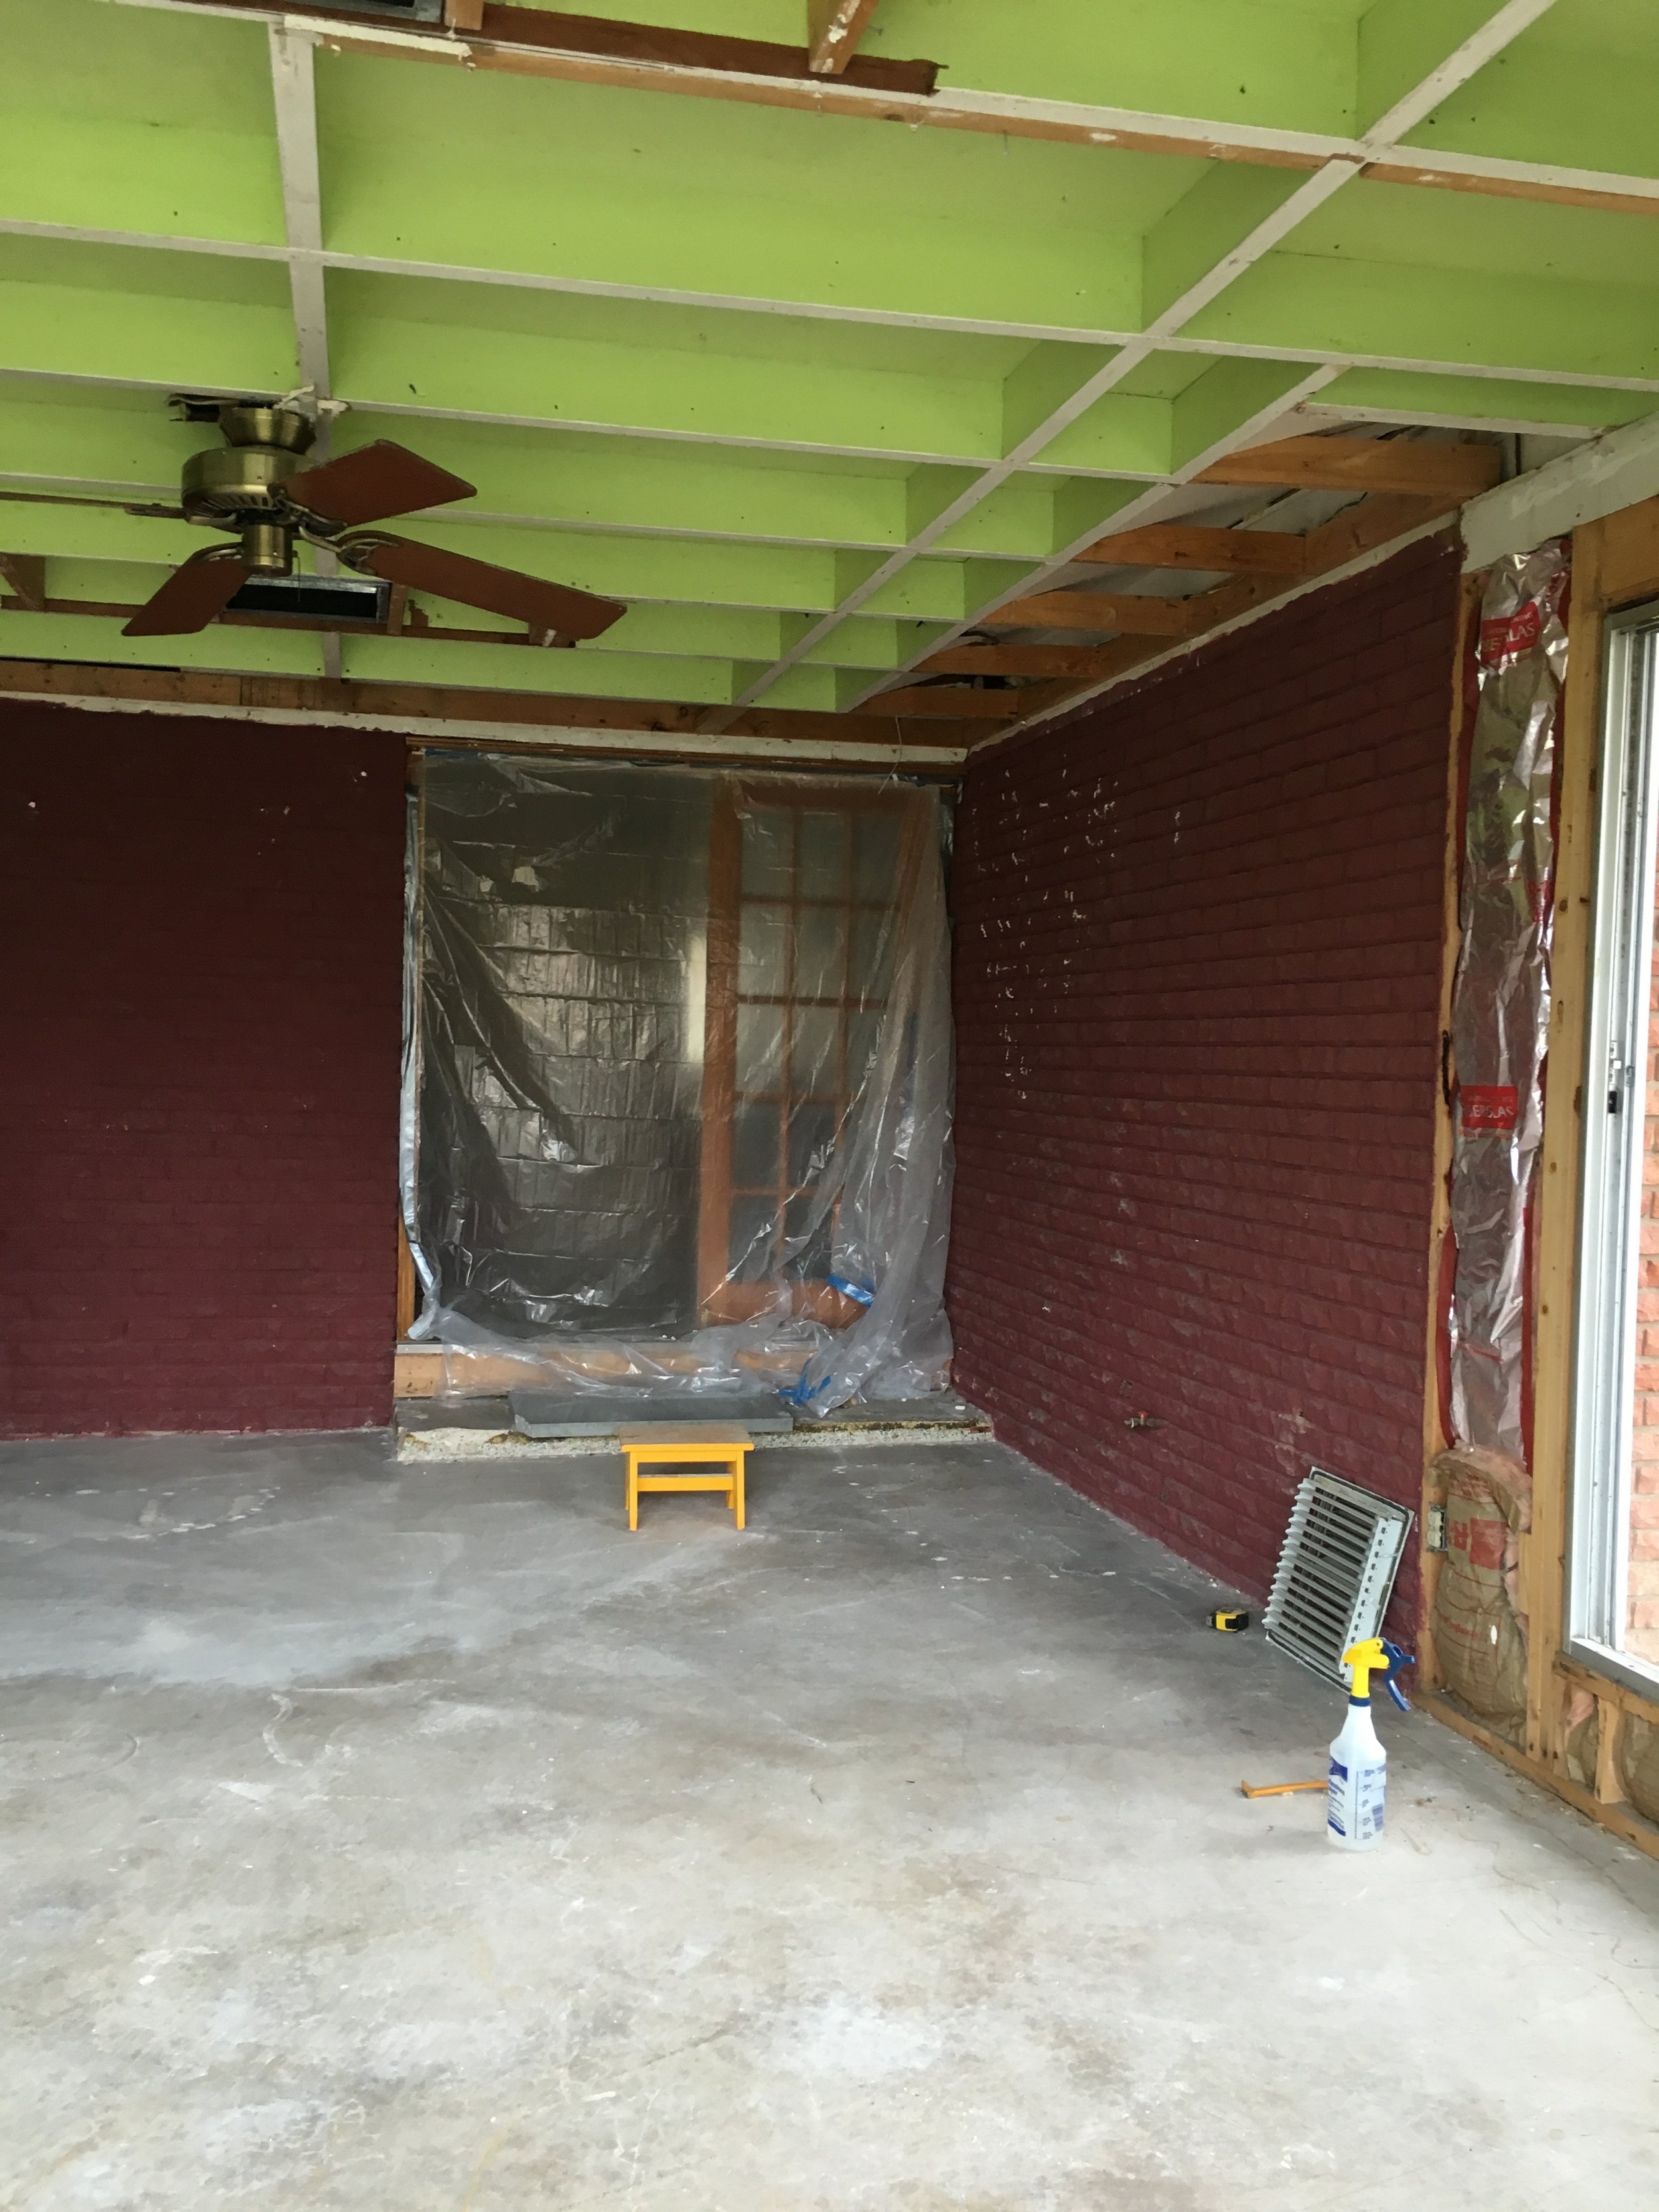
This next picture is what will eventually become our kitchen nook. It’s hard to believe that this picture is actually an improvement from when we bought the house. The back wall had striped wall paper that was nauseating to look at. We removed it immediatly after moving in so we would not feel dizzy while eating.
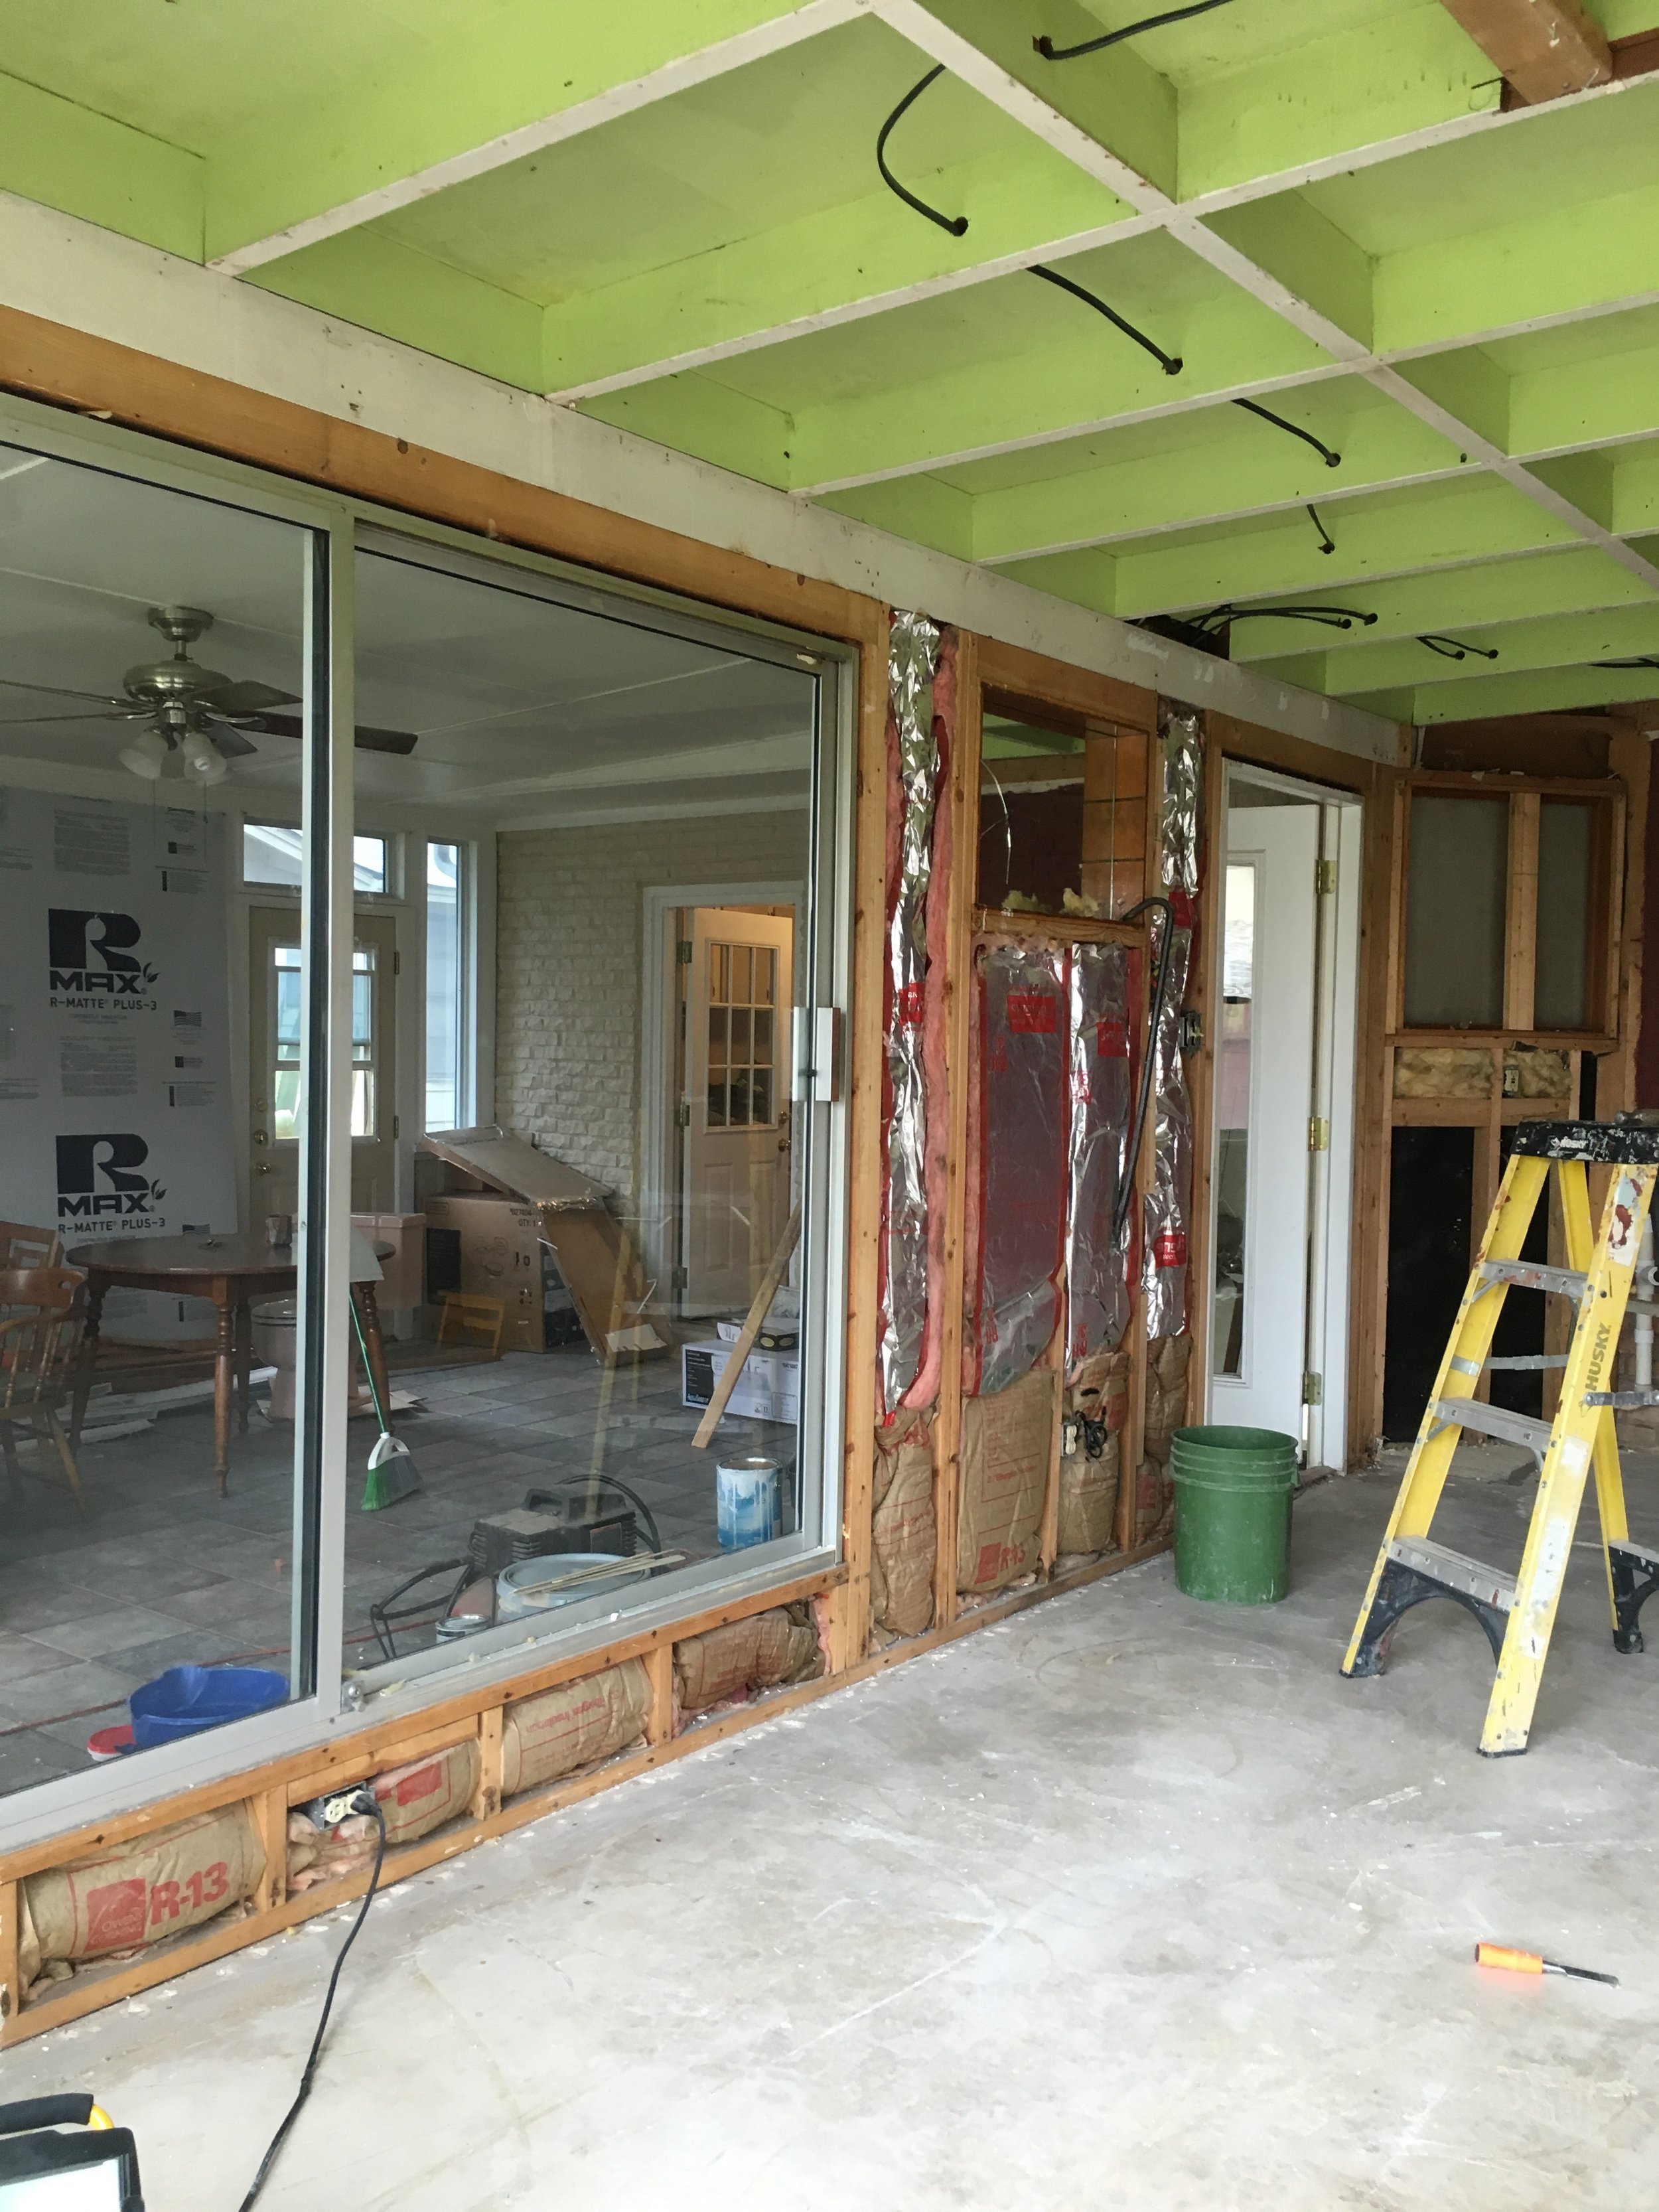
On the other side of this back wall, were two closets that were accessible to the master bedroom. We already had a walk-in closet and didn’t feel the need for the extra storage space, so we pushed that wall back two feet to utilize the space for our future kitchen nook.
This was a fresh start situation. We had to remove two layers of wood paneling from all the walls in the kitchen. The flooring and subfloor came up and cabinets out. The only thing that stayed was the ceiling, with exception to the popcorn texture.

What will become our kitchen nook. You can see in this picture the two closets we utilized in the kitchen.

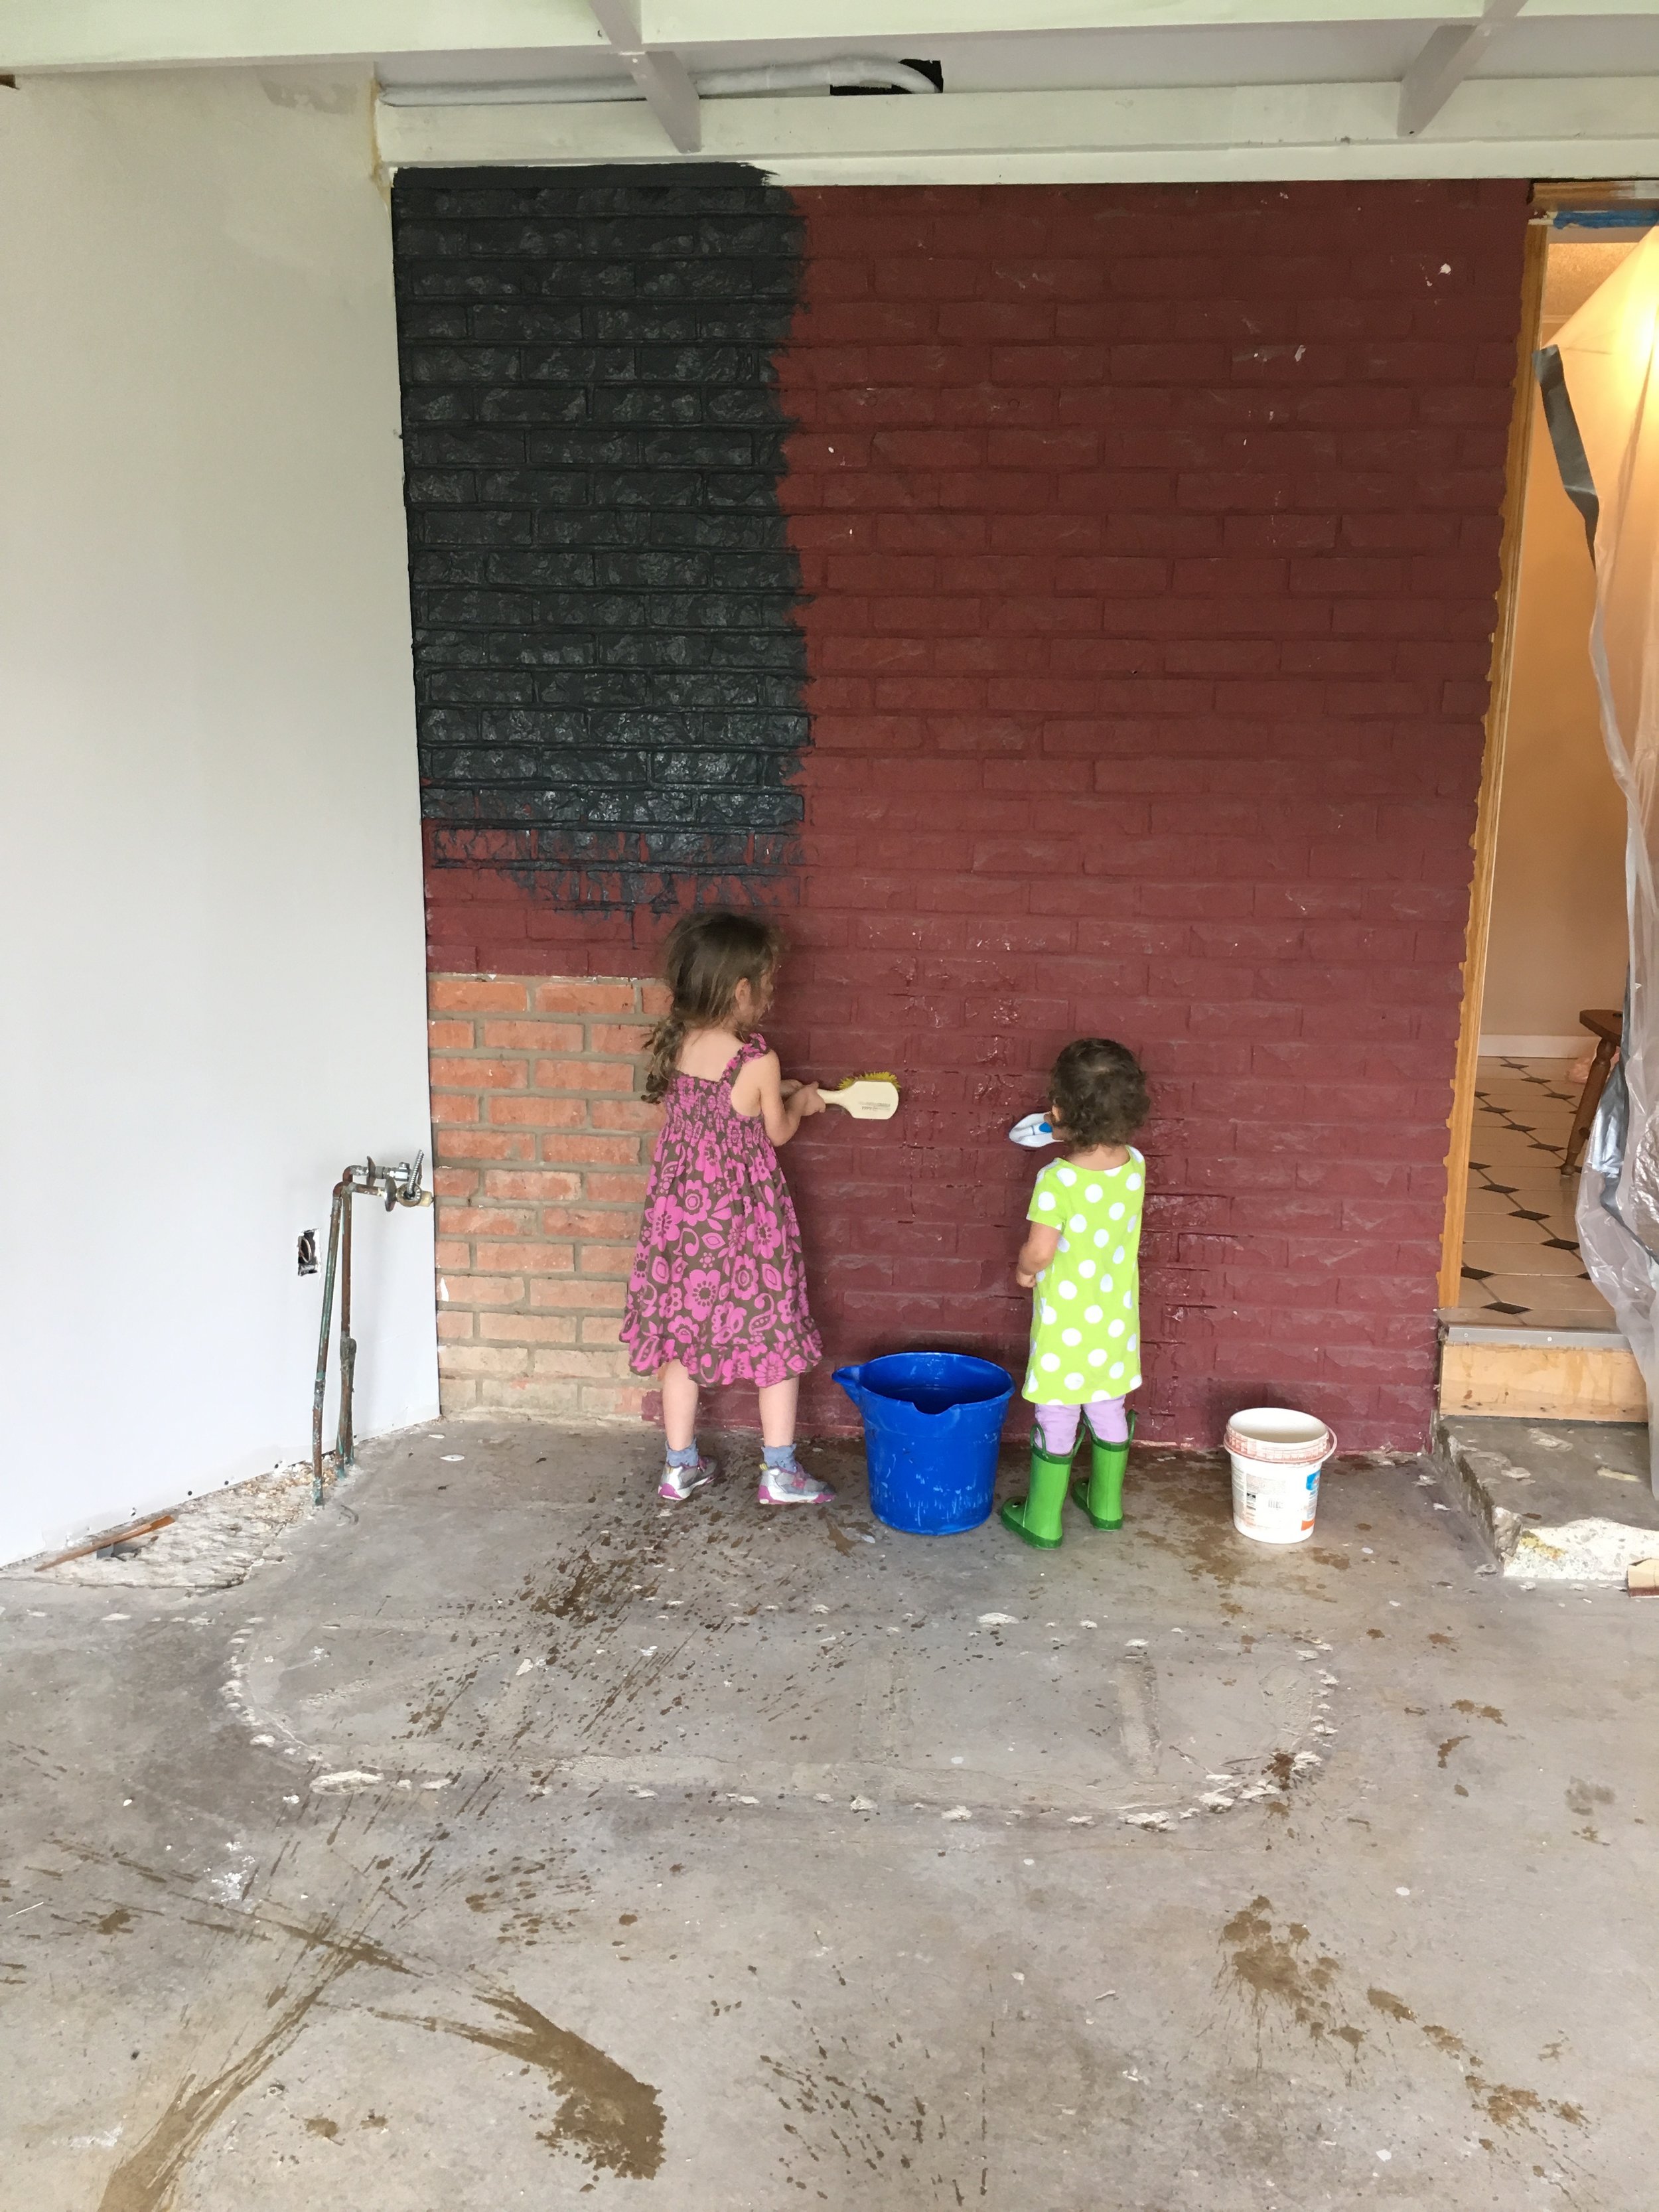
It was such a mess!
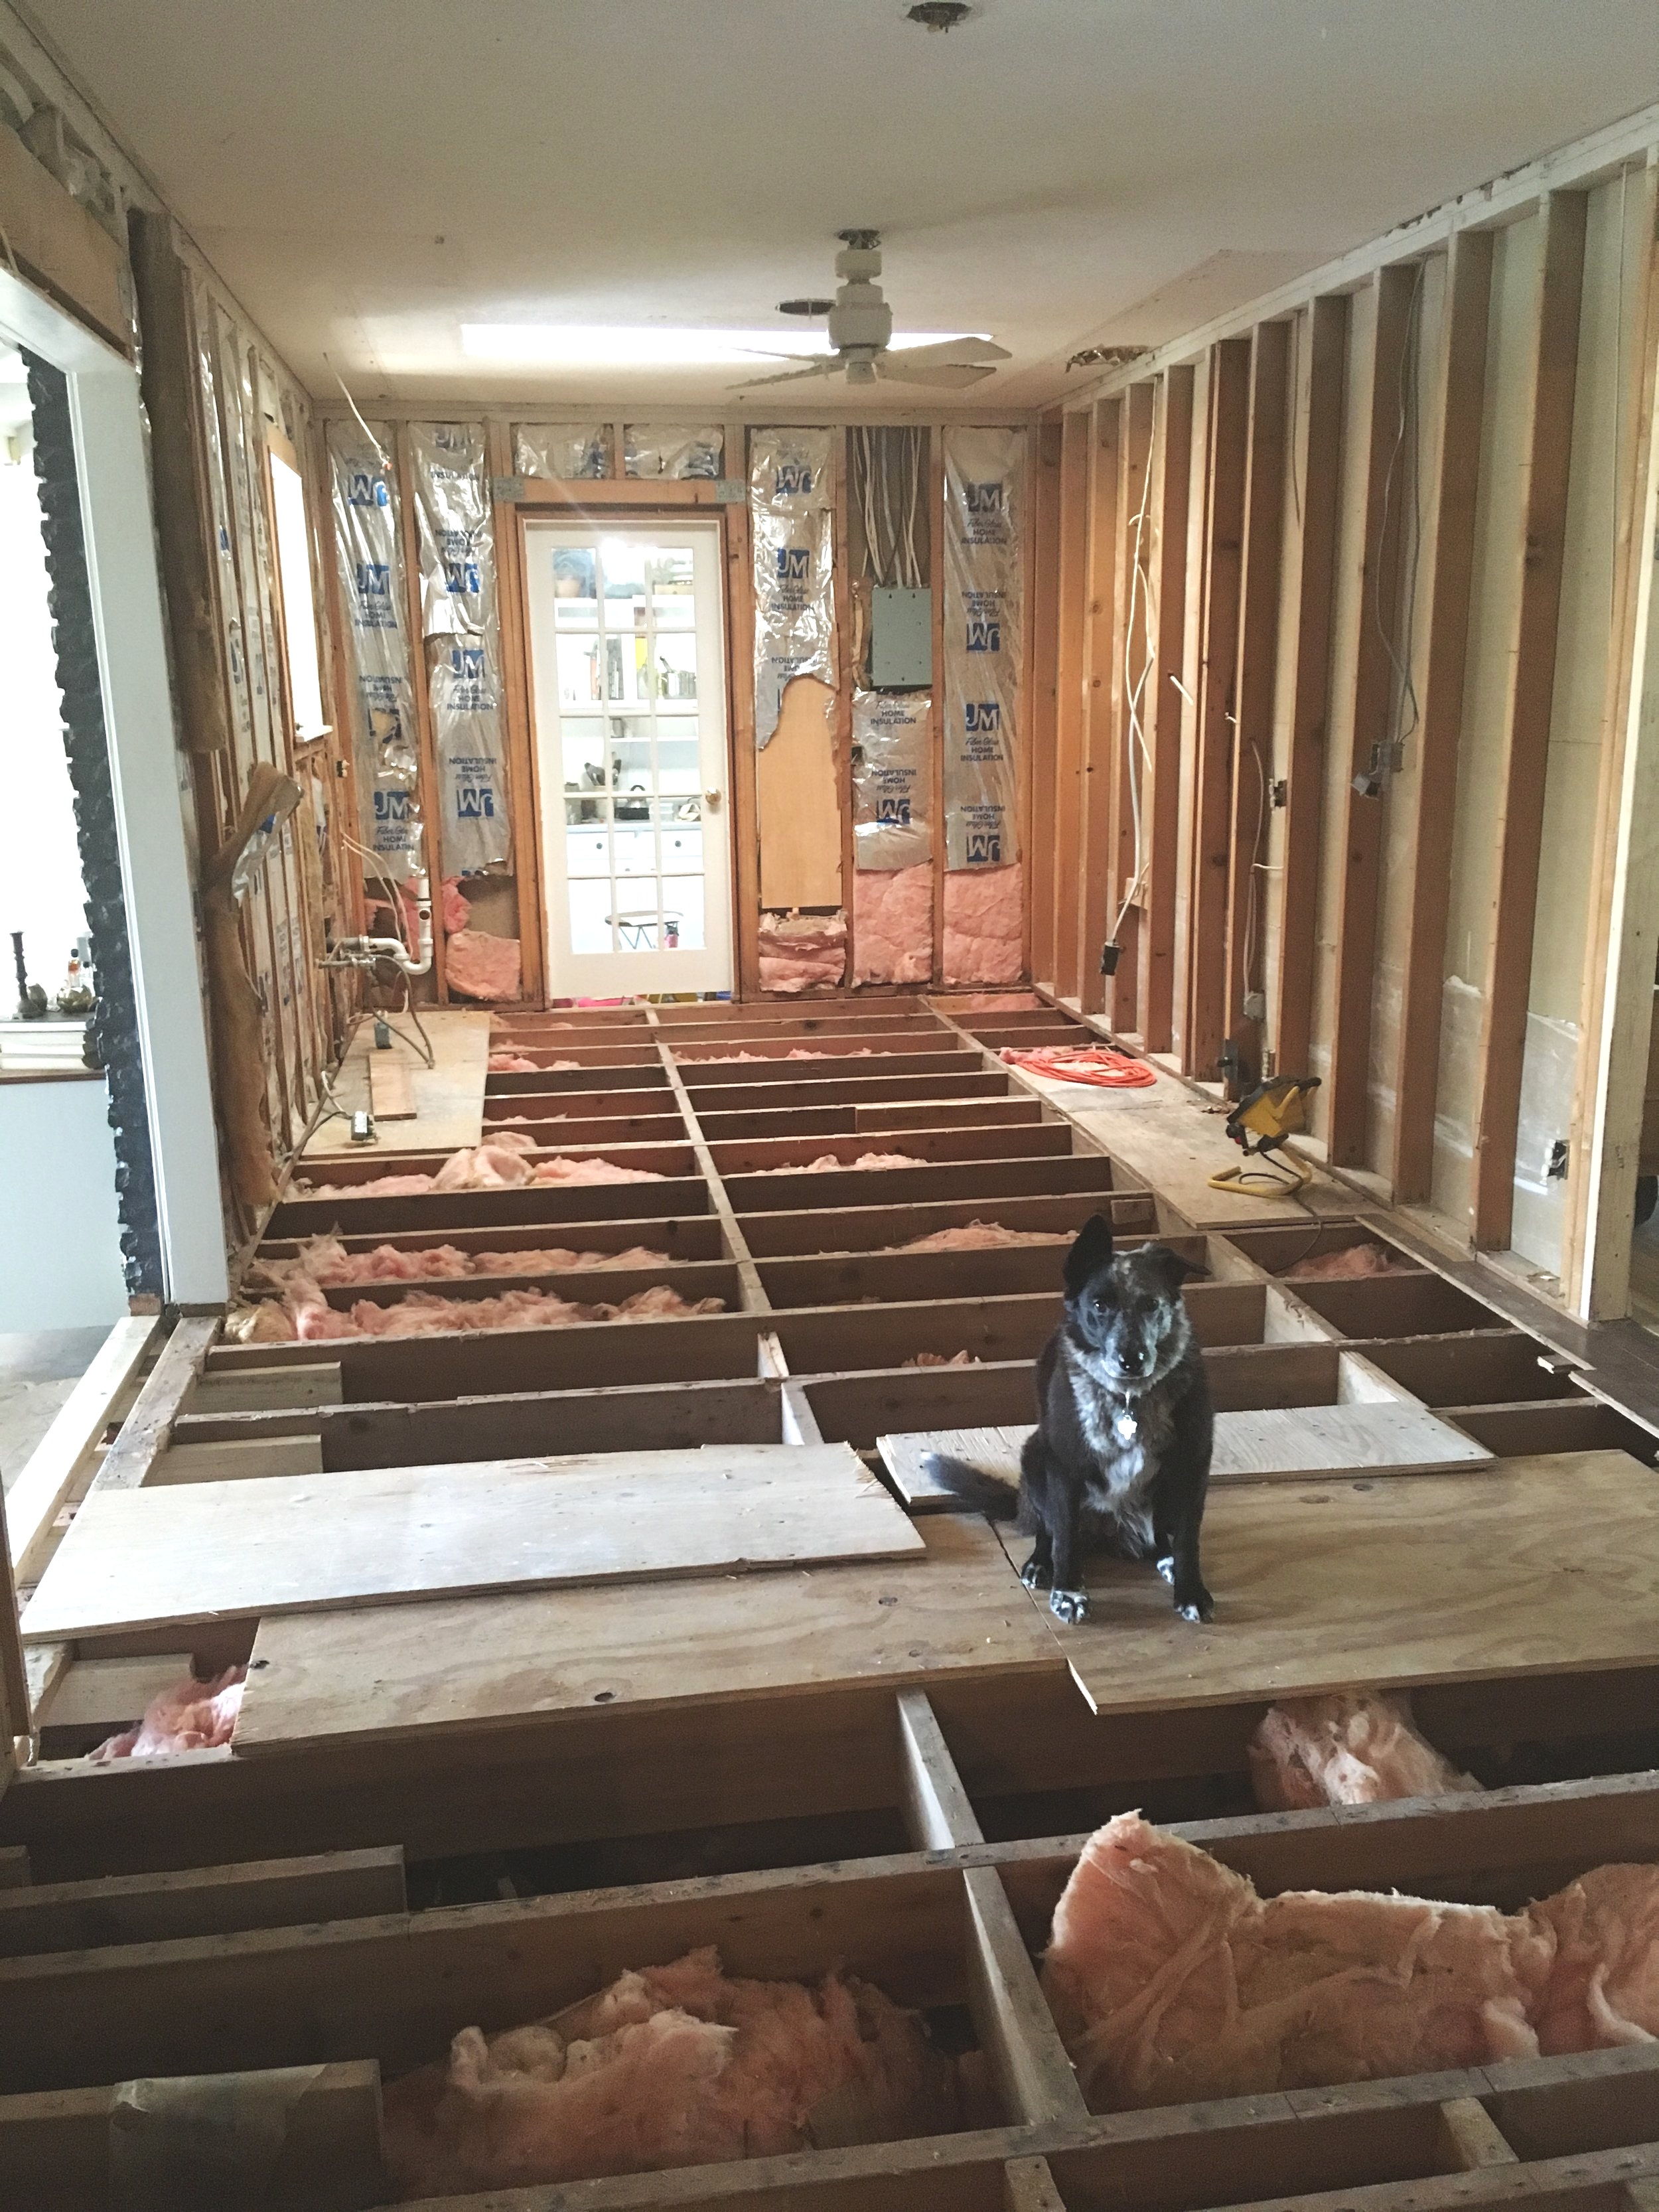
Subfloor had to come up so that our new floors would be level with the old floors.

Starting to make some progress. Cabinets are going in.

The nook is coming together!
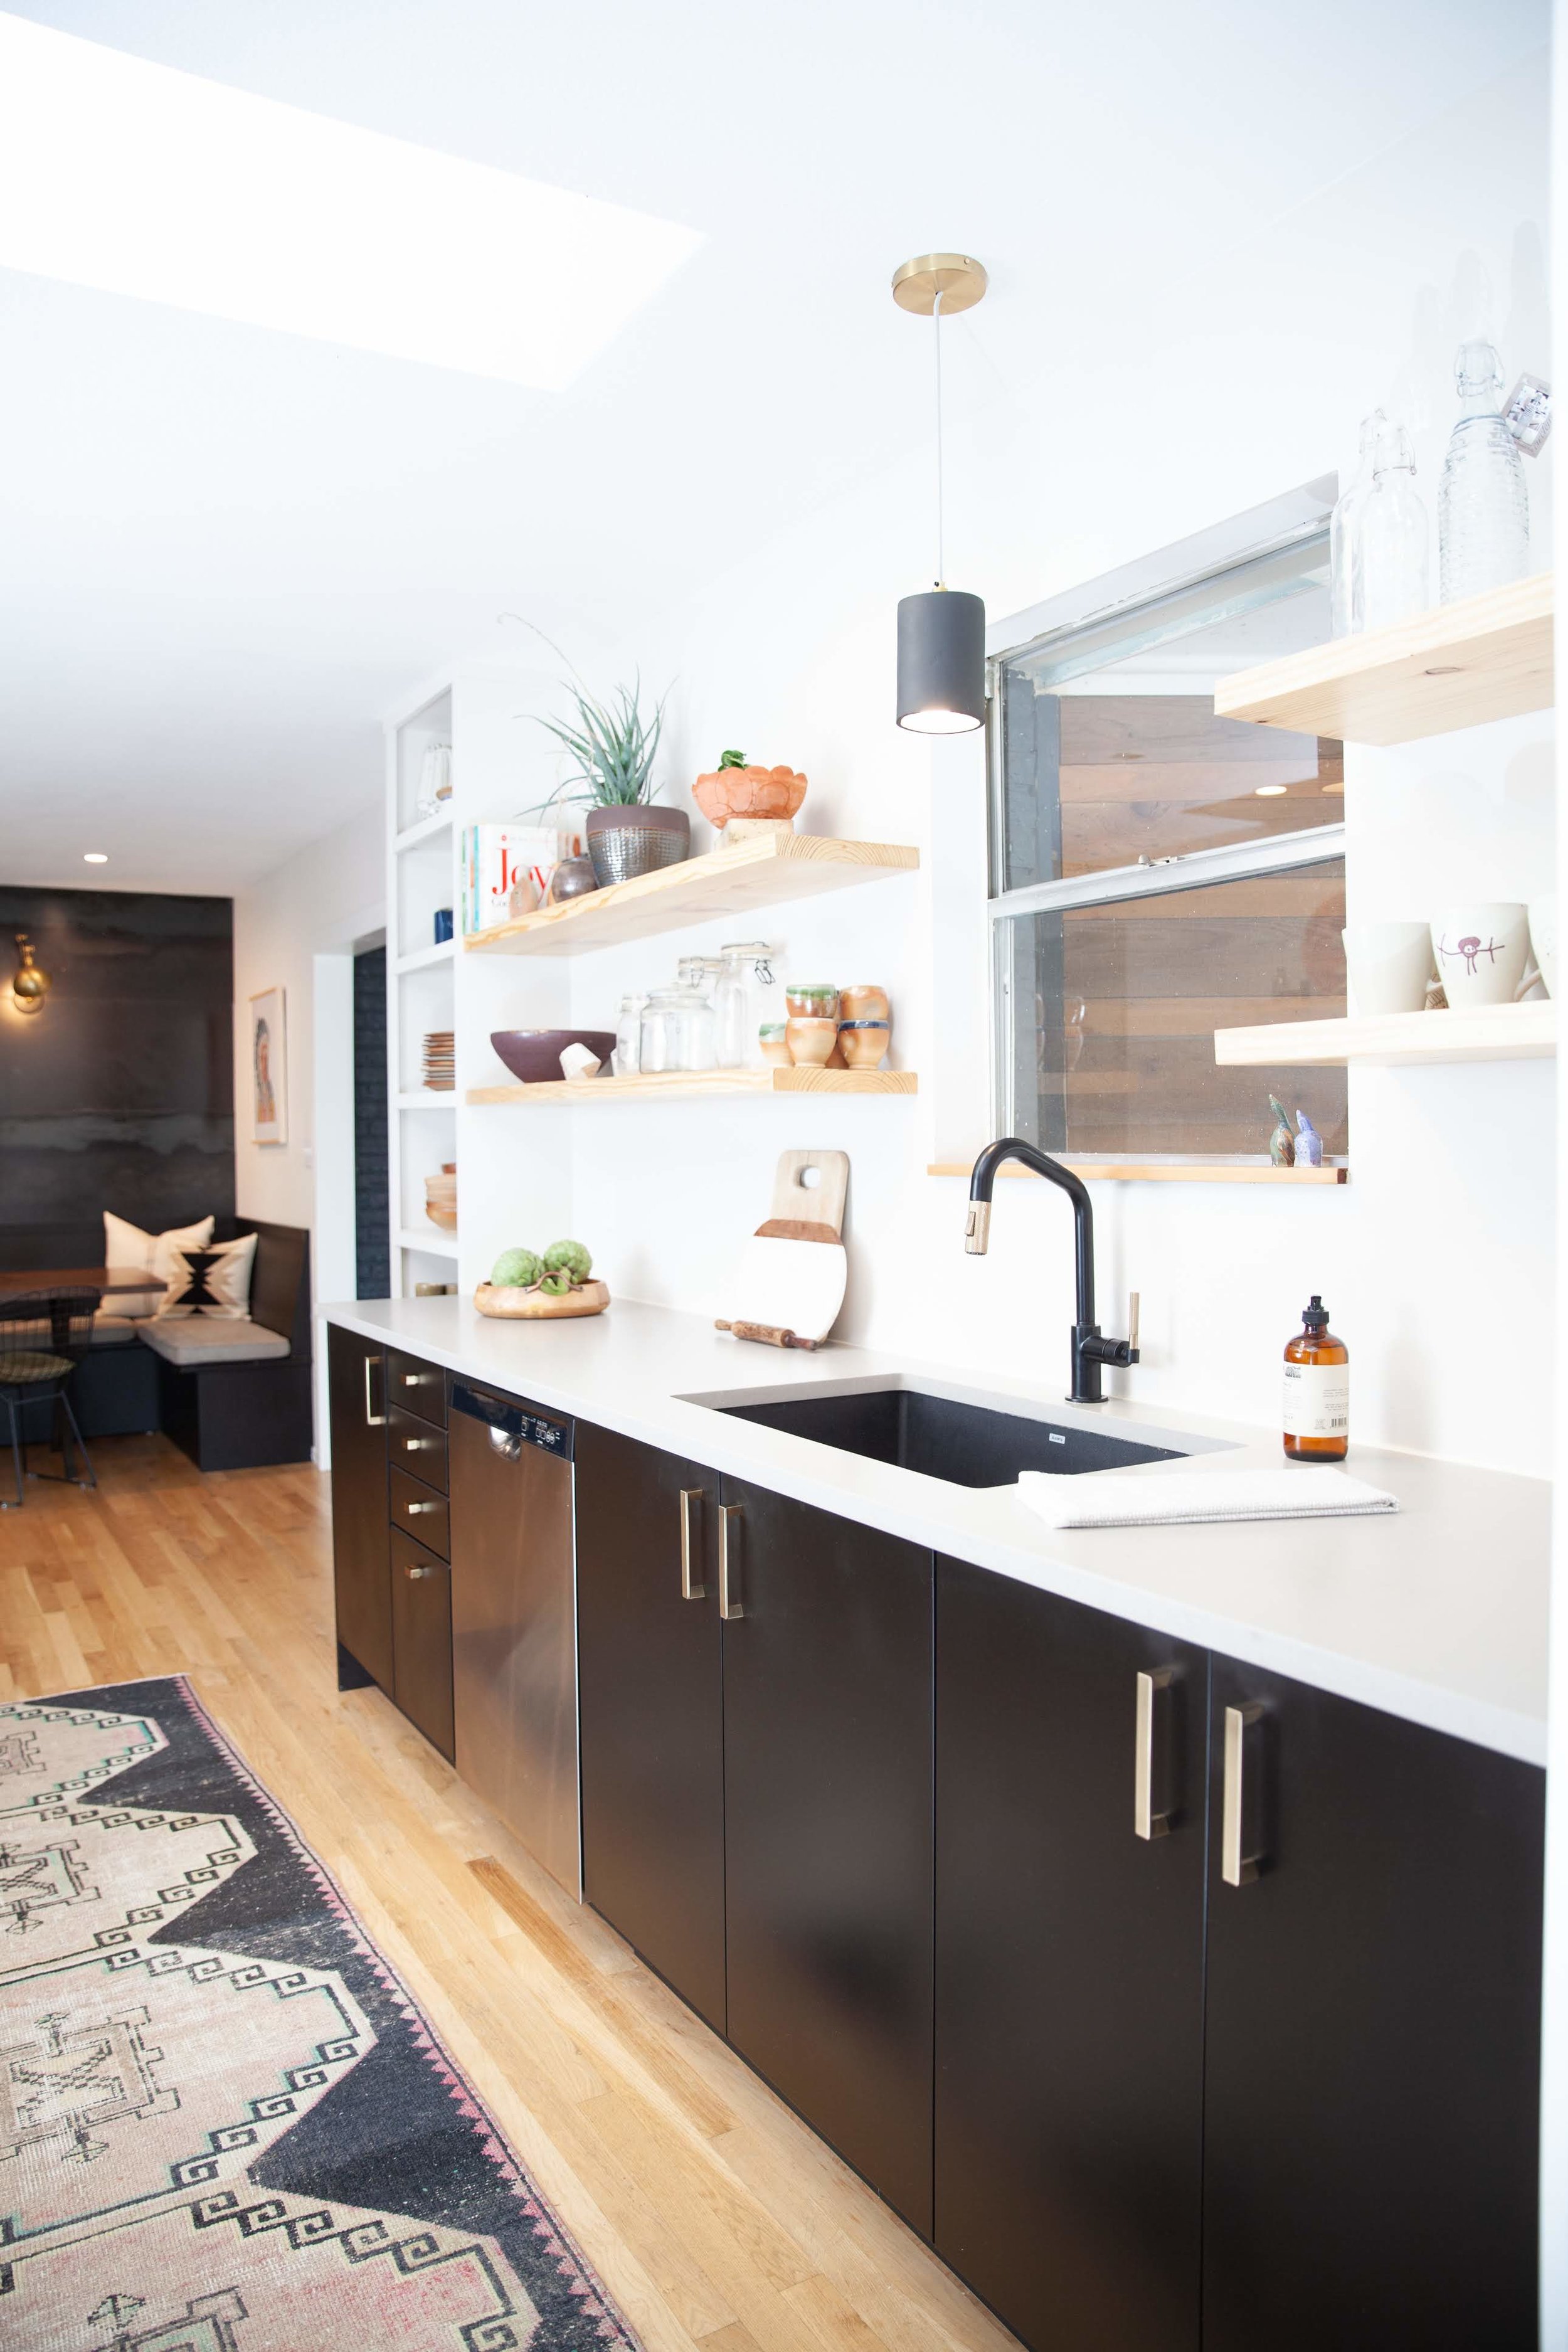
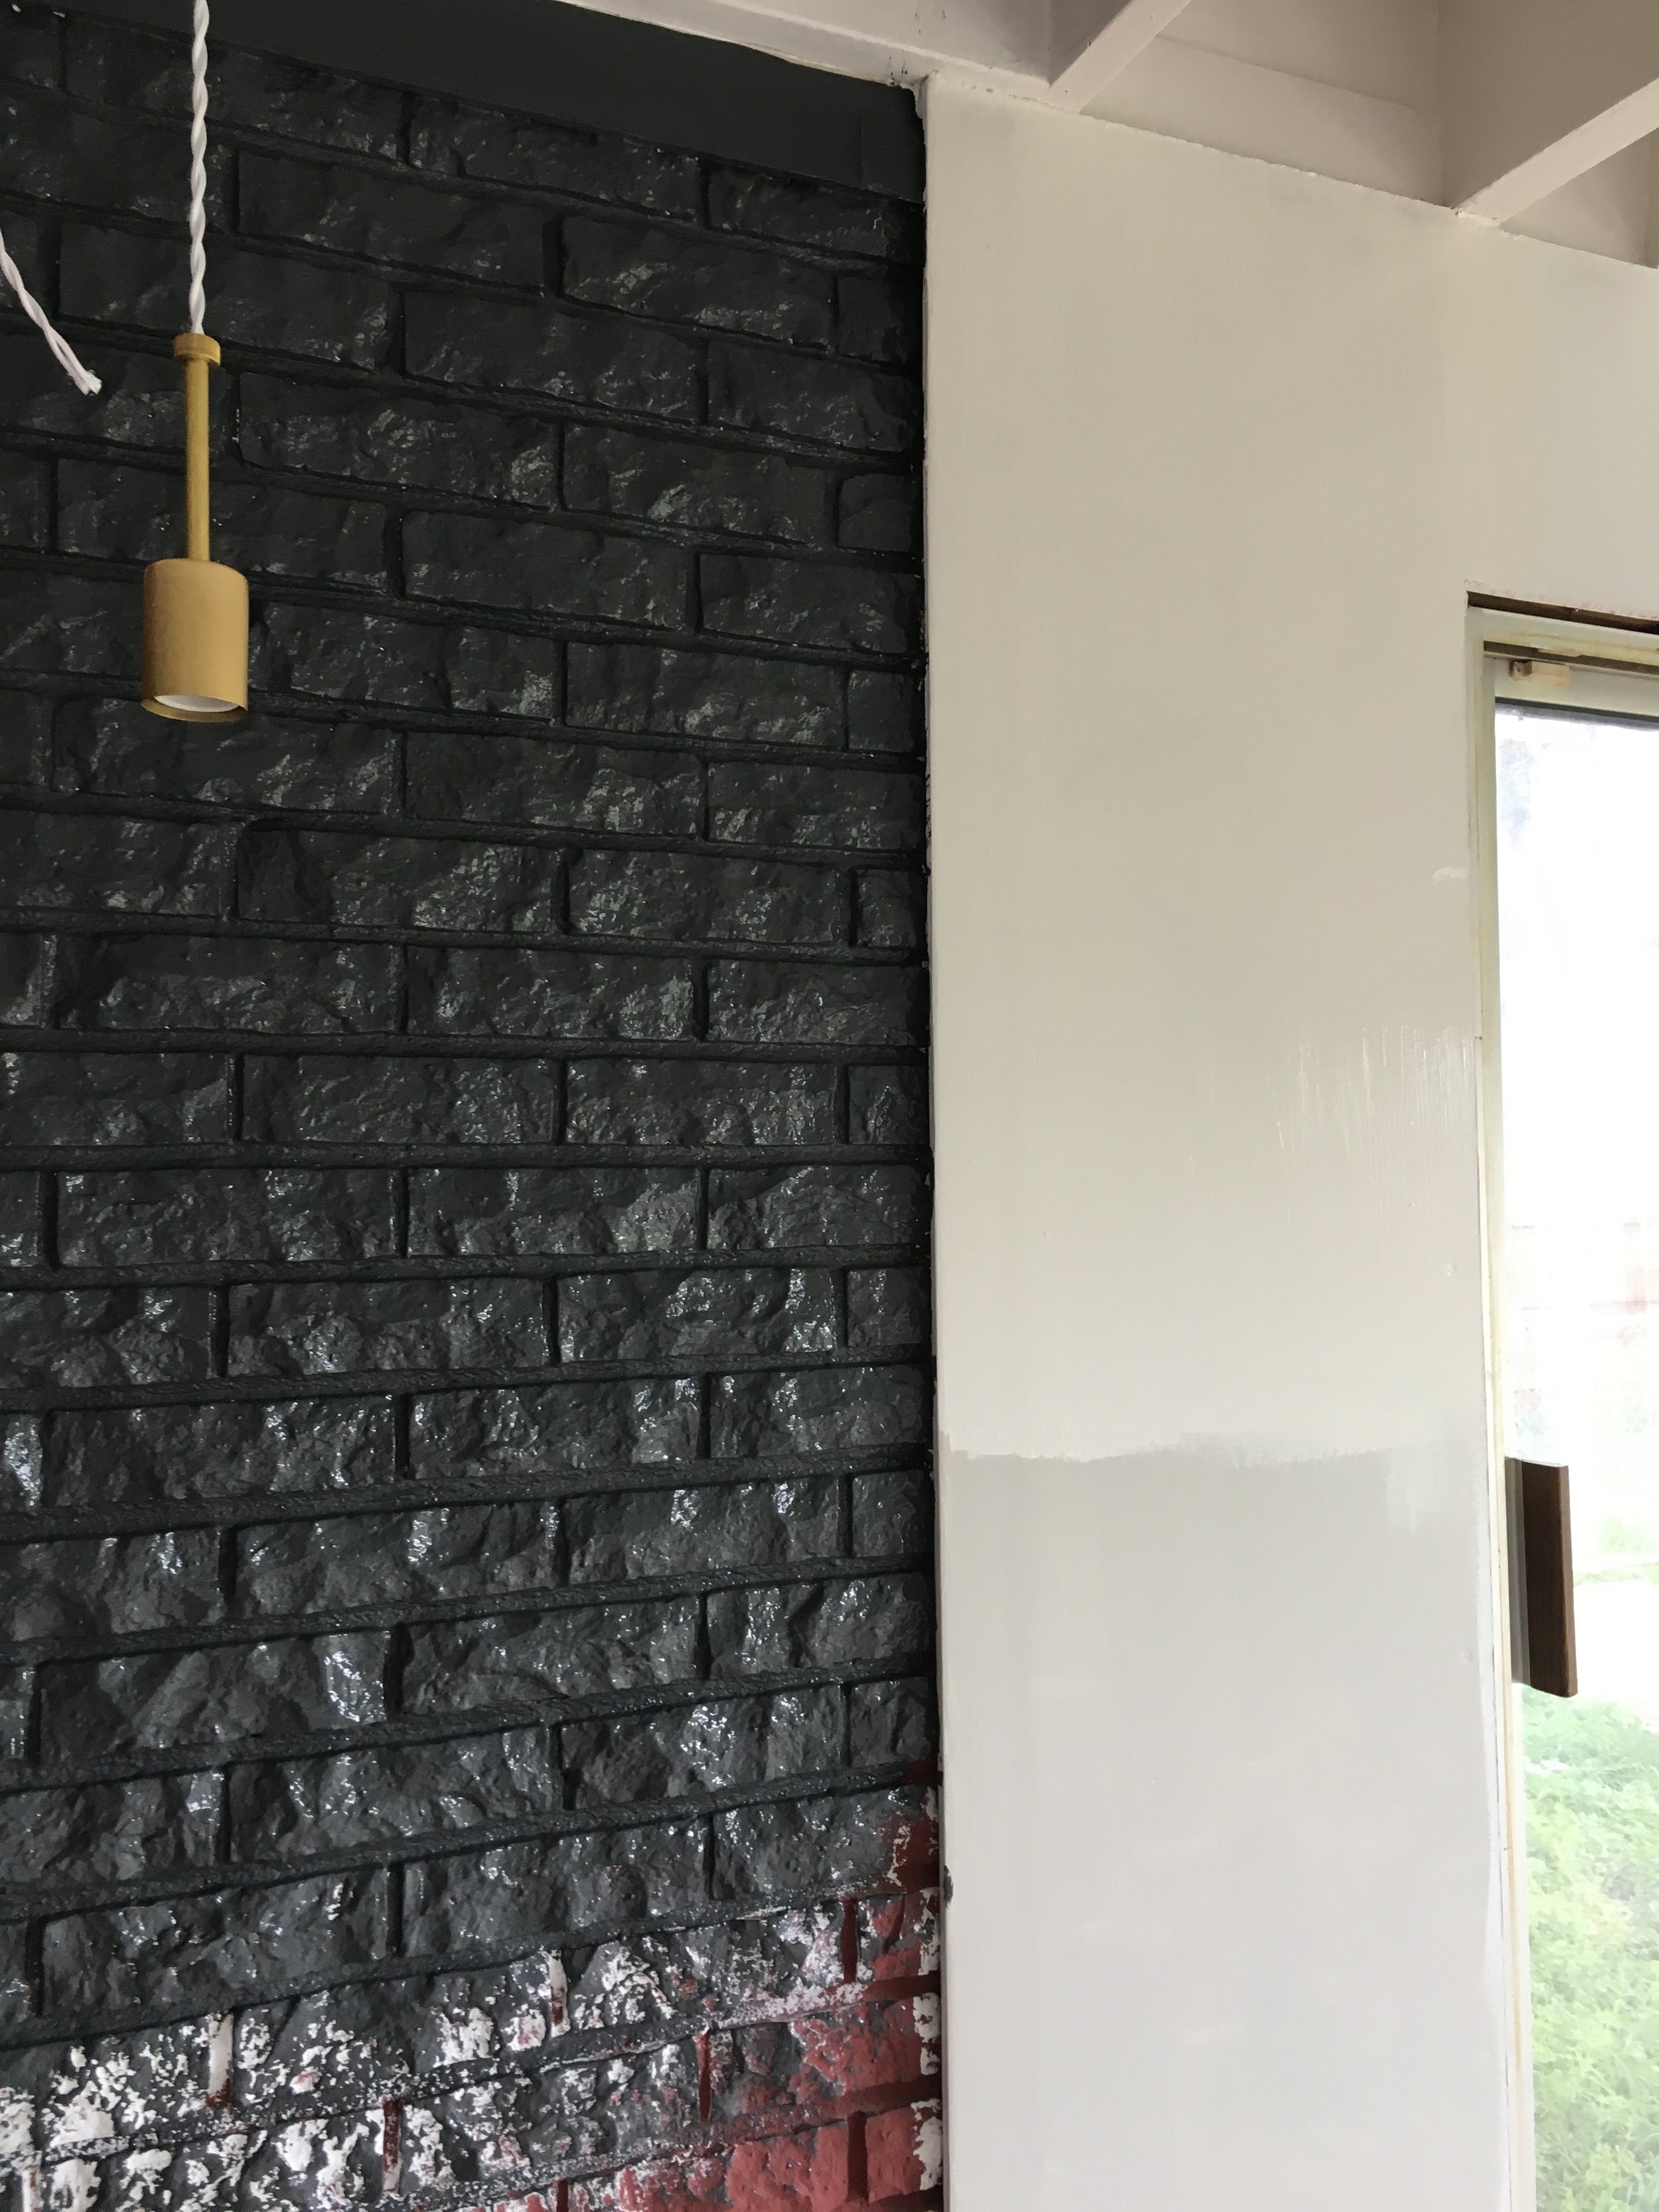
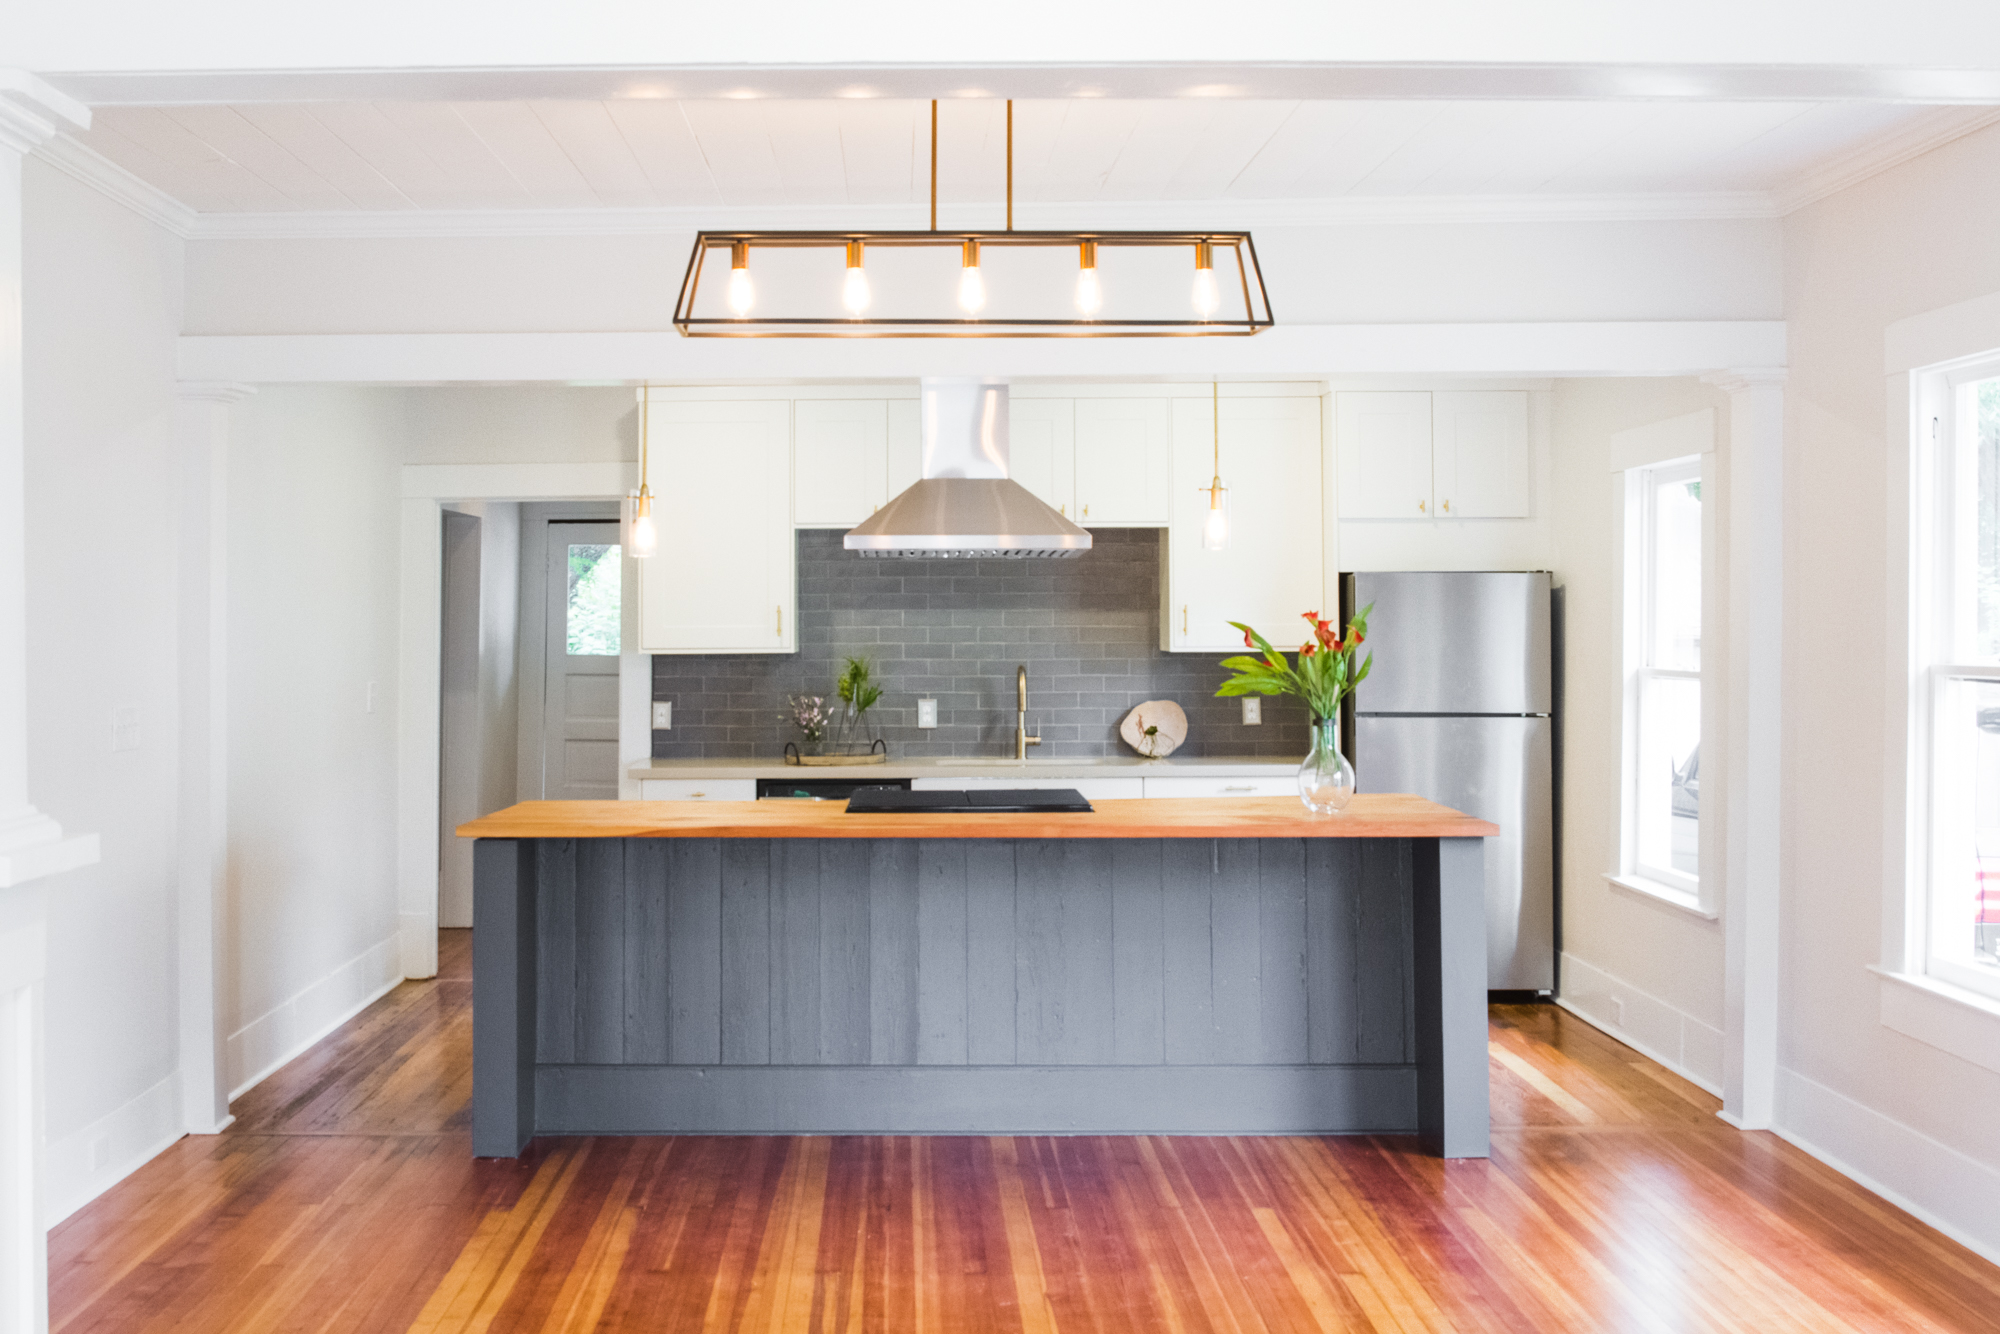
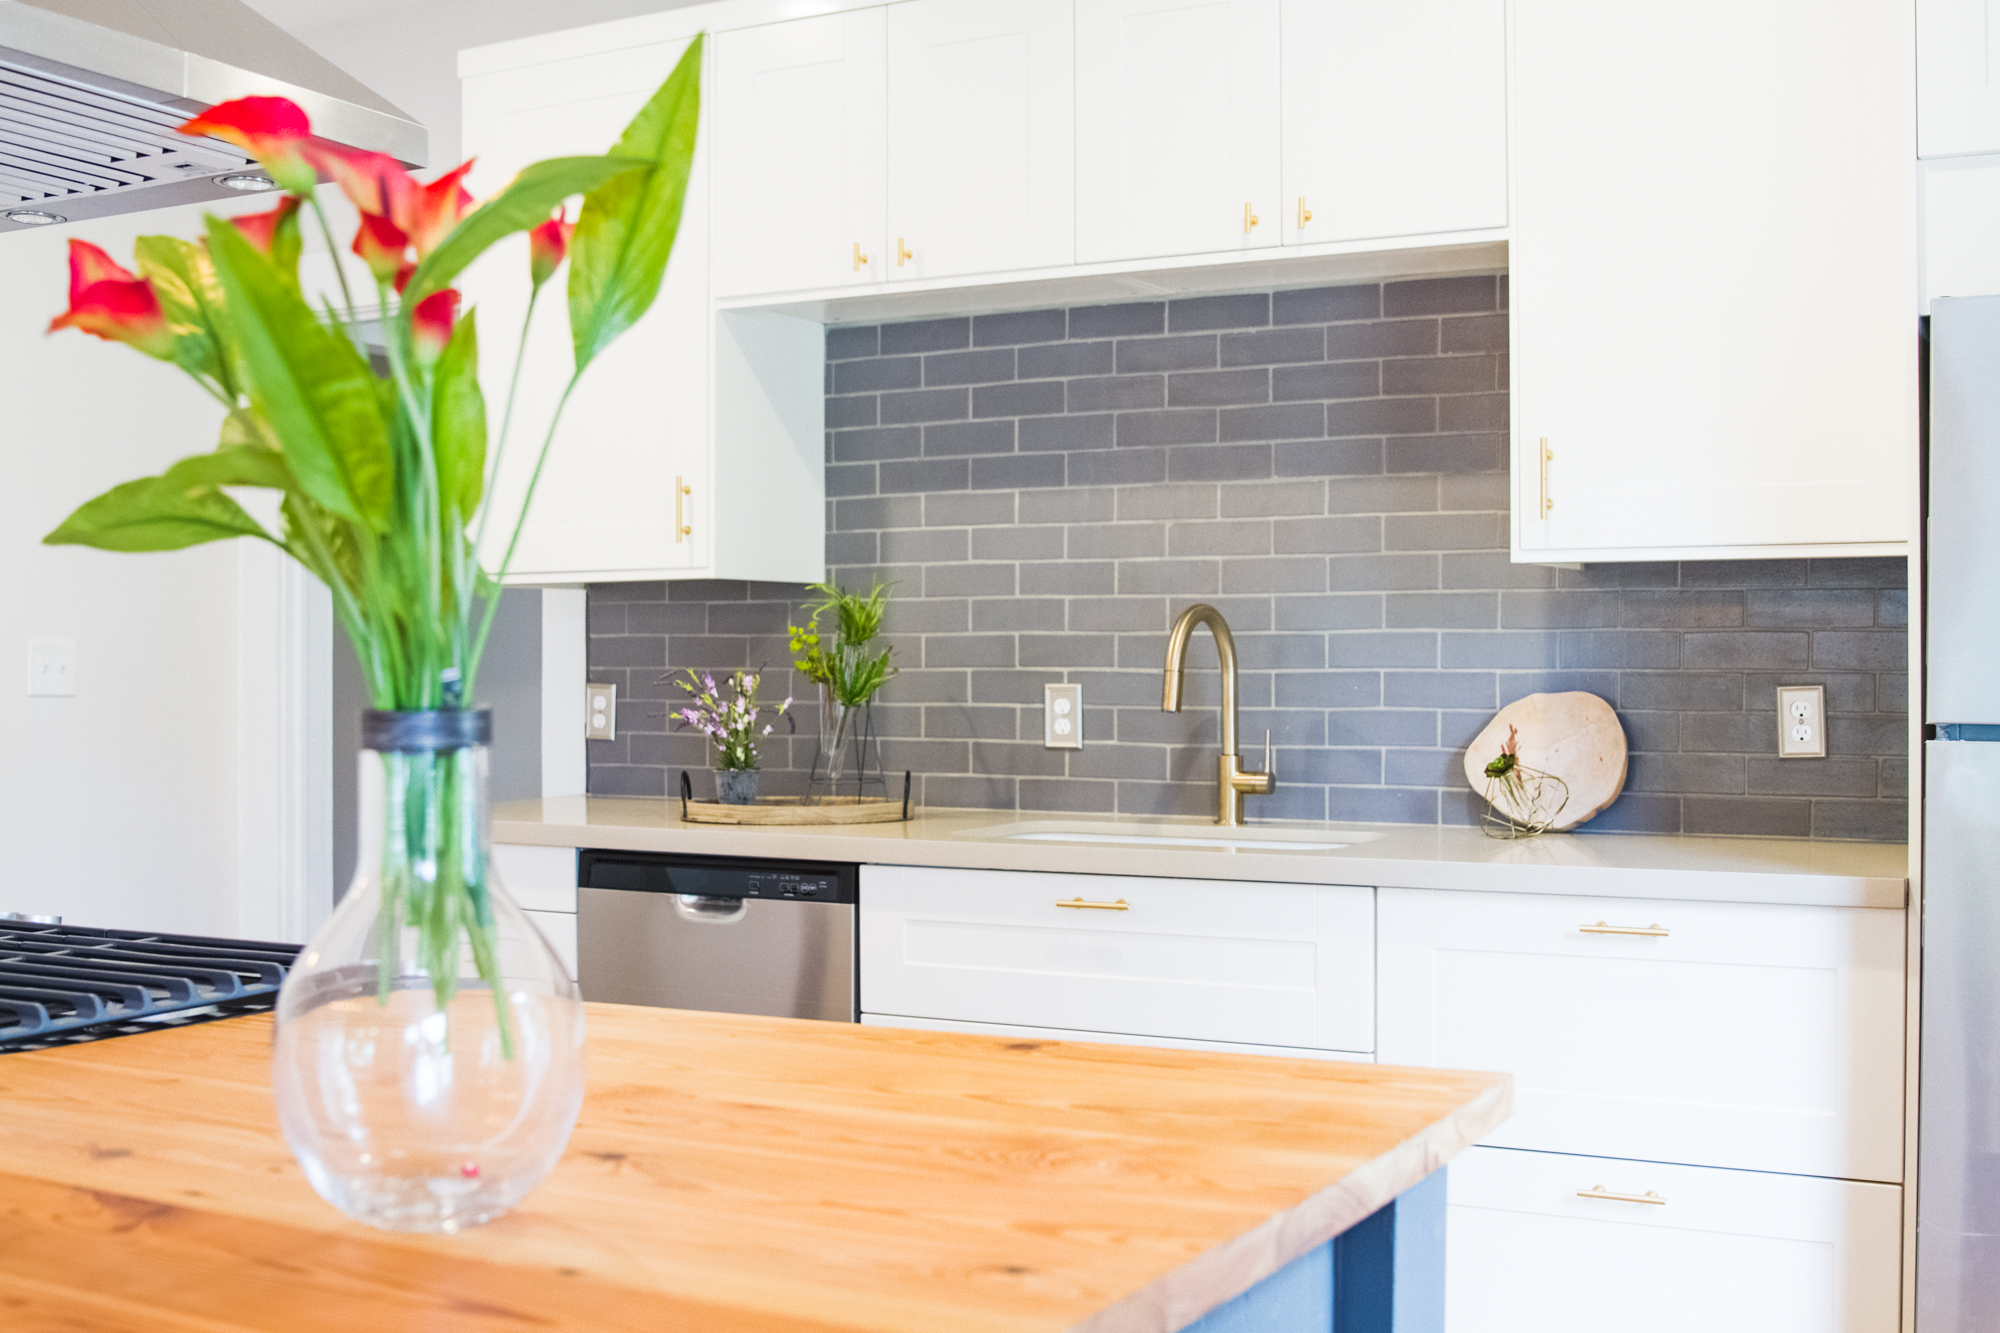
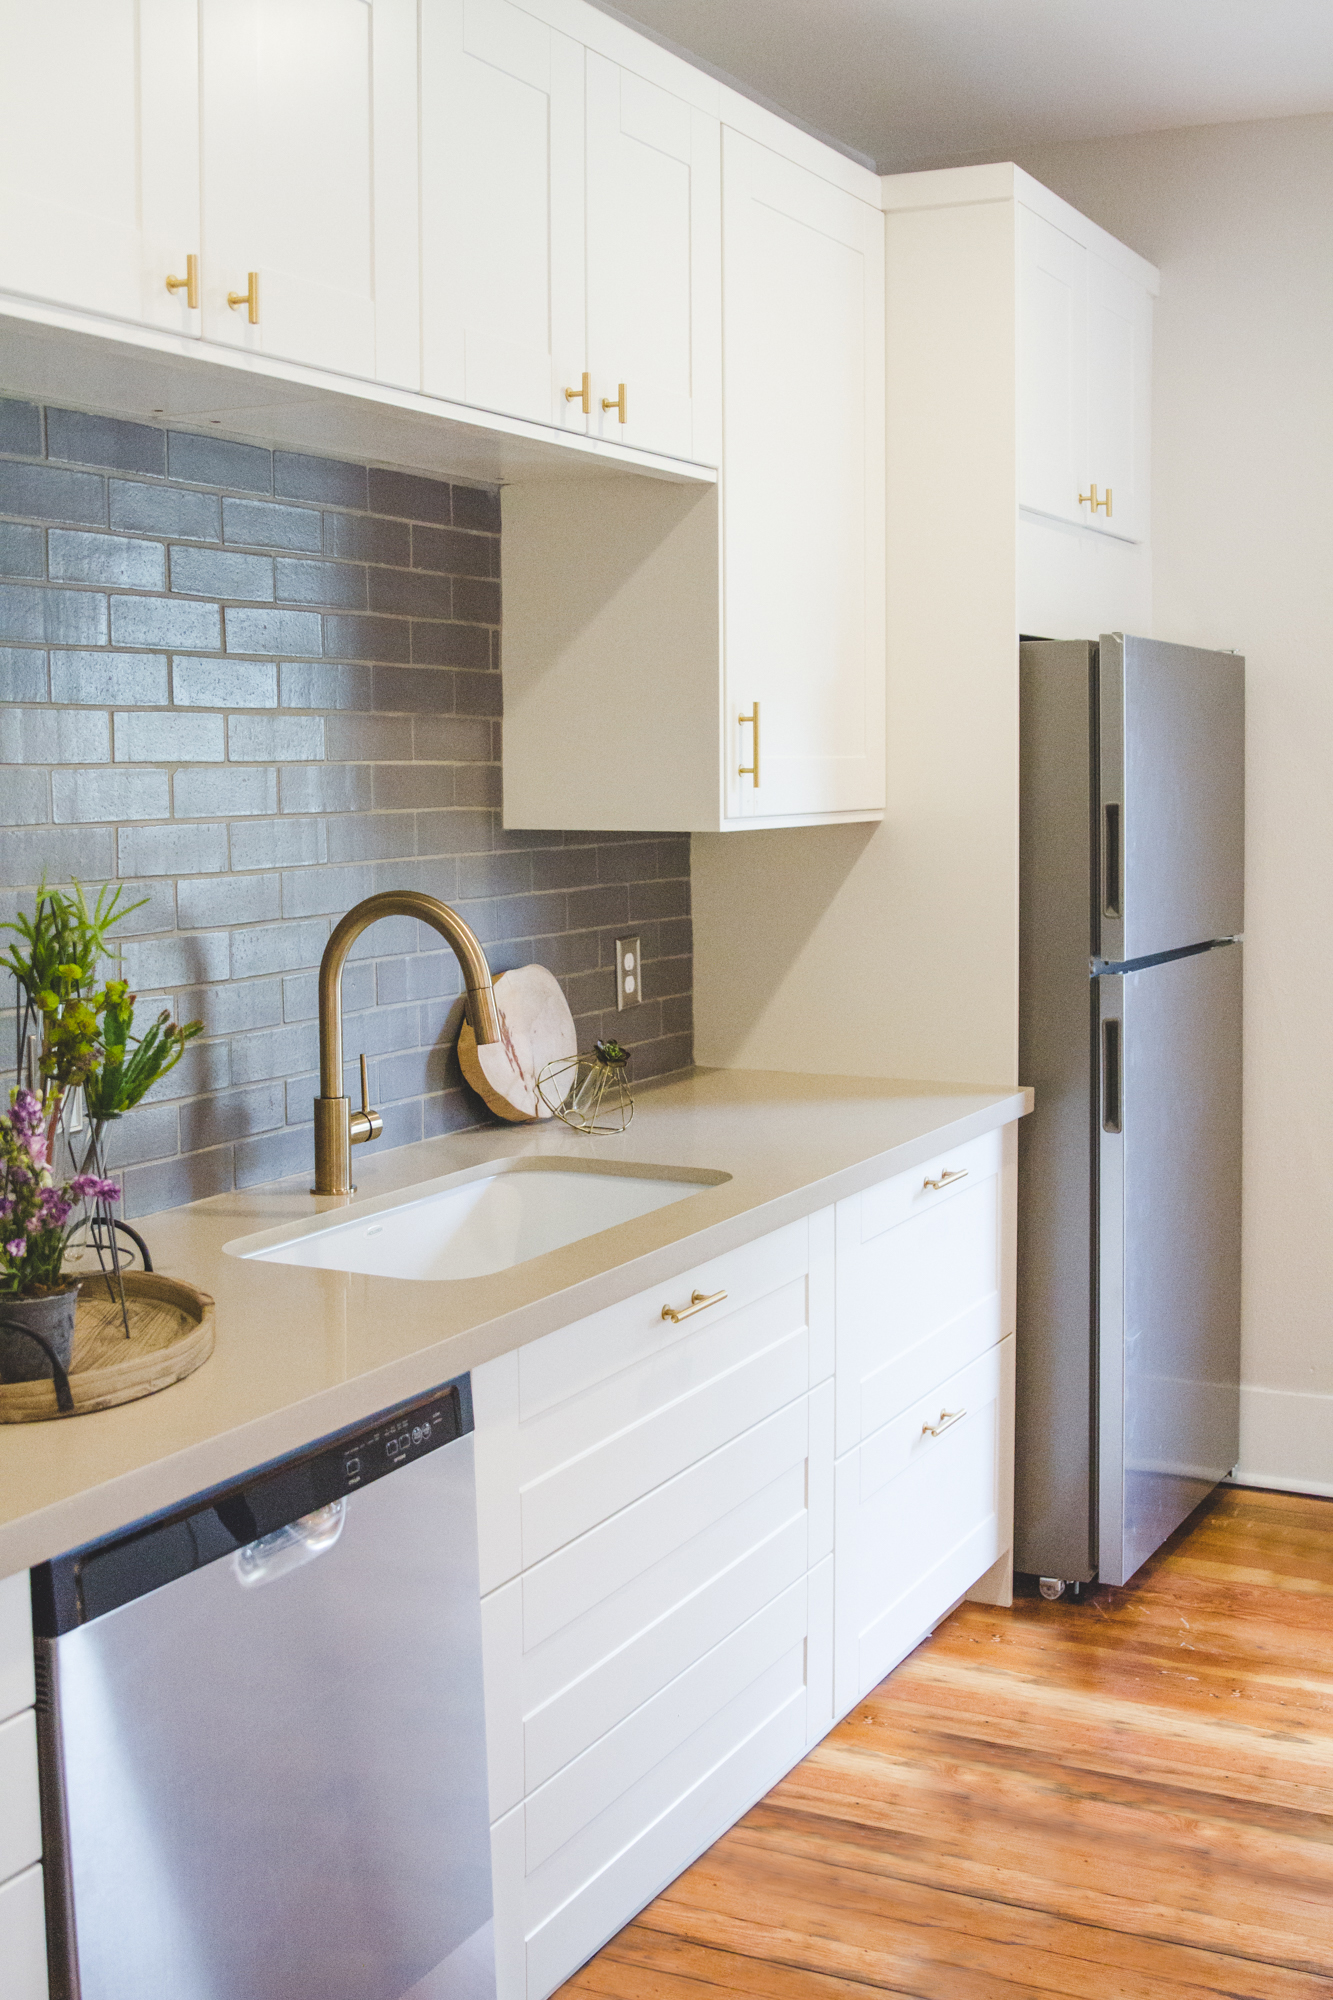
And now to the finished product! We have hardwood floors throughout the majority of the house, so bringing that into the kitchen was seamless. To contrast the floors, we decided on black cabinets with brass accents. For the sink wall we wanted the durability of a quartz countertop but the look of concrete, so we utilized one of Caesarstone’s concrete looks. We didn’t want the kitchen to appear too cold, so we warmed up the walls with wood open shelves and lots of pottery!

The full picture looking at our custom nook.
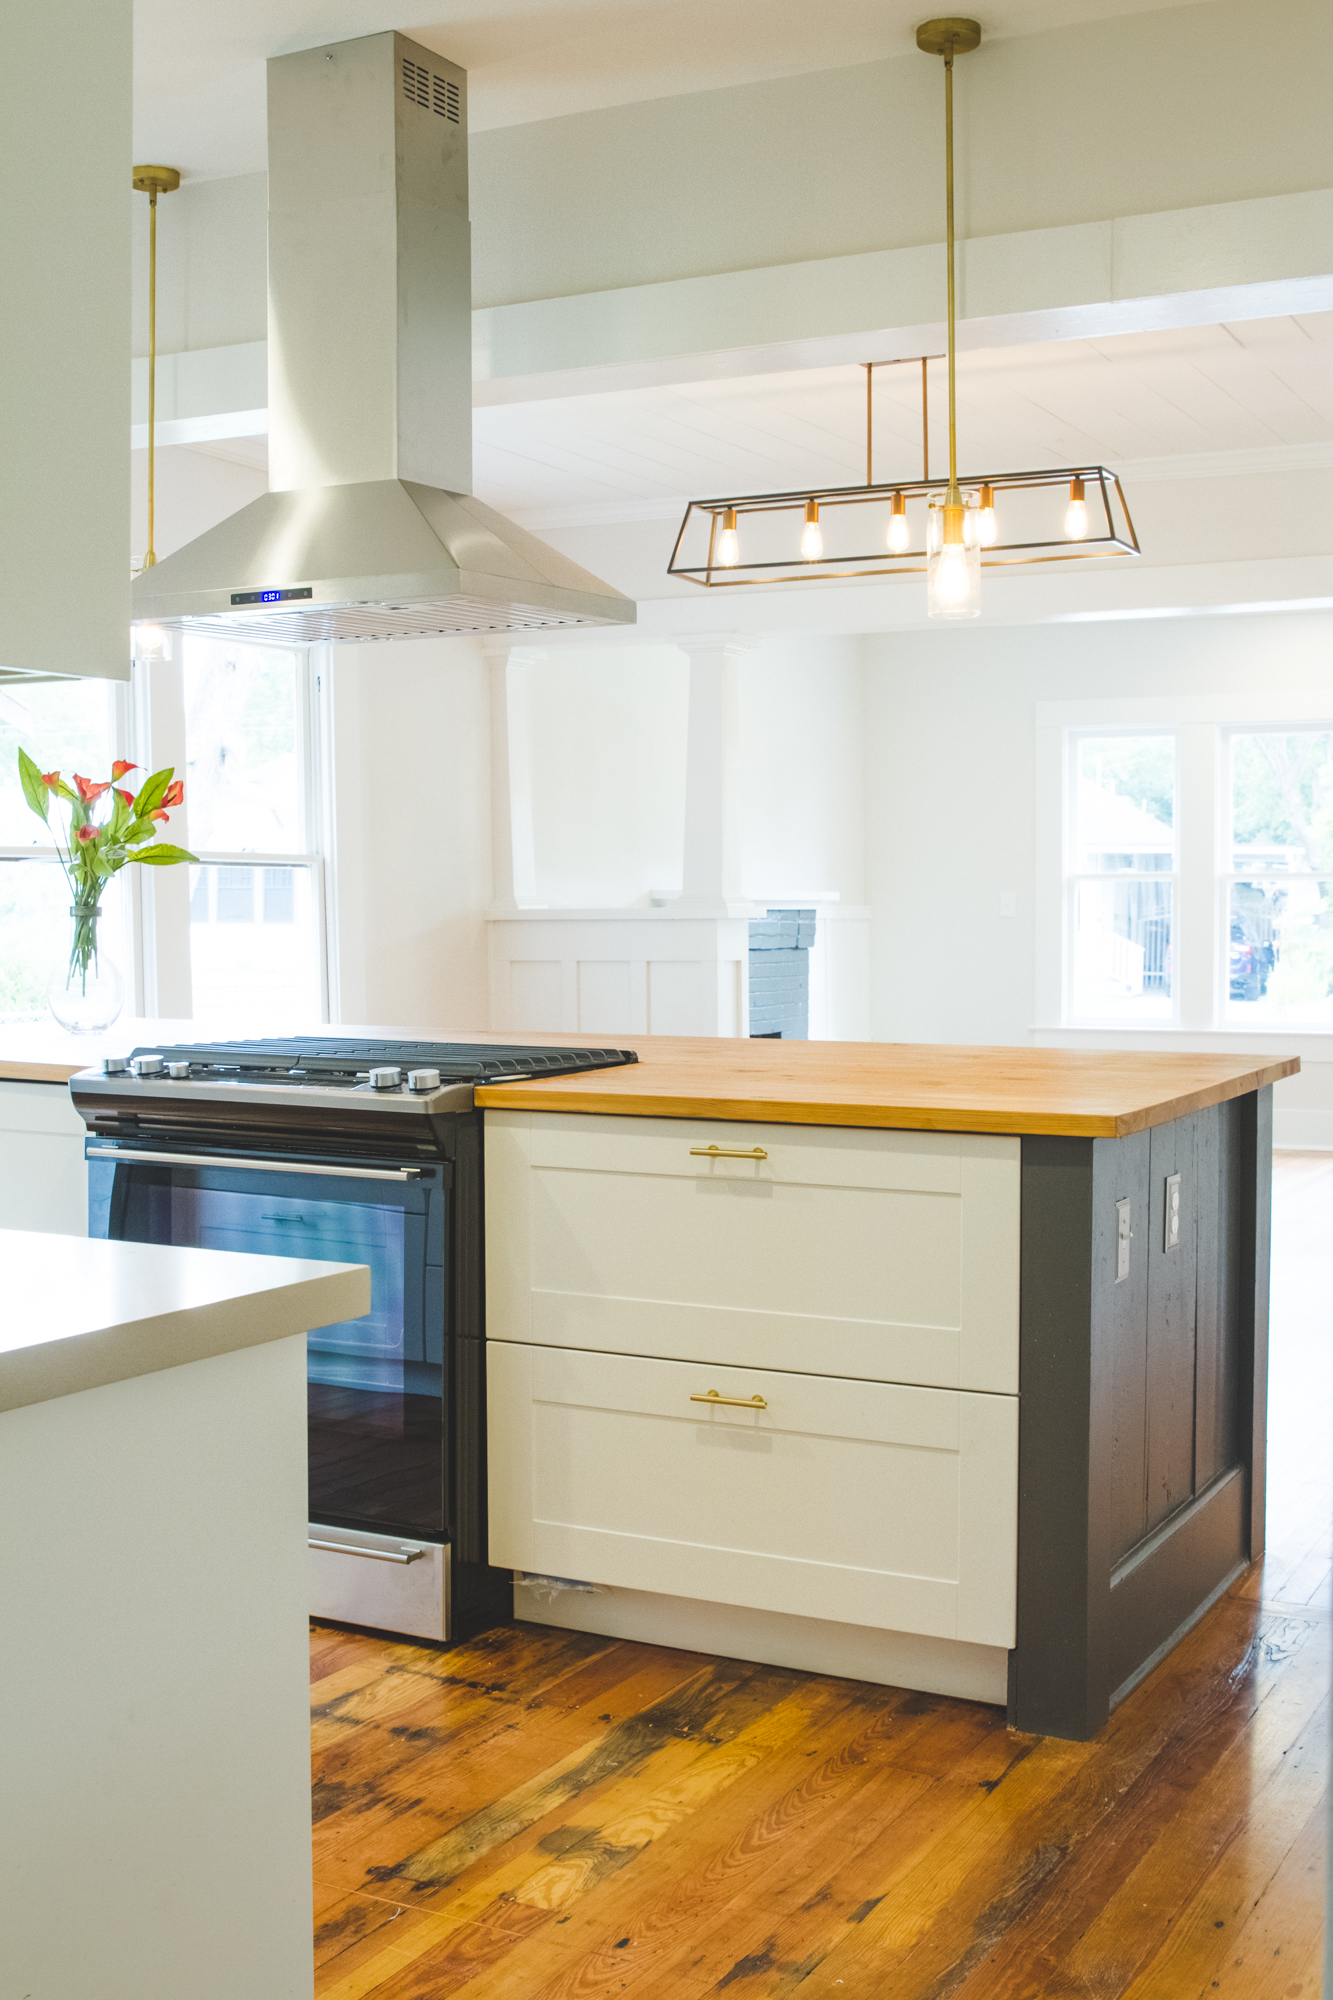
The pendant fixture you see hanging above the sink is a collaborative effort between my husband and I. He hand built it with clay, utilizing a black glaze and I pieced it together to the fixture that you see. And check out that awesome Brizo faucet from Ferguson Showroom. It’s the perfect amount of black and brass that is carried throughout the kitchen.
I am lucky enough to be related to potters. I have lots of beautiful, handmade pottery that is not only gorgeous but also totally functional. This needs to be on display. One of the reasons we went with a tall “bookshelf” on the side of our kitchen was so that our kiddos can reach glasses, bowls and whatever they need so they can be self-sufficient in the kitchen too. They also have no excuse not to help unload the dishwasher, an added bonus!

Lots of open shelves both functional and decorative!
This nook is my happy place. It was such a wonderful addition to our kitchen. This is where life happens for us. The back wall is sheets of steel, which adds a really interesting backdrop to the nook. The steel is, obviously, magnetic and is typically filled with our kiddos’ art creations and lit by the custom wall sconces made by yours truly.

Our nook!!
When we pushed back the two closets from the master bedroom, there was a small recess in the wall, which we utilized as a bookshelf. This bookshelf allows us to add so much interest to our nook through artwork and books.

Bookshelf in nook.
Well that about sums it up! It was a lot of work but it has been so worth it. Next up on the house is our studio. I’d say it is about 80% complete, so you should be seeing it here very soon! I can’t wait to share that project with you, as it is very special to me.
Thank you so much for reading and as always…
Stay True!
Allyson

Trends I love
As you all know, today is Valentine’s Day. For me, it’s not a really big day in our household but, I do think it is a nice reminder to stop and really appreciate our loved ones. Maybe hold them a little tighter and a little longer and to say thank you for all they do. It’s also a perfect day to to talk about the topic of our blog today, “Trends I Love”! There’s no need to beat around the “rose” bush, let’s get to it.
1. Color!
Get ready people, color is back! Don’t get me wrong, I have loved the white walls, and neutral color tones but I am ready for color to make it’s return. No longer do we need to save color for accent pieces and throw pillows. I am seeing bold colors on not only walls and ceilings, but cabinets too.

Love the color, love the name! Farrow & Ball’s new color “Sulking Room Pink,” is a wonderful color to complement any gray color scheme. See more at us.farrow-ball.com.

Bancha, by Farrow & Ball, is one of their newly introduced colors for 2019. It is so rich and dynamic and I love that it is on the ceiling in this picture. Dare to be bold! website: us.farrow-ball.com
2. Non-traditional Kitchens
You know, sometimes I love taking a step back from what is seemingly the best way of doing things and breaking it apart. It often, will take you right back to where you started, but other times, this is when the magic happens. For me, kitchens are the best example of that. So let’s take a look at a few examples of some unique kitchens, that are anything but traditional.

Who needs kitchen cabinets? When you have beautiful kitchenware, there really is no need! Love this design by Tinta Luhrman. You can find some really beautiful and unique wood products on her website, woodchuck.nl.

Here is another unique kitchen by Jersey Ice Cream Co. Take a look at those plaster walls! So much depth and interest. And that kitchen sink…….Well done, Jersey Ice Cream Co.! website: jerseyicecreamco.com
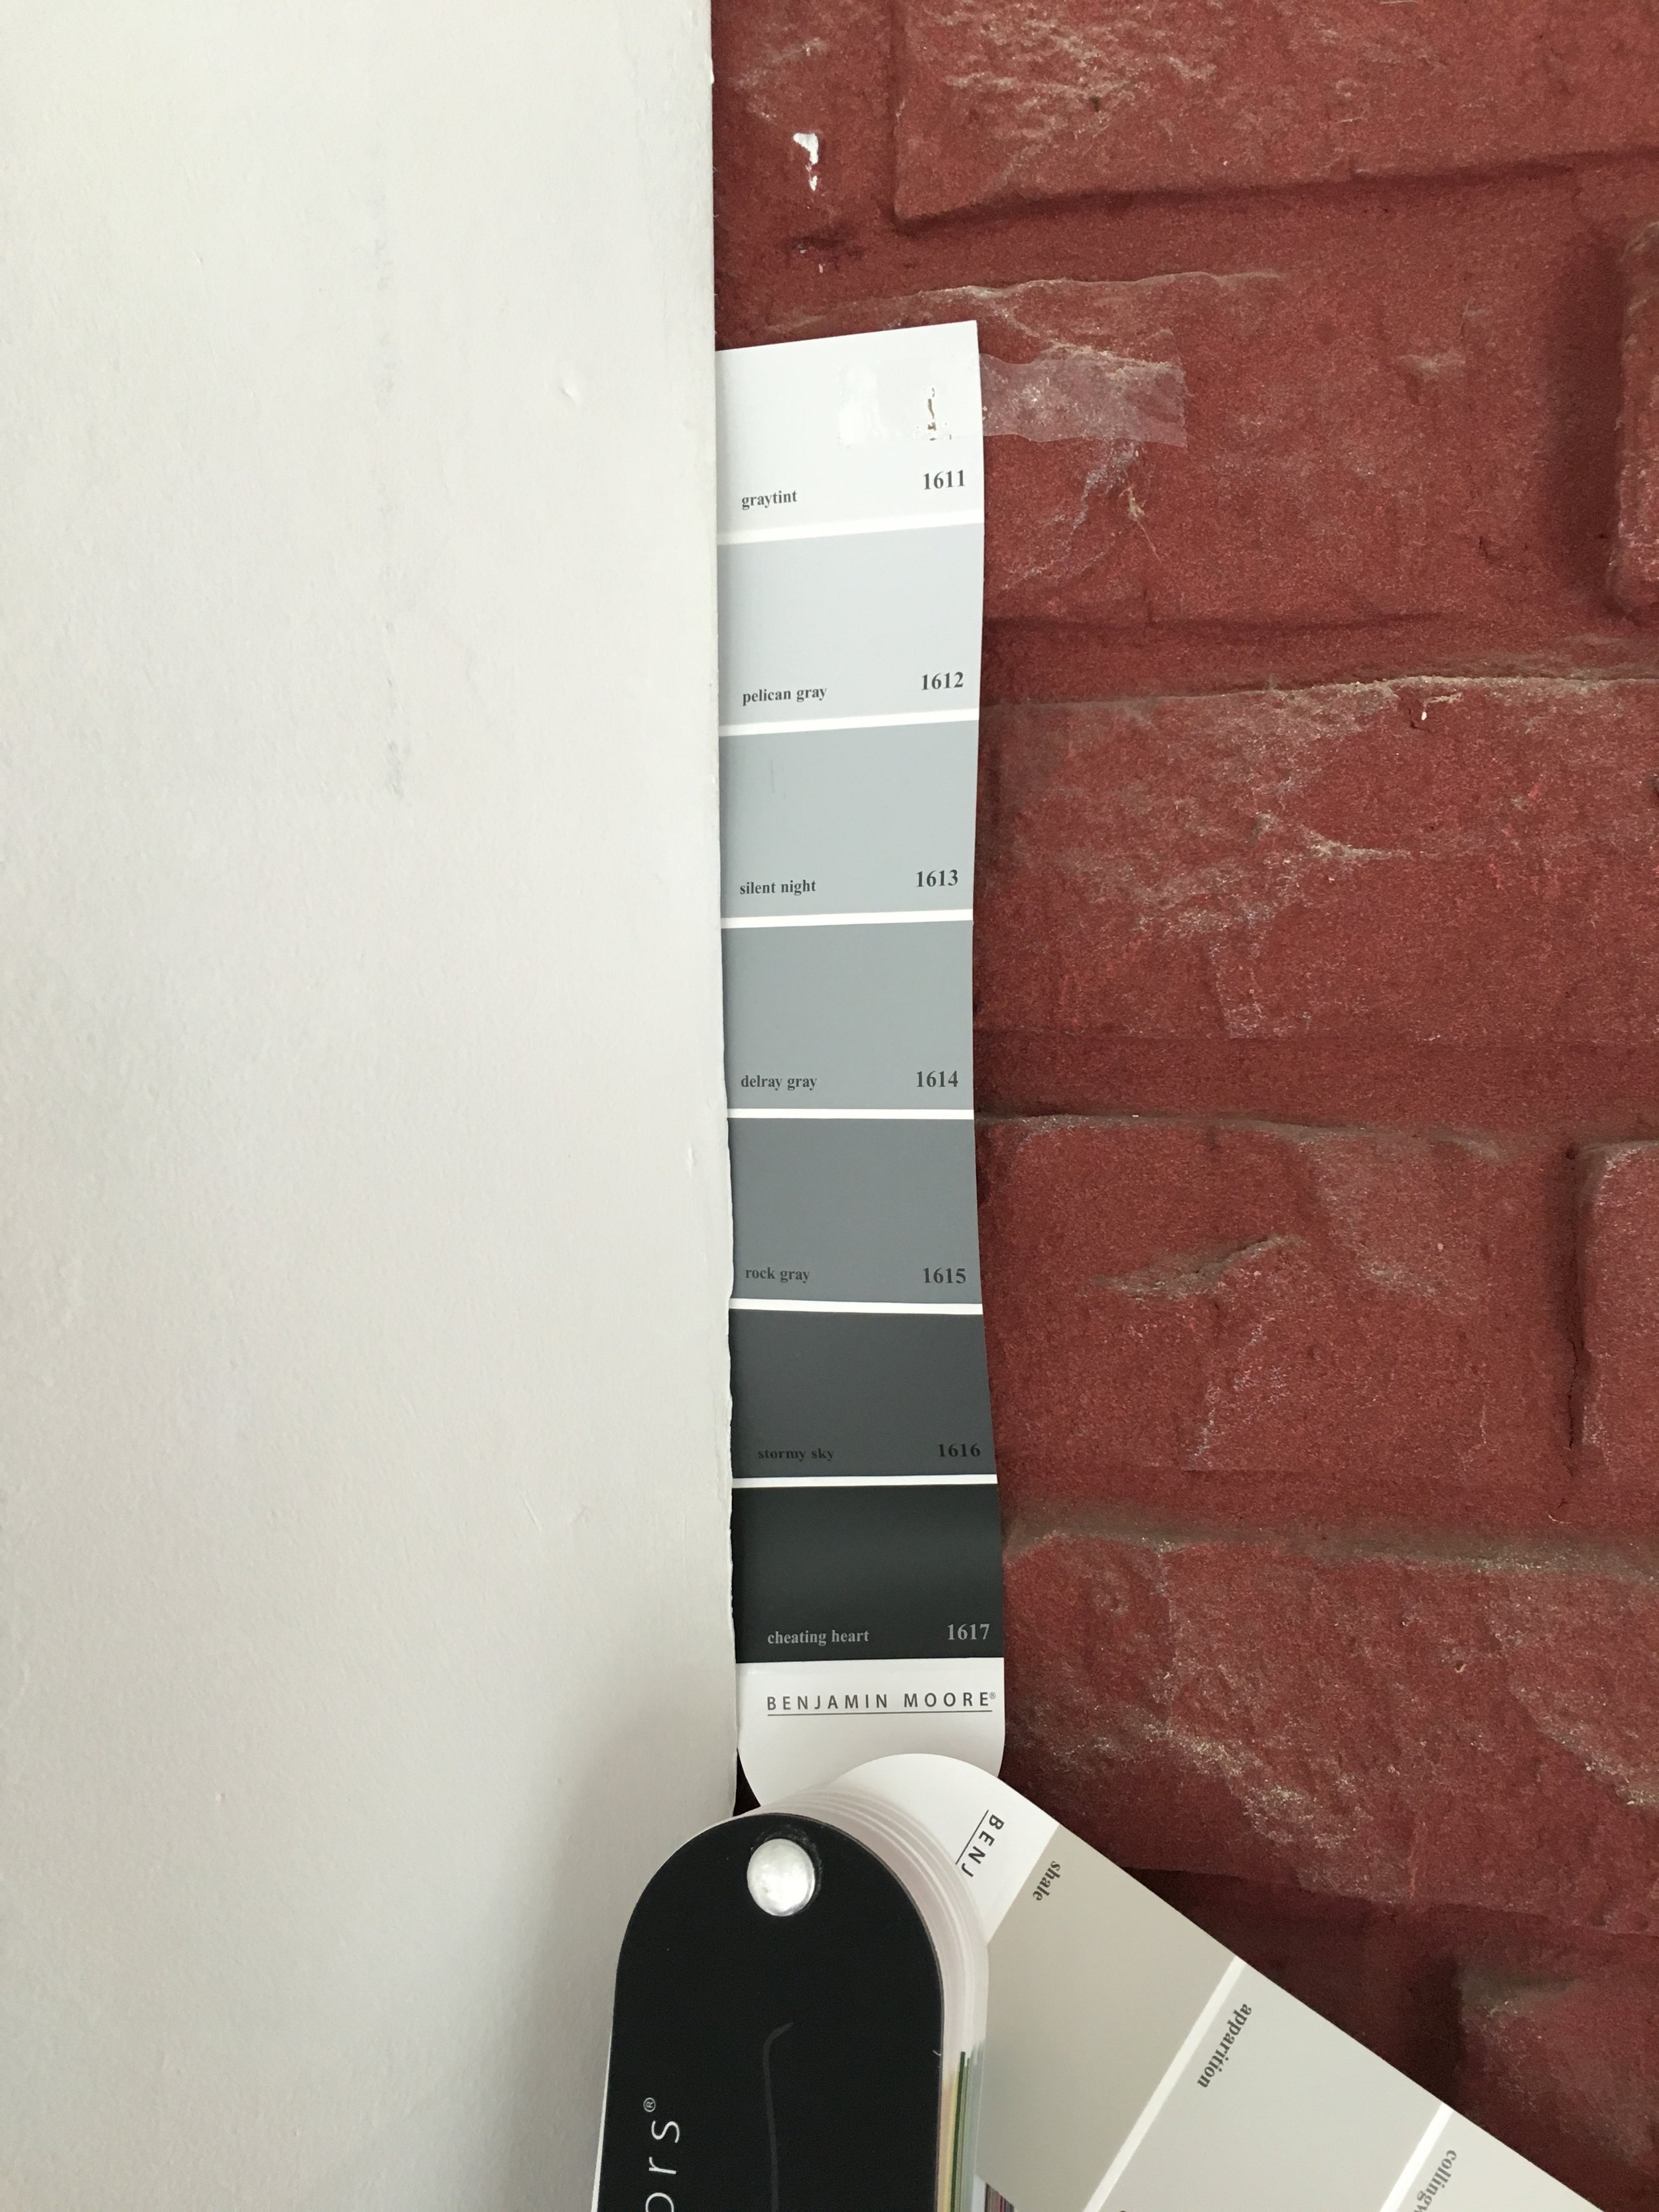
3. Plaster Walls
I am seeing more and more plaster walls and I have very pleased this trend is returning. Plaster walls add depth, interest and personality to an otherwise plain wall. There is something about the movement that is gained in a space with earthy walls. My favorite plaster on the market is American Clay. It is not only stunning, but also non-toxic and sustainable. These walls, you will want to touch!!

That right there is what I am talking about. Love these plaster walls by Jersey Ice Cream Company. If you don’t follow them on Instagram by now, you are missing out! Website: jerseyicecreamco.com

American Clay walls by Sandi Imondi with Imondi Interiors. Website: imondiinteriors.com
4. Leather Straps
Yup. I said it. Leather Straps. I am seeing them incorporated in wall mounted shelves, seat cushions, window coverings and cabinet hardware, to name a few and I. Love. It. The leather pairs really well with metal and velvet and it takes an ordinary cushion into extraordinary.

So much yes! I love everything about this picture but those bespoke cushions are where it is at! Design by Geremia Design, website: geremiadesign.com. Photography by Nicole Franzen.

This coffee shop, Otto’s located in the historic Adolphus Hotel is top notch. Design by Swoon, located in Dallas, TX. Check them out at swoonthestudio.com. Or the next time you are in the Dallas area, check out it for yourself!
5. Glass Partitions and Doors
Why should commercial properties get to have all the fun? I have been seeing glass partition walls pop up more and more in residential settings and I have to say I am a huge fan! I love having the visual break in a space but not necessarily closing off rooms with traditional walls.

What an absolutely lovely library and space designed by Busatti Australia. Website: busatti.com.au

This space is perfection when it comes to a downtown city loft. Design perfectly done by Becky Shea. Website: beckyshea.com
Well Folks. There you have it. My top five trends that are happening right now in the design industry. I hope you love them as much as I do. Make sure to squeeze your loved ones extra tight today!
Stay True!
Allyson

Five Reasons To Hire A Designer
Let’s be real for a second. Interior design today is more accessible than ever before. There are countless shows dedicated to our passion for design. From the self made DIY designers to the traditionally trained designers and everything in between. Not to mention there is so much information on Pinterest, You Tube, Houzz and of course design blogs. It’s true, even I can be found zoning out on the pages of my own favorite designers on instagram from time to time. However, with all the content out there, it can be easy to believe that hiring an interior designer isn’t necessary anymore. Well today on my blog we will be discussing five reasons why that just isn’t true!
1. You will save money!
Whether you’re looking to tear down a wall in your outdated ranch or rehab that drab kitchen, a trained Interior Designer really has the skill set to carry out your vision. With comprehensive drawings and specifications, big costly mistakes, like ordering the wrong size refrigerator, are less likely to happen. Designers are all about the details and those details can cost big if missed.

2. You will save time.
Many homeowners can run in circles trying to make decisions. If you don’t believe me, walk into a tile showroom and pick just one tile that you love. People’s lives are busier than ever and taking on a fixer upper or any sort of home project can be a full time job. Ask yourself if you have the time, skills, and resources to manage a design project and if not, that’s where a designer comes in. It’s our job to take your vision, organize your options, and put those choices into detailed drawings, specifications and pricing proposals. Clients have a better understanding of the process of construction projects with a designer on board.

3. You have an advocate.
Projects inevitably run into problems. It’s not a matter of if but when. Designers are problem solvers, that’s what we do best. When issues come up with construction, for example, the designer is there to facilitate not only a solution that works for the contractor but one that works for the Client and the overall design as well. A designer is there to represent and advocate for your best interest. They are also there to help you make the decisions that you are unsure of or might not even consider like furniture placement or repurposing materials or furniture. From design to execution, I am with you every step of the way.

4. Interior design is not just for the wealthy.
Throw out your ideas that an interior designer is only for people who have lots of money. People who appreciate good design also understand that good design is an investment and that it does not have to break the bank. My approach to design is to stay true to the roots and the client. I love repurposing materials and finding solutions to meet the needs of my clients. I have worked with all sorts of budgets including my own and I know good design does not have to cost a fortune.

5. Our job is to understand what works.
Are you unsure of your style or can’t decide on one? Maybe you want design that will last for years to come. Designers are more in tune with current trends and products that are available. You are less likely to have an interior that is out of style in a year with a designer. Not to mention the huge amount of resources available to designers. I am not one who is led by trends but I do believe in creating a look that is holistic and stands the test of time. A designer is going to know the best places to source your desired look and bring the vision all together. From local businesses to large vendors a designer will have the right connections to carry out the project and within your budget.

So there you have it, my unsolicited advice on why hiring a designer like me, is a great idea. If your not sure if a designer is what you need, don’t hesitate to reach out to myself or any designer. Have the conversation. That’s the only way you will know for sure! Up next on my blog, what questions to ask your designer!
Stay True!
Allyson
Studio Inspiration
Today I’m setting some time aside to work on our personal house. It’s difficult for me to prioritize my personal projects, so I’ve made our house one of my design clients. It’s the only way it will get done. I’m currently on the schematic phase of design for our studio, which is basically pulling lots of inspiration pictures and beginning to pull together mood boards for the space. Speaking of mood boards, one of the must-haves for our new studio is a cork board. Something I can work off of for mood boards and notes. Of course not any old “cork board” will do. I am so excited to get this studio under way, as our family needs a space to office and the occasional arts and crafts project. I will go into more detail on the specifics of the project in a later blog post, but for today, inspiration!

To be honest, I love everything about this picture. From the corkboard to the concrete floors and white walls. I could definitely work in this space!

I love the storage of this space! One of our main requirements for our new studio is lots and lots of storage!! The windows in this space and the view are oh so charming and the white walls are perfect for a creative space. The office chair is pretty easy on the eyes as well.

Texture!! I love the texture of these walls. Not sure if it would work in our space but it’s inspirational nonetheless. Maybe a future project……

Giant pegboards are always a great idea in a craft room. My girls would love this!! I especially love the giant eyeballs on the shelf. I always see those at craft stores and wonder what people use them for. Now I know, a really nice photo op. I am not as excited about crafting as my girls are but in this room, I might be able to find some inspiration.
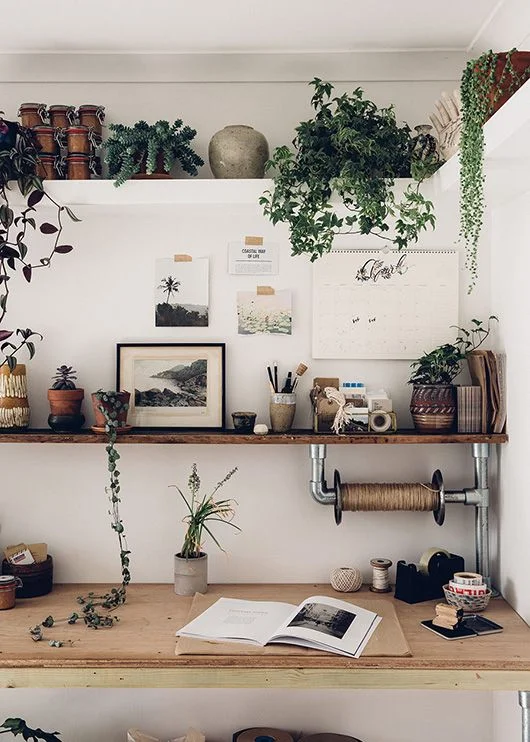
This picture has all the good vibes. I love the plywood top with raw wood apron. It works perfectly as a craft and art table. You don’t have to worry if it gets ruined, in fact little imperfections on the top would give the space the character of an art studio. I don’t have to explain why everything else is so good because it just is. And that plant shelf is ah-ma-zing!
That’s it for today! It will be fun to see how this all shapes up in my mind and real life!
Stay True!
Allyson

Who is True?
Today on my blog we are going to be talking about the roots of True Design. Check it out!
While 2018 was a wonderful year for True Design, we are very excited about the upcoming year. I don’t want to reveal everything just yet but I do have some very exciting news I will be sharing in the coming months. In the meantime, I wanted to share with my readers out there a little bit about me. I have a tendency to keep my business and personal life separate, which at times I feel is necessary but as an entrepreneur trying to sell my services and in turn, myself, I feel it’s time to reveal a bit more about me. So here goes.
Who is True Design?
I am Allyson Buck, an educated, experienced, certified interior designer. You can read more about my credentials in my bio on my website, but just for today, we are going to go a little deeper than the on-the-surface credentials. I am a mother to two beautiful, creative and joyful little girls, Gwyn (8) and Stella (5), and a wife to an awesome, talented, man, Austin Buck. I have a passion for travel and the personal and business growth I gain from my experiences outside of my daily bubble, (not that I don’t love my bubble). I am to my core very loyal and honest. Growing up I could never tell a lie, just ask my mom. My eldest daughter shares this characteristic with me. The kid cannot lie. Which I, of course as her mother, love! My youngest on the other hand, that’s out for debate. Only time will tell.

Gwyn and Stella, my littlest loves, photo credit to Austin Buck @copilotcreative.com.
Let’s take a minute and talk hair. I know that sounds crazy but bare with me, there’s a story there. I noticed my first gray hairs when I was in the 8th grade. I kind of talked myself into it just being sunkissed highlights, but it wasn’t. By the time I was 22 I had people telling me all the time, “wow, you have so much gray hair.” I got really self-conscious and started dying it. I died it for over 10 years. I hated everything about it. The money spent, the time lost and the super stinky chemicals penetrating my brain, (I can be a little dramatic at times). Here’s the thing, I felt like I was lying to myself. I would spend all this time and money changing my hair color and after just 1 week, my gray hairs were back. This was a battle I was never going to win. Ever. So I went back to my roots, literally, and my husband buzzed my hair. I’ve never had short hair, or gray hair but at that time, I had never felt more like myself. My True self. So there you go. I can’t lie and neither can my hair.
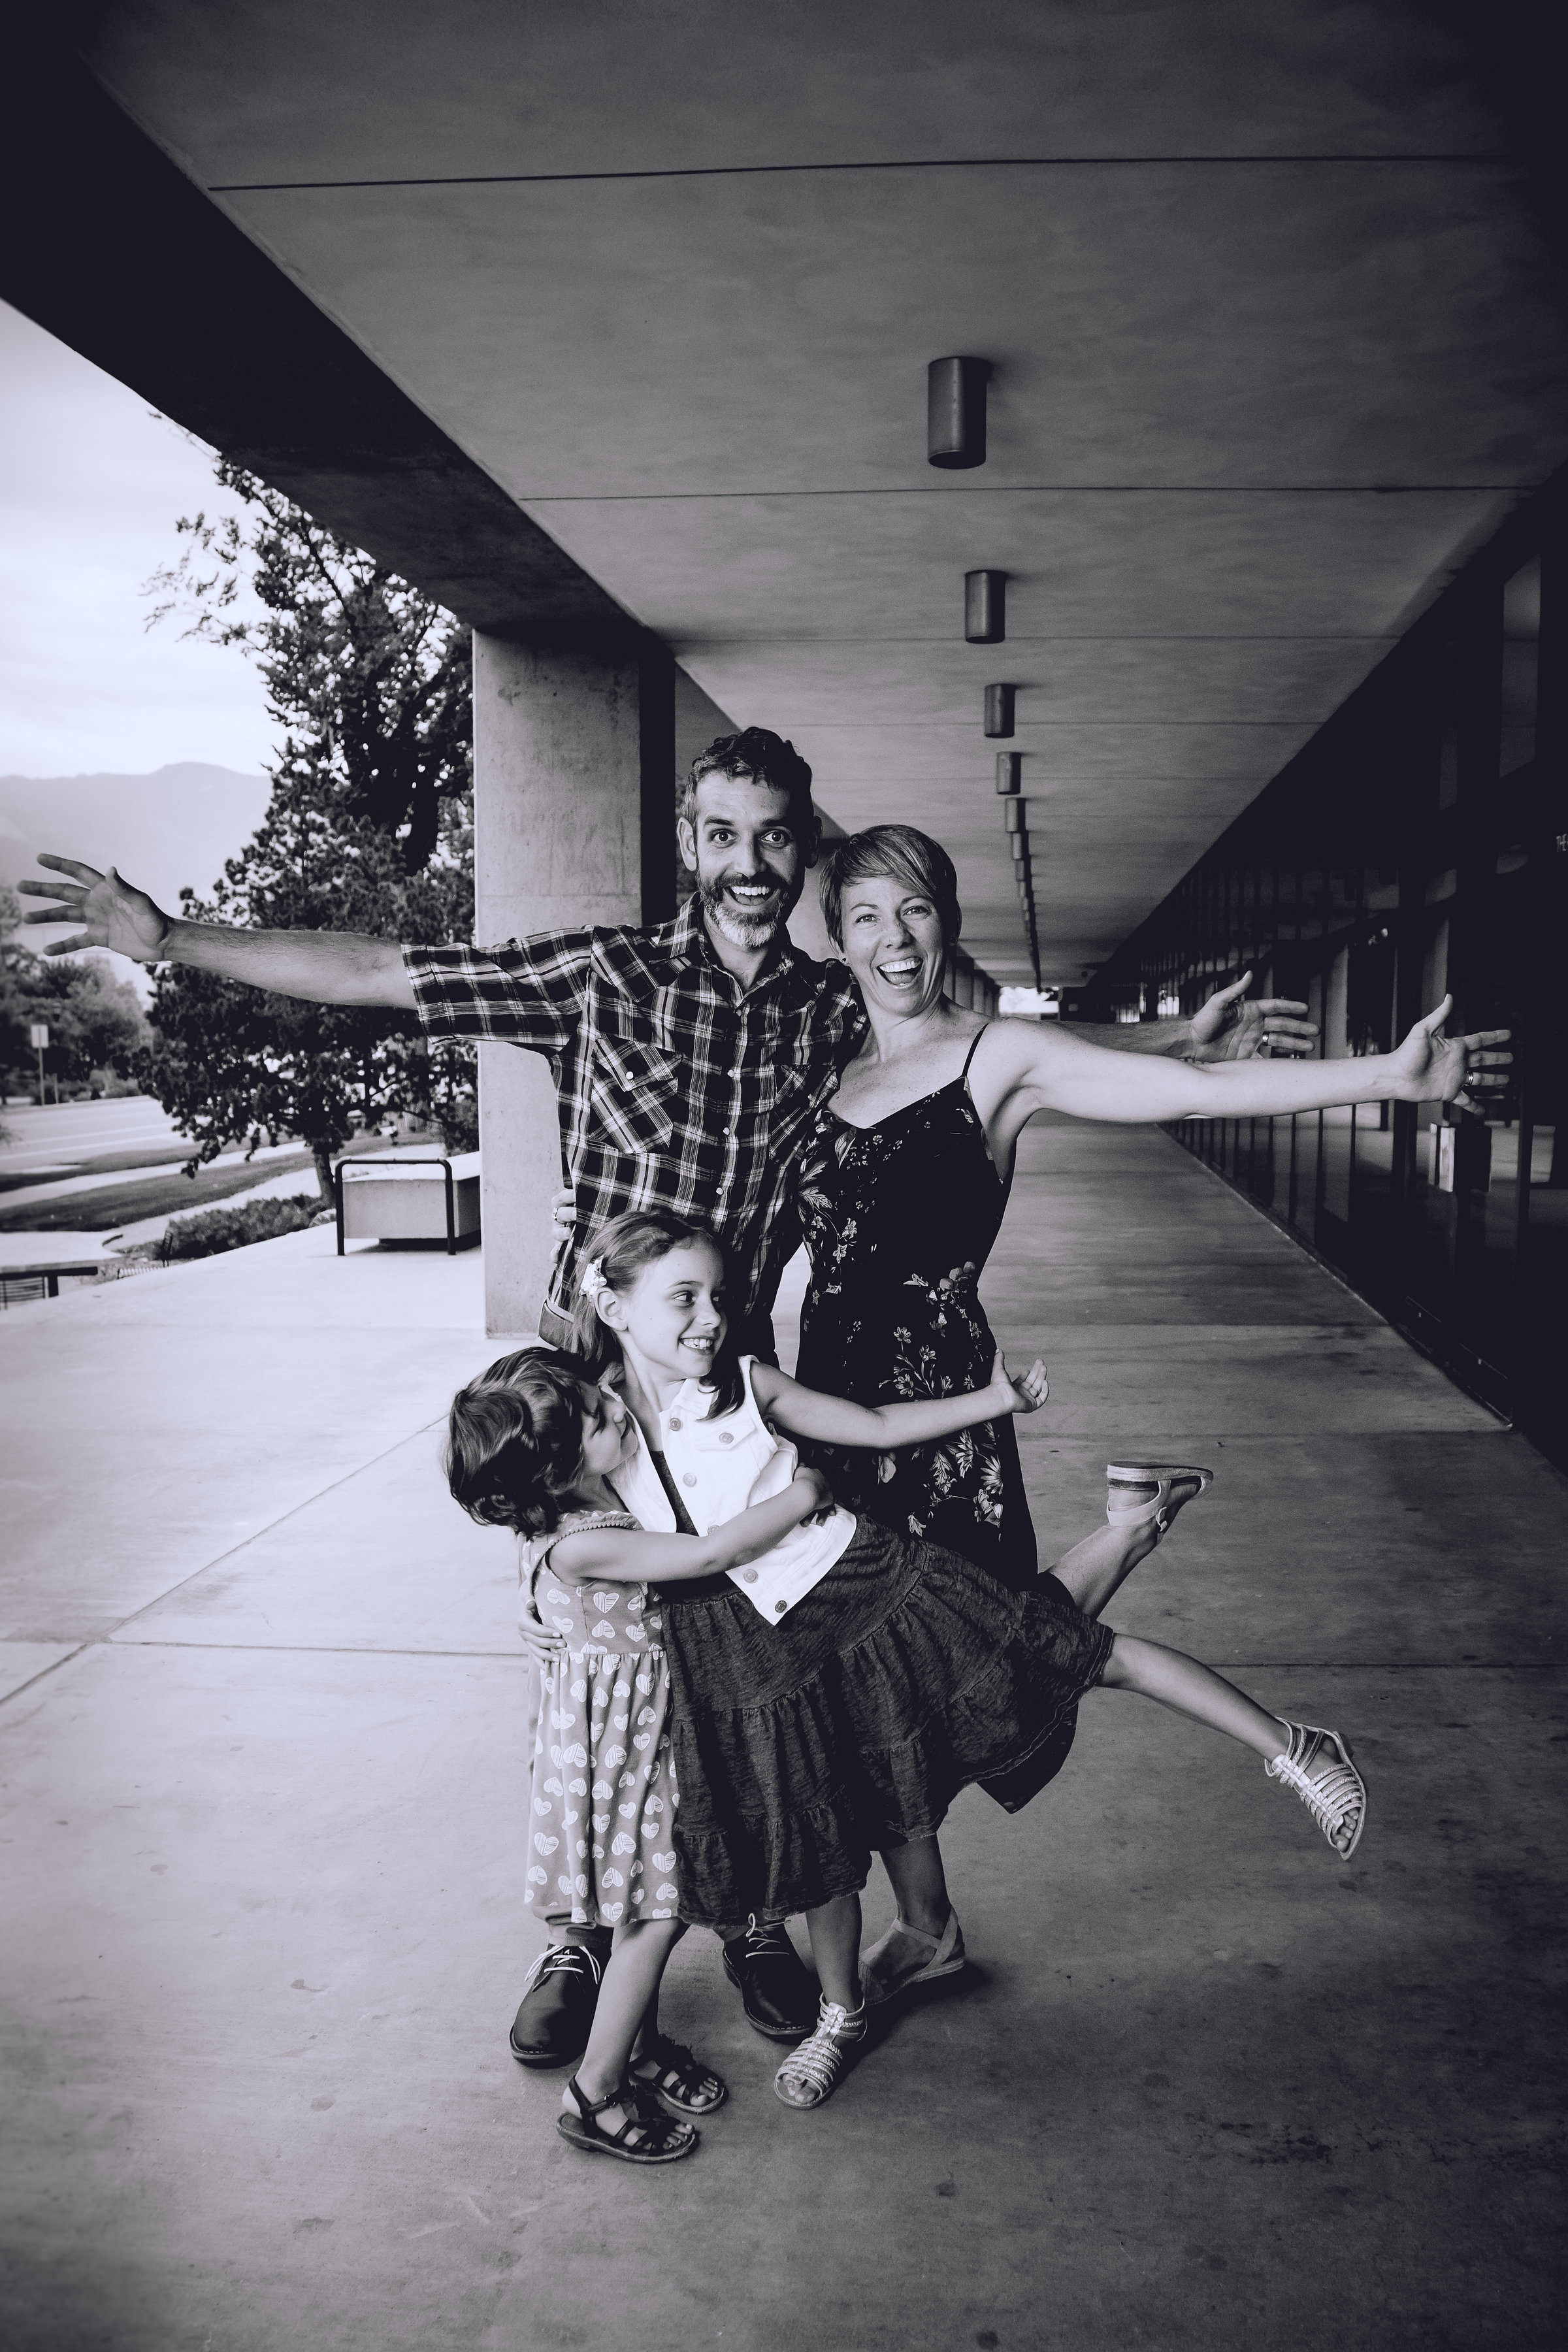
Yup. This is us. The Buck Family. Photo credit to Ben Lutze @benlutzephotography.
Why True Design?
I once met a woman named Tru. I couldn’t get it out of mind. I just loved her name. It’s so simple, but powerful. When branding my business adjectives like, Honest, Loyal, Pure, True kept coming up. I’ve never been one to be overly trendy. I do love trends but they come and go so quickly and that is especially true of interiors. Avocado green, say no more. The majority of my work is in existing spaces, whether it is commercial or residential, I do a lot of remodels. I have so much joy in working within existing parameters. Those spaces have stories, years and years of stories. It’s such a joy highlighting some of those stories from the past but also bringing new light and new life into a space. The way I do that is staying True to a buildings roots. That’s not to say that a home that was built in the 60’s must be remodeled to a mid-century home, but rather, tieing in some of those aspects of the era of the home into the remodel. On the flip side of that, it doesn’t feel right to me to take a 1960s ranch house and convert it to a traditional farmhouse interior. So for me, True Design is who I am and now it’s my business too.

Allyson Buck, certified interior designer and local business owner. Photo credit to Austin Buck @copilotcreative.com.
What’s next?
As a human (how very raw of me), I am constantly evolving in my personal and business life. I hope that my mind never remains stagnant. Change is as natural as it gets. So embrace it, cause it’s coming. You will just have to sit tight to the next chapter…..
Stay True,
Allyson

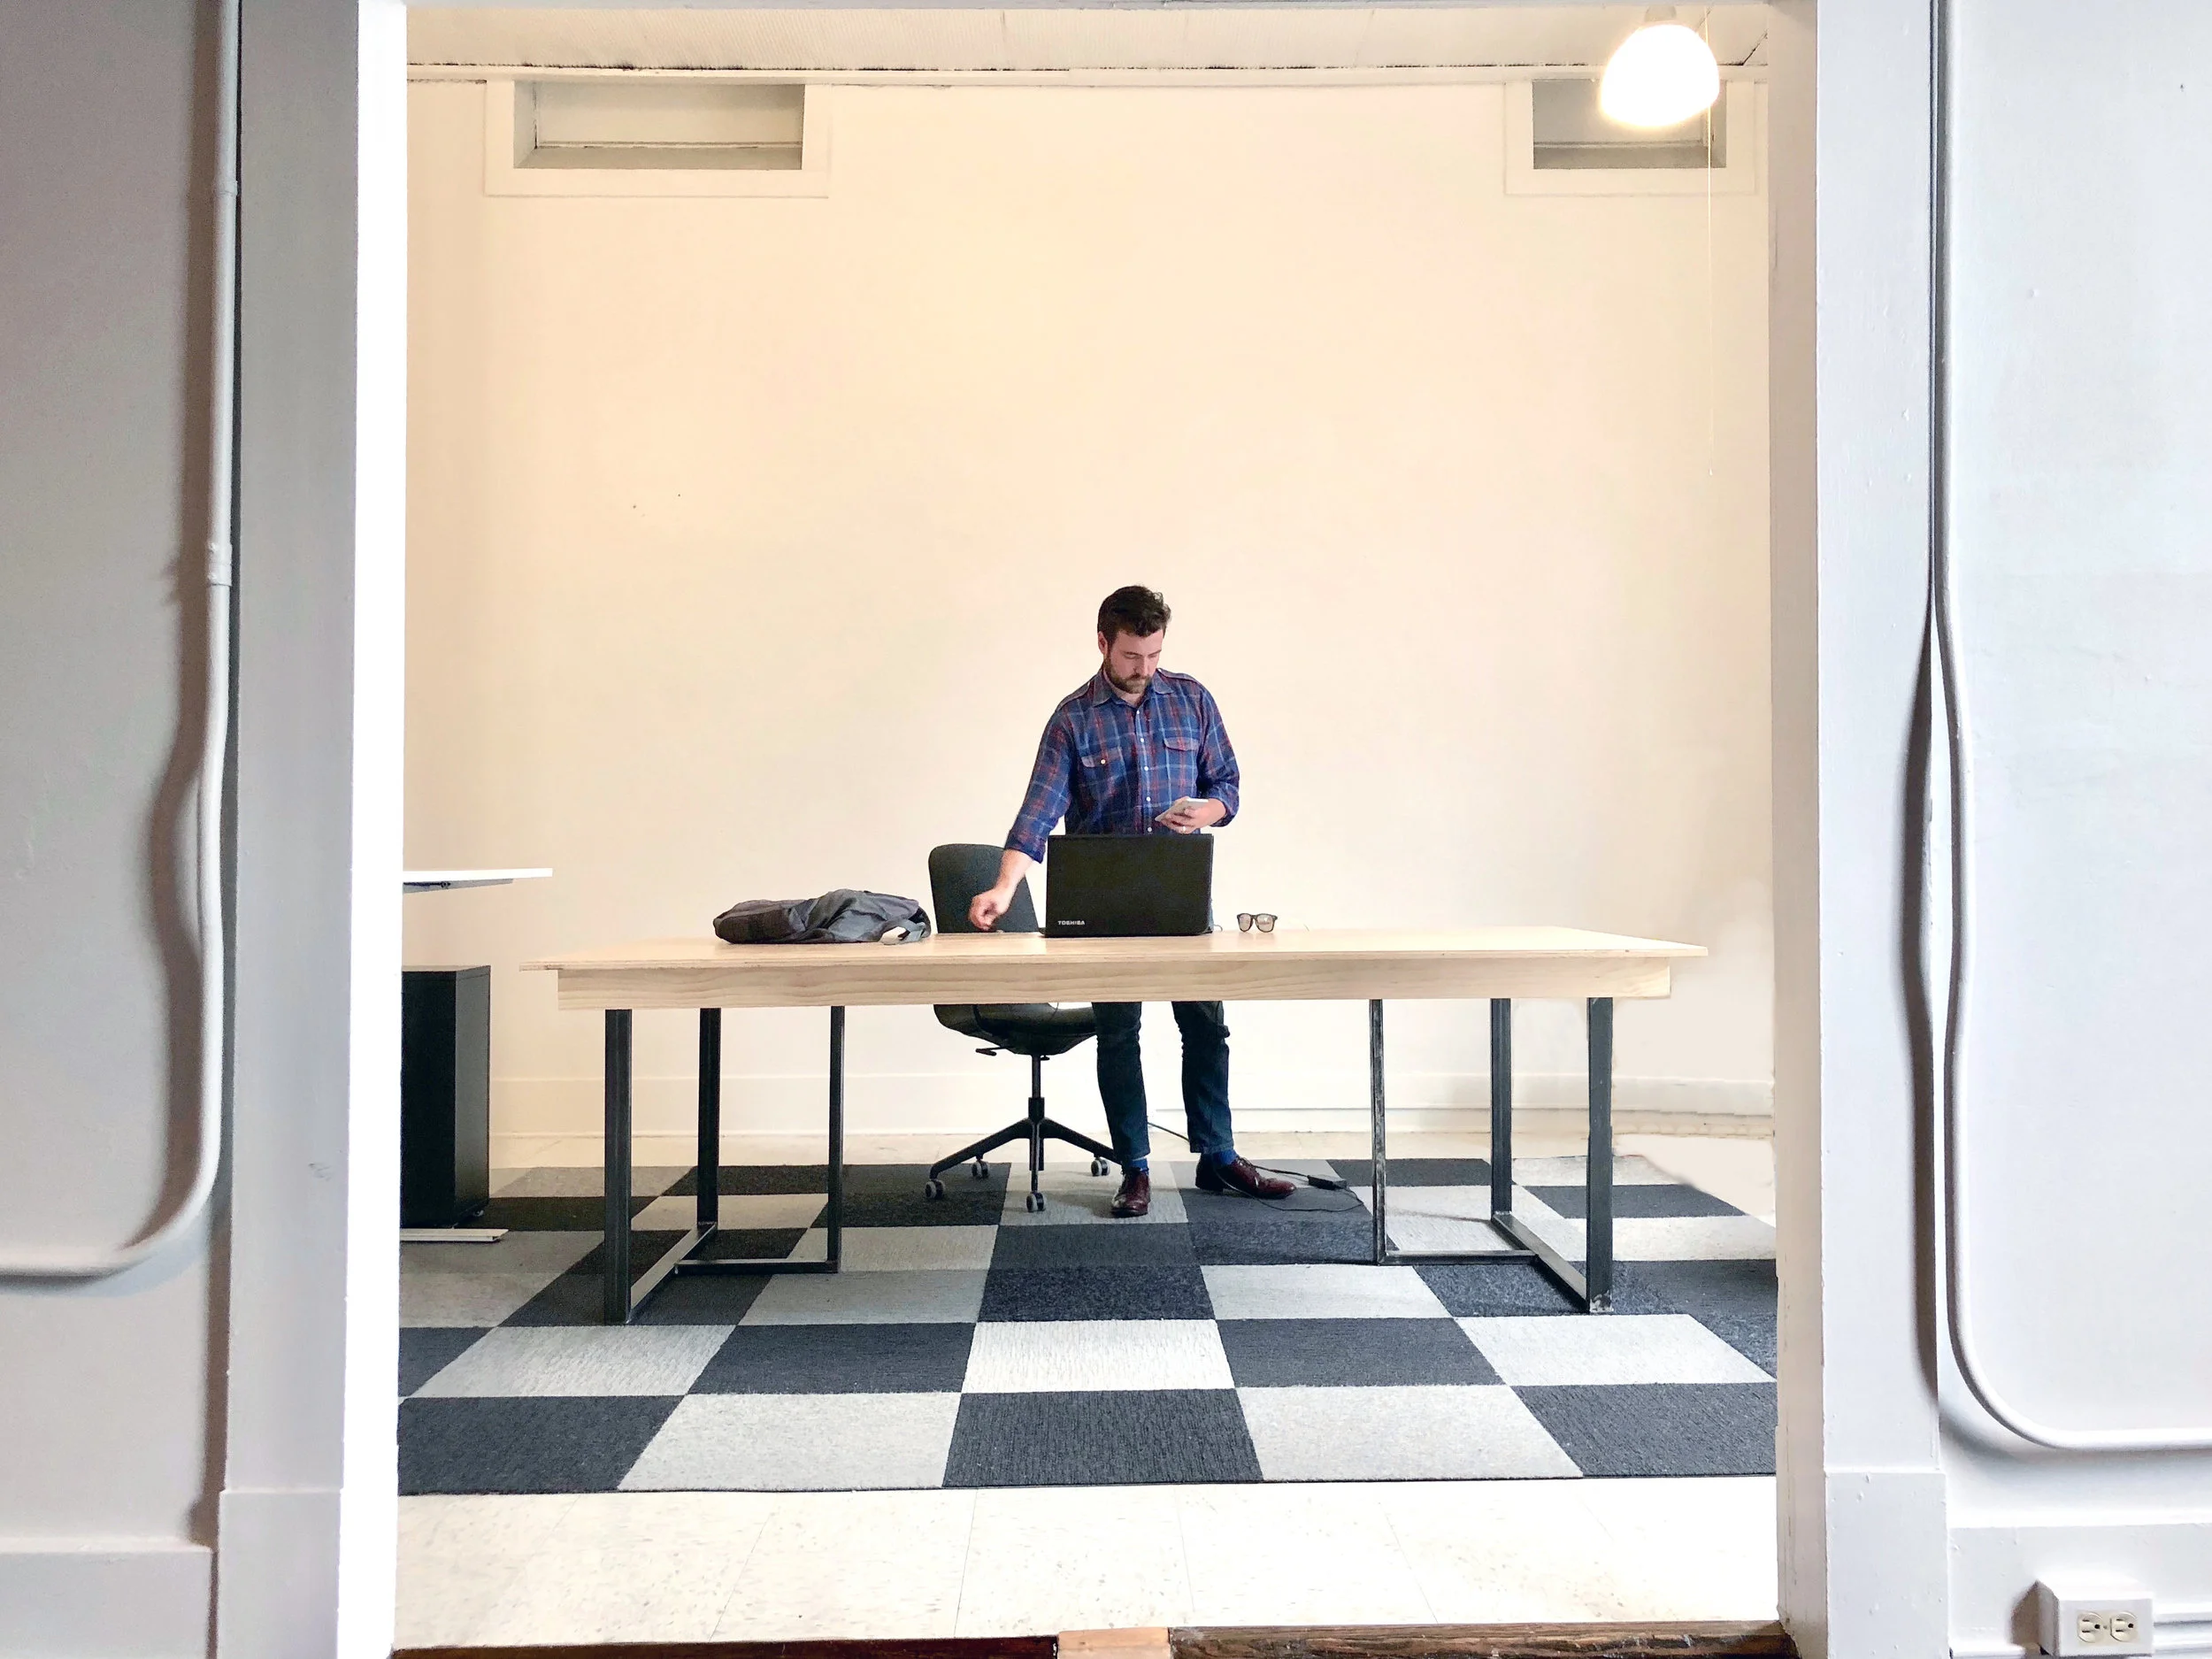
Big table, Big ideas
Tis the season for family, joy and if you’re us, projects! My husband and I are doers. We always have a list of projects in our queue and having a little bit of time off from work allows us to tackle a few of these. Our current “big” project at our house is our studio remodel. The current state is studs and raw concrete. We are hoping to stain and seal the concrete in the coming week and throw up a wall. That will make us feel like we are making some progress! So in the spirit of getting sh!t done, here is a mini project we worked on for one of our clients to inspire all you doers out there!
The dilemma……
Our clients needed a table that would be big enough for meetings, social gatherings and the occasional rap session. The problem is that tables of that size and caliber can be very expensive. Taking into consideration that our clients were paying for the remodel of the space and the complete furnishings and accessories, we were very budget conscious.
The solution……
I designed a custom table made out of steel table legs and a white oak plywood top. The steel table legs I sourced from a local metal fabricator in San Antonio. I sent over the design for the legs and he was able to fabricate and deliver to me in a just a few weeks, along with a pair of table legs for our personal use as well. Quick learning lesson here. Have your fabricator pre-drill the holes for the fasteners. This ensures a super quick installation. From there, I skipped over to a lumber store and grabbed a 4’x8’ sheet of white oak plywood. I then went through the process of sealing the table. Sand, seal, sand, seal, sand, seal and done!

I love the process of woodworking because it is such a process!
Installation…….
Due to the size, the table was installed in the space. We drilled holes in the flat plate of the table legs and then fastened a 2x4 between the plywood and steel legs. The plywood is only 3/4” thick, so adding the thickness of the 2x4 ensures that the table legs were secure. I also added a 1x4 apron across the front and the back of the table so that the additional 2x4s were not seen and for additional stabitility. If I did this all over again, I would do something a little smaller for the aprons, perhaps a 1x3. Then we flipped it and bam! Awesome gigantic worksurface!
This is a great solution for anyone that needs a big worksurface for a community work table, craft table or maybe even a huge dining room table, depending on your aesthetics. Cost to the end user was under $500. Another bonus for our clients is that those steel legs will last for-ev-er. If they move to a new office space, they can break down their table and resize the table top to something smaller.

I absolutely love how it turned out. And the best part is, the clients love it too! We will be adding a large rectangular grommet in the center of the table. This will offer cord management solutions for computer and table lamp cords.

So here is to all the future rap sessions out there! May they be the makings of our future!
Stay True and Happy Holidays!
Allyson

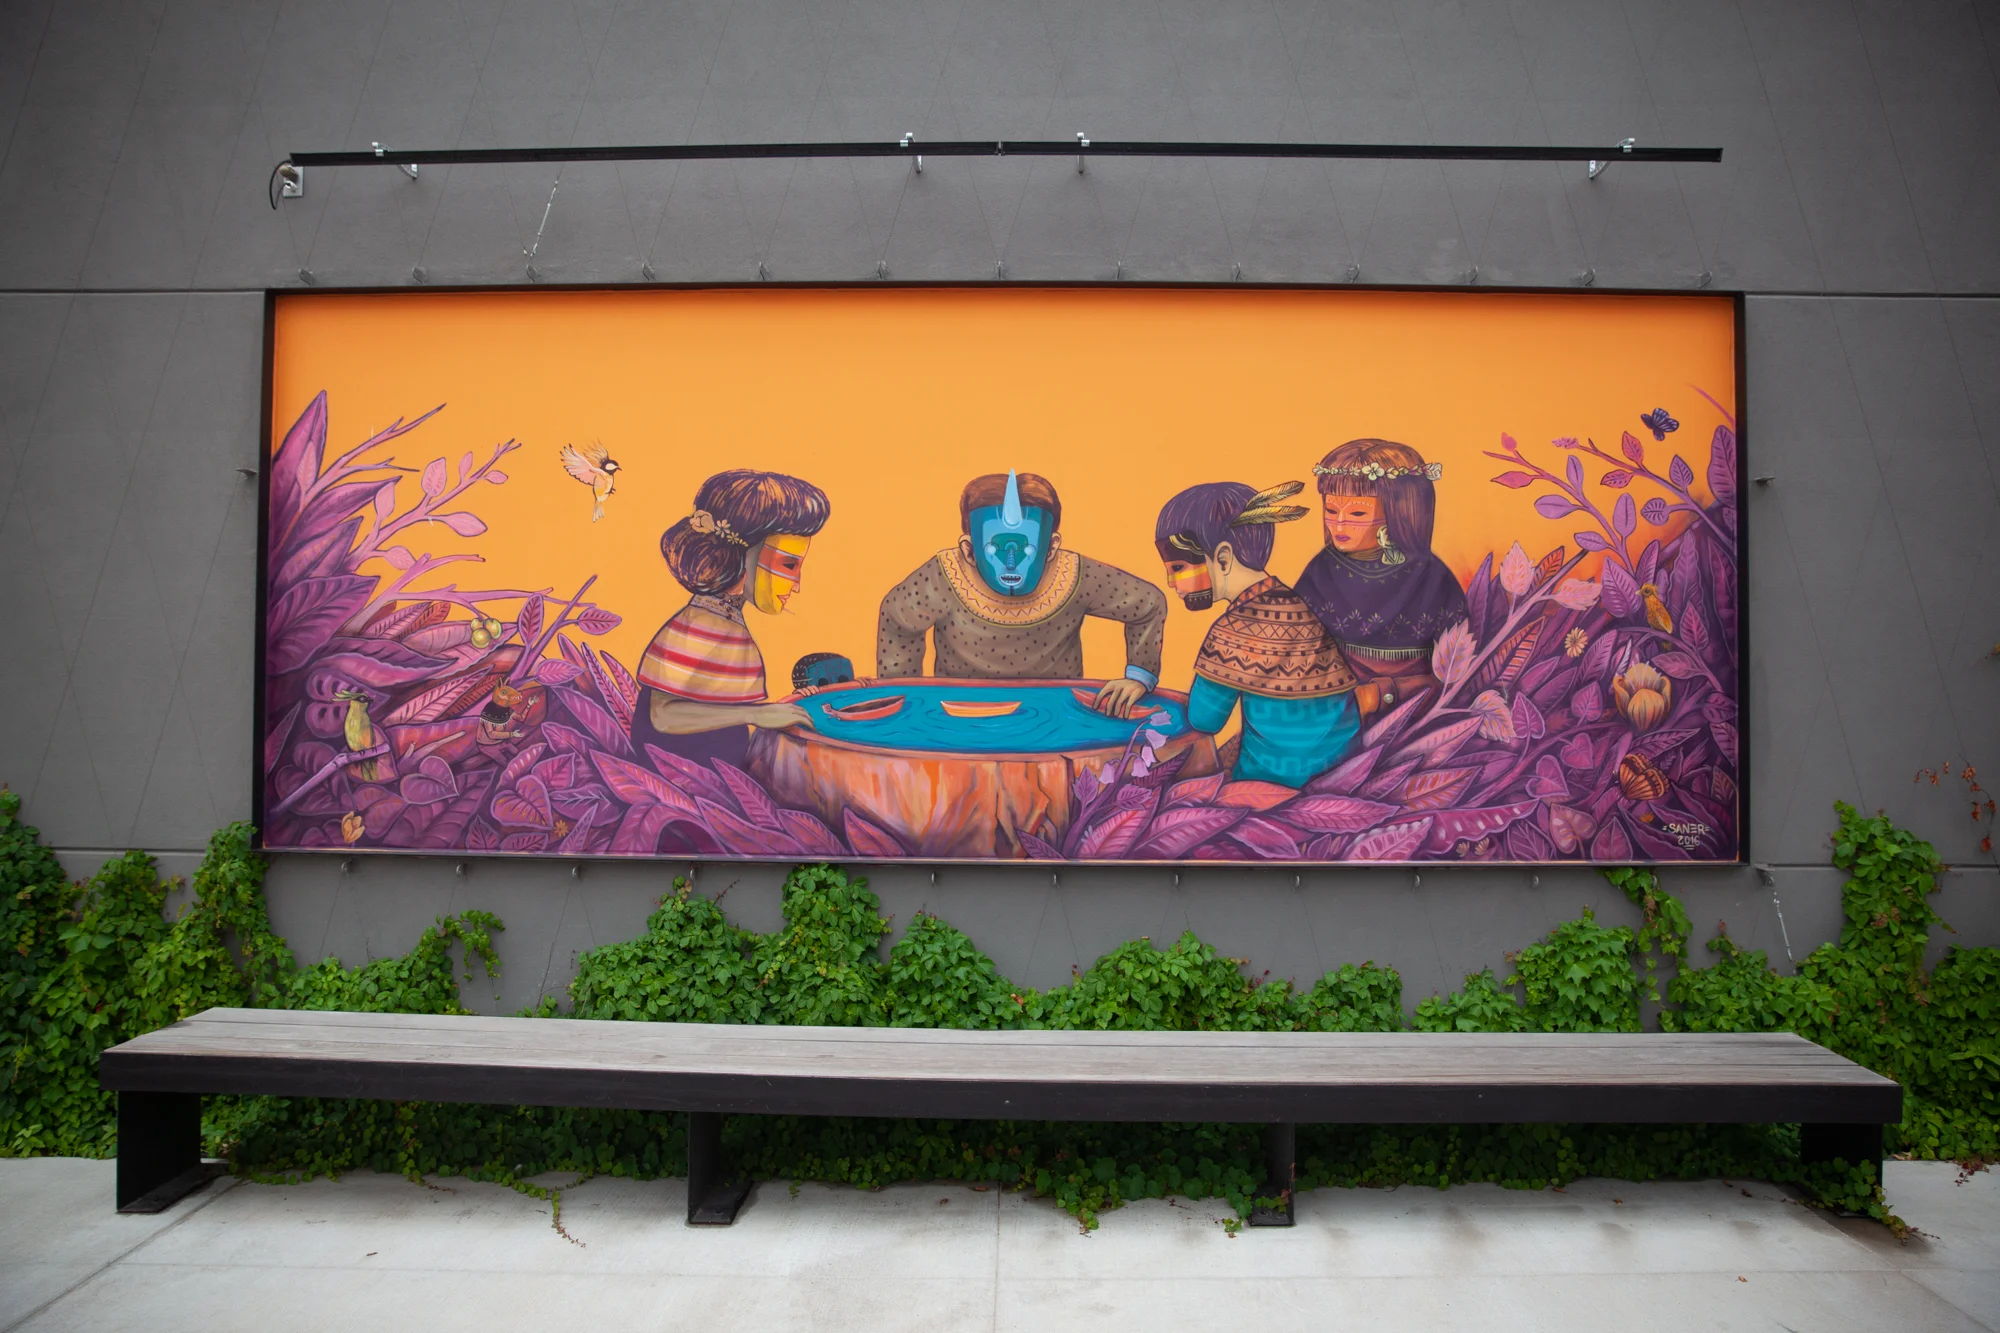
A Clever Downtown Space
Today we are discussing a recent commercial project that we just completed in downtown New Braunfels, TX for a small, family owned business, Cloud CFO. Talk about a dream team! I always tell my commercial clients, brand identity comes first! The interiors should come second, not that interiors are not as important as brand identity, on the contrary, but to have your space reflect your brand is quintessential.
The Client……
Let’s start at the beginning. Who is Cloud CFO? Well, if you’re like me, a small business owner that wears too many hats on a regular basis, they are the answer to my dreams. They offer cloud based bookkeeping services and now that I have them in my life, I will never EVER let them go! What were the needs of their space? As a small husband and wife team, they wanted a great office space to work their bookkeeping magic as well as a comfortable space they can meet with new and old clients.
The space…...
The office space is located in an historic building built in 1871 in downtown New Braunfels. If you are a hardcore history buff, read up about the buildings interesting past at thephoenixsaloon.com/history/. Most office spaces tend to be uninspiring with low acoustical ceiling tiles and fluorescent lighting. This space, however, had really good bones to start with. With the original doors and windows in place and high ceilings it was easy to create a comfortable and dreamy atmosphere that would make you hop out of bed to run to work! This space required a minimal face lift mixed with a lot of love to bring out its character and function as an office. Let’s take a look at some of the before pictures.
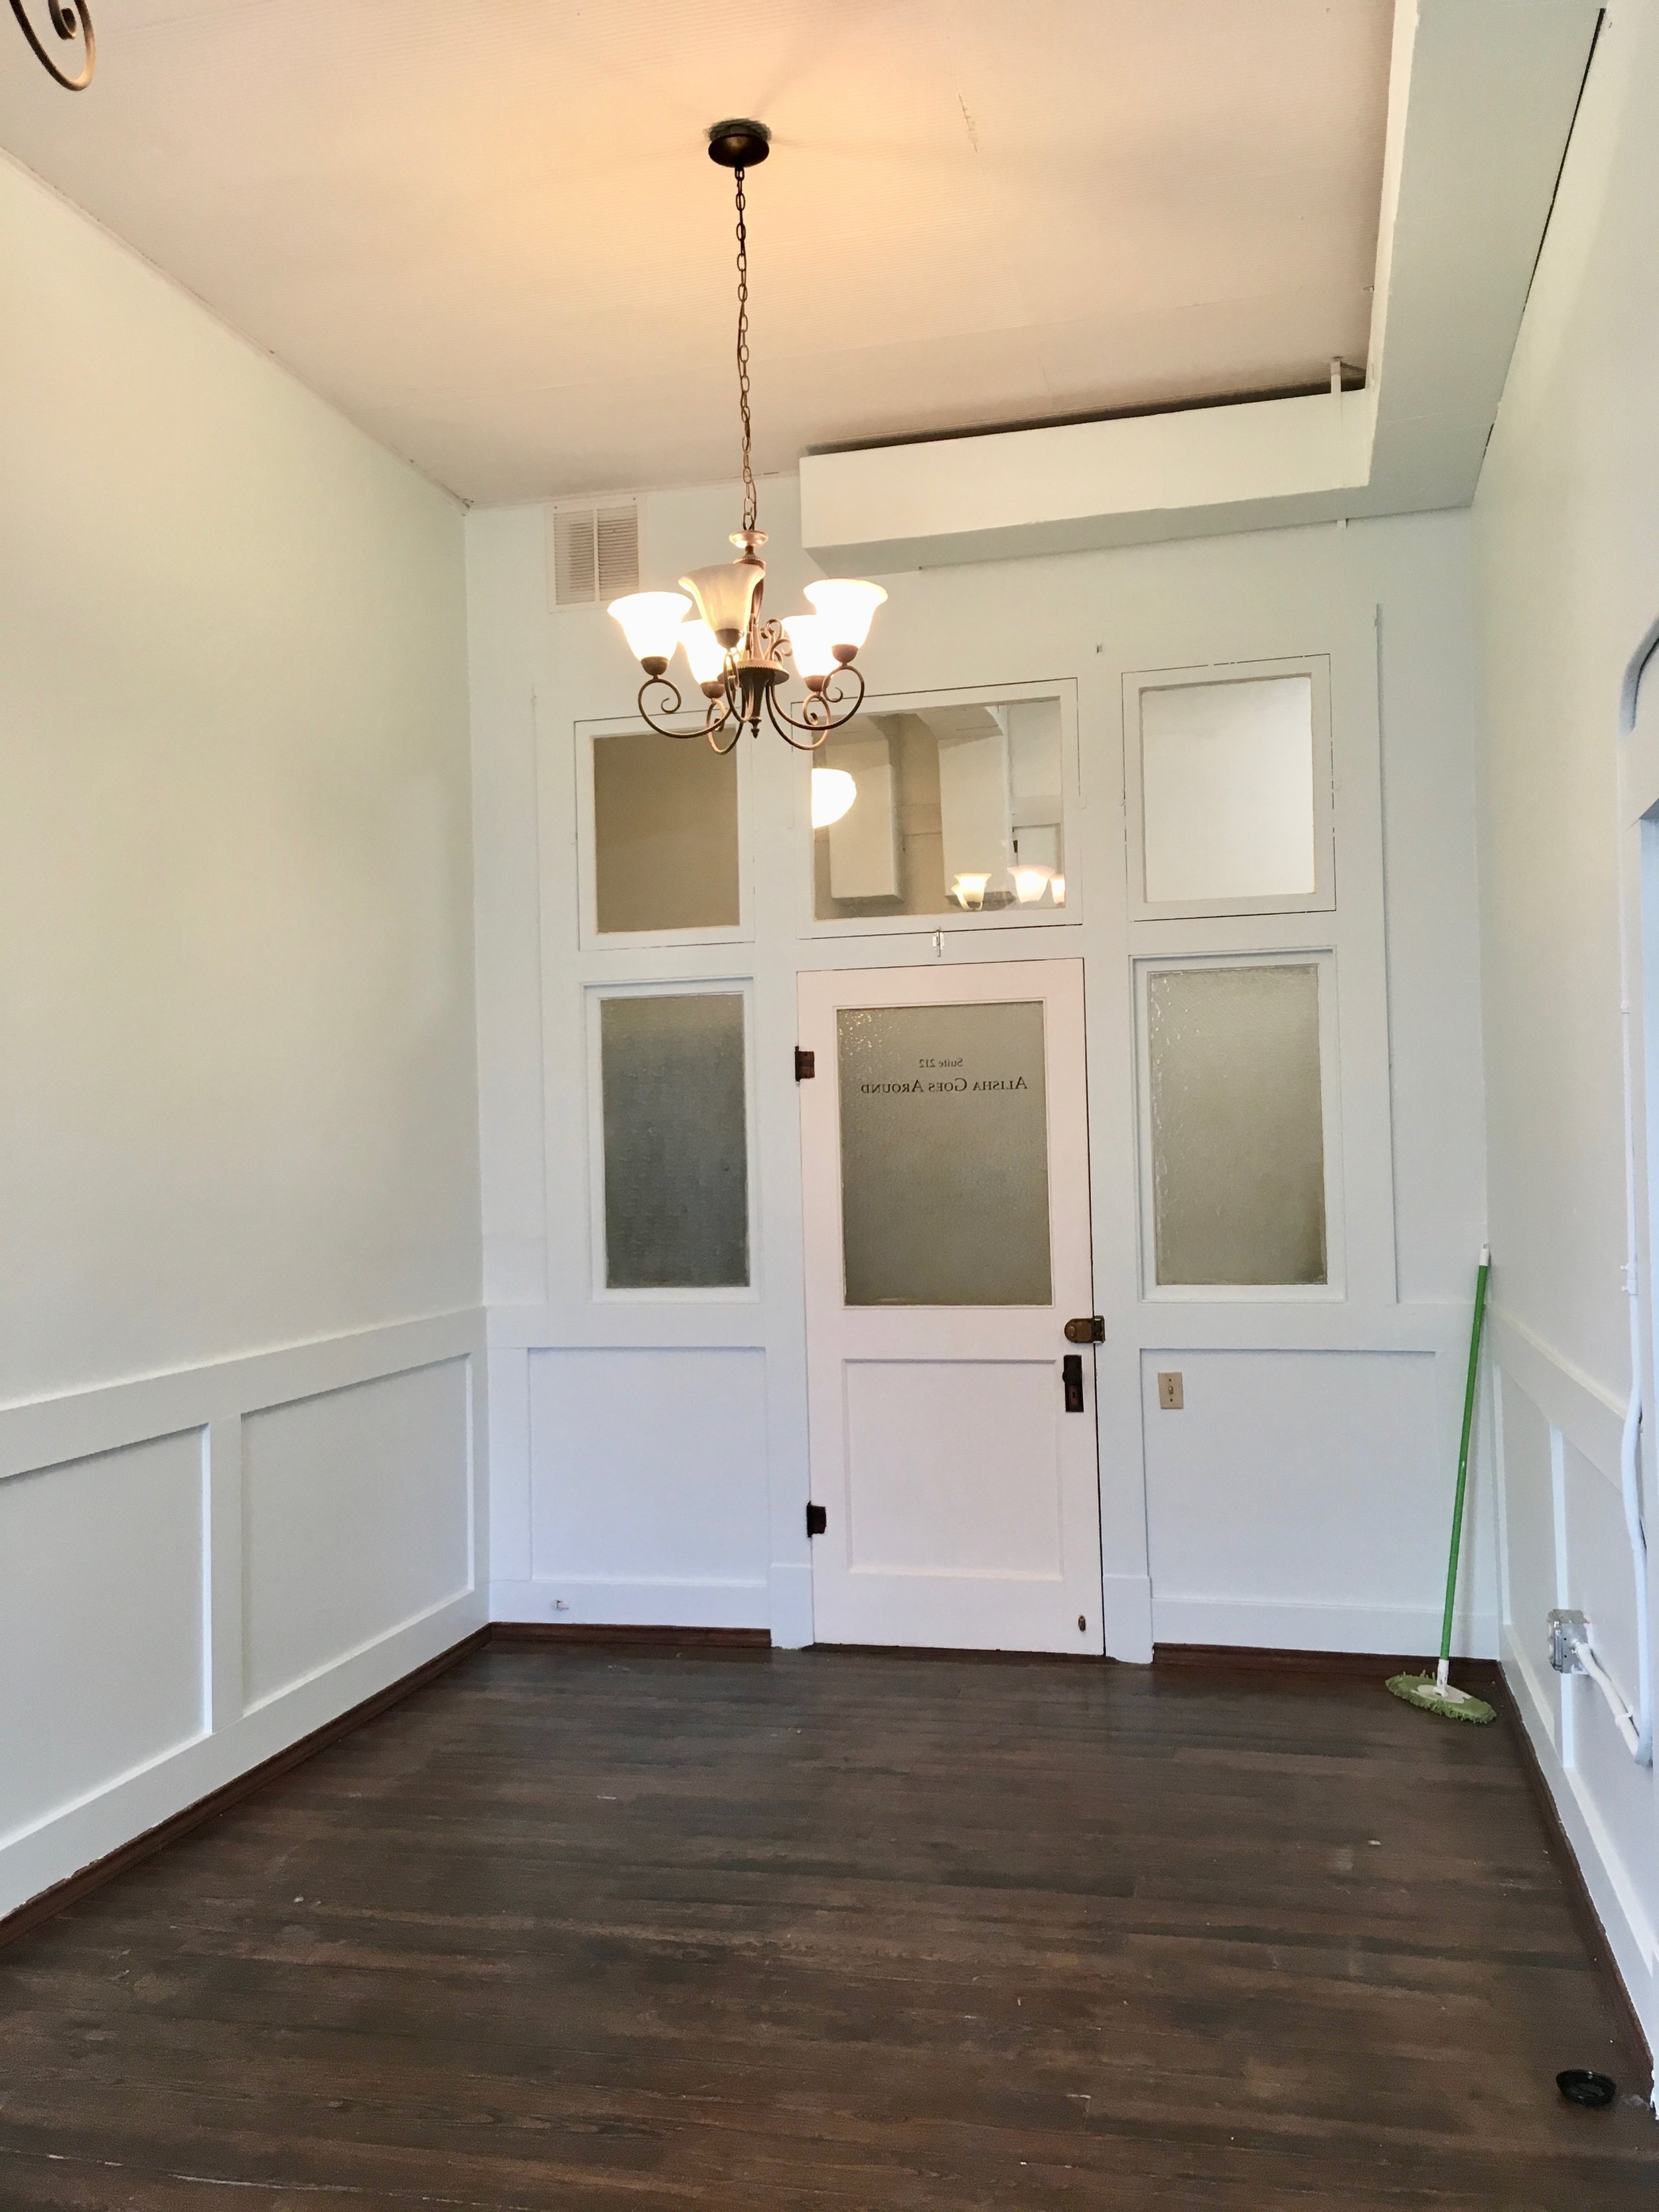

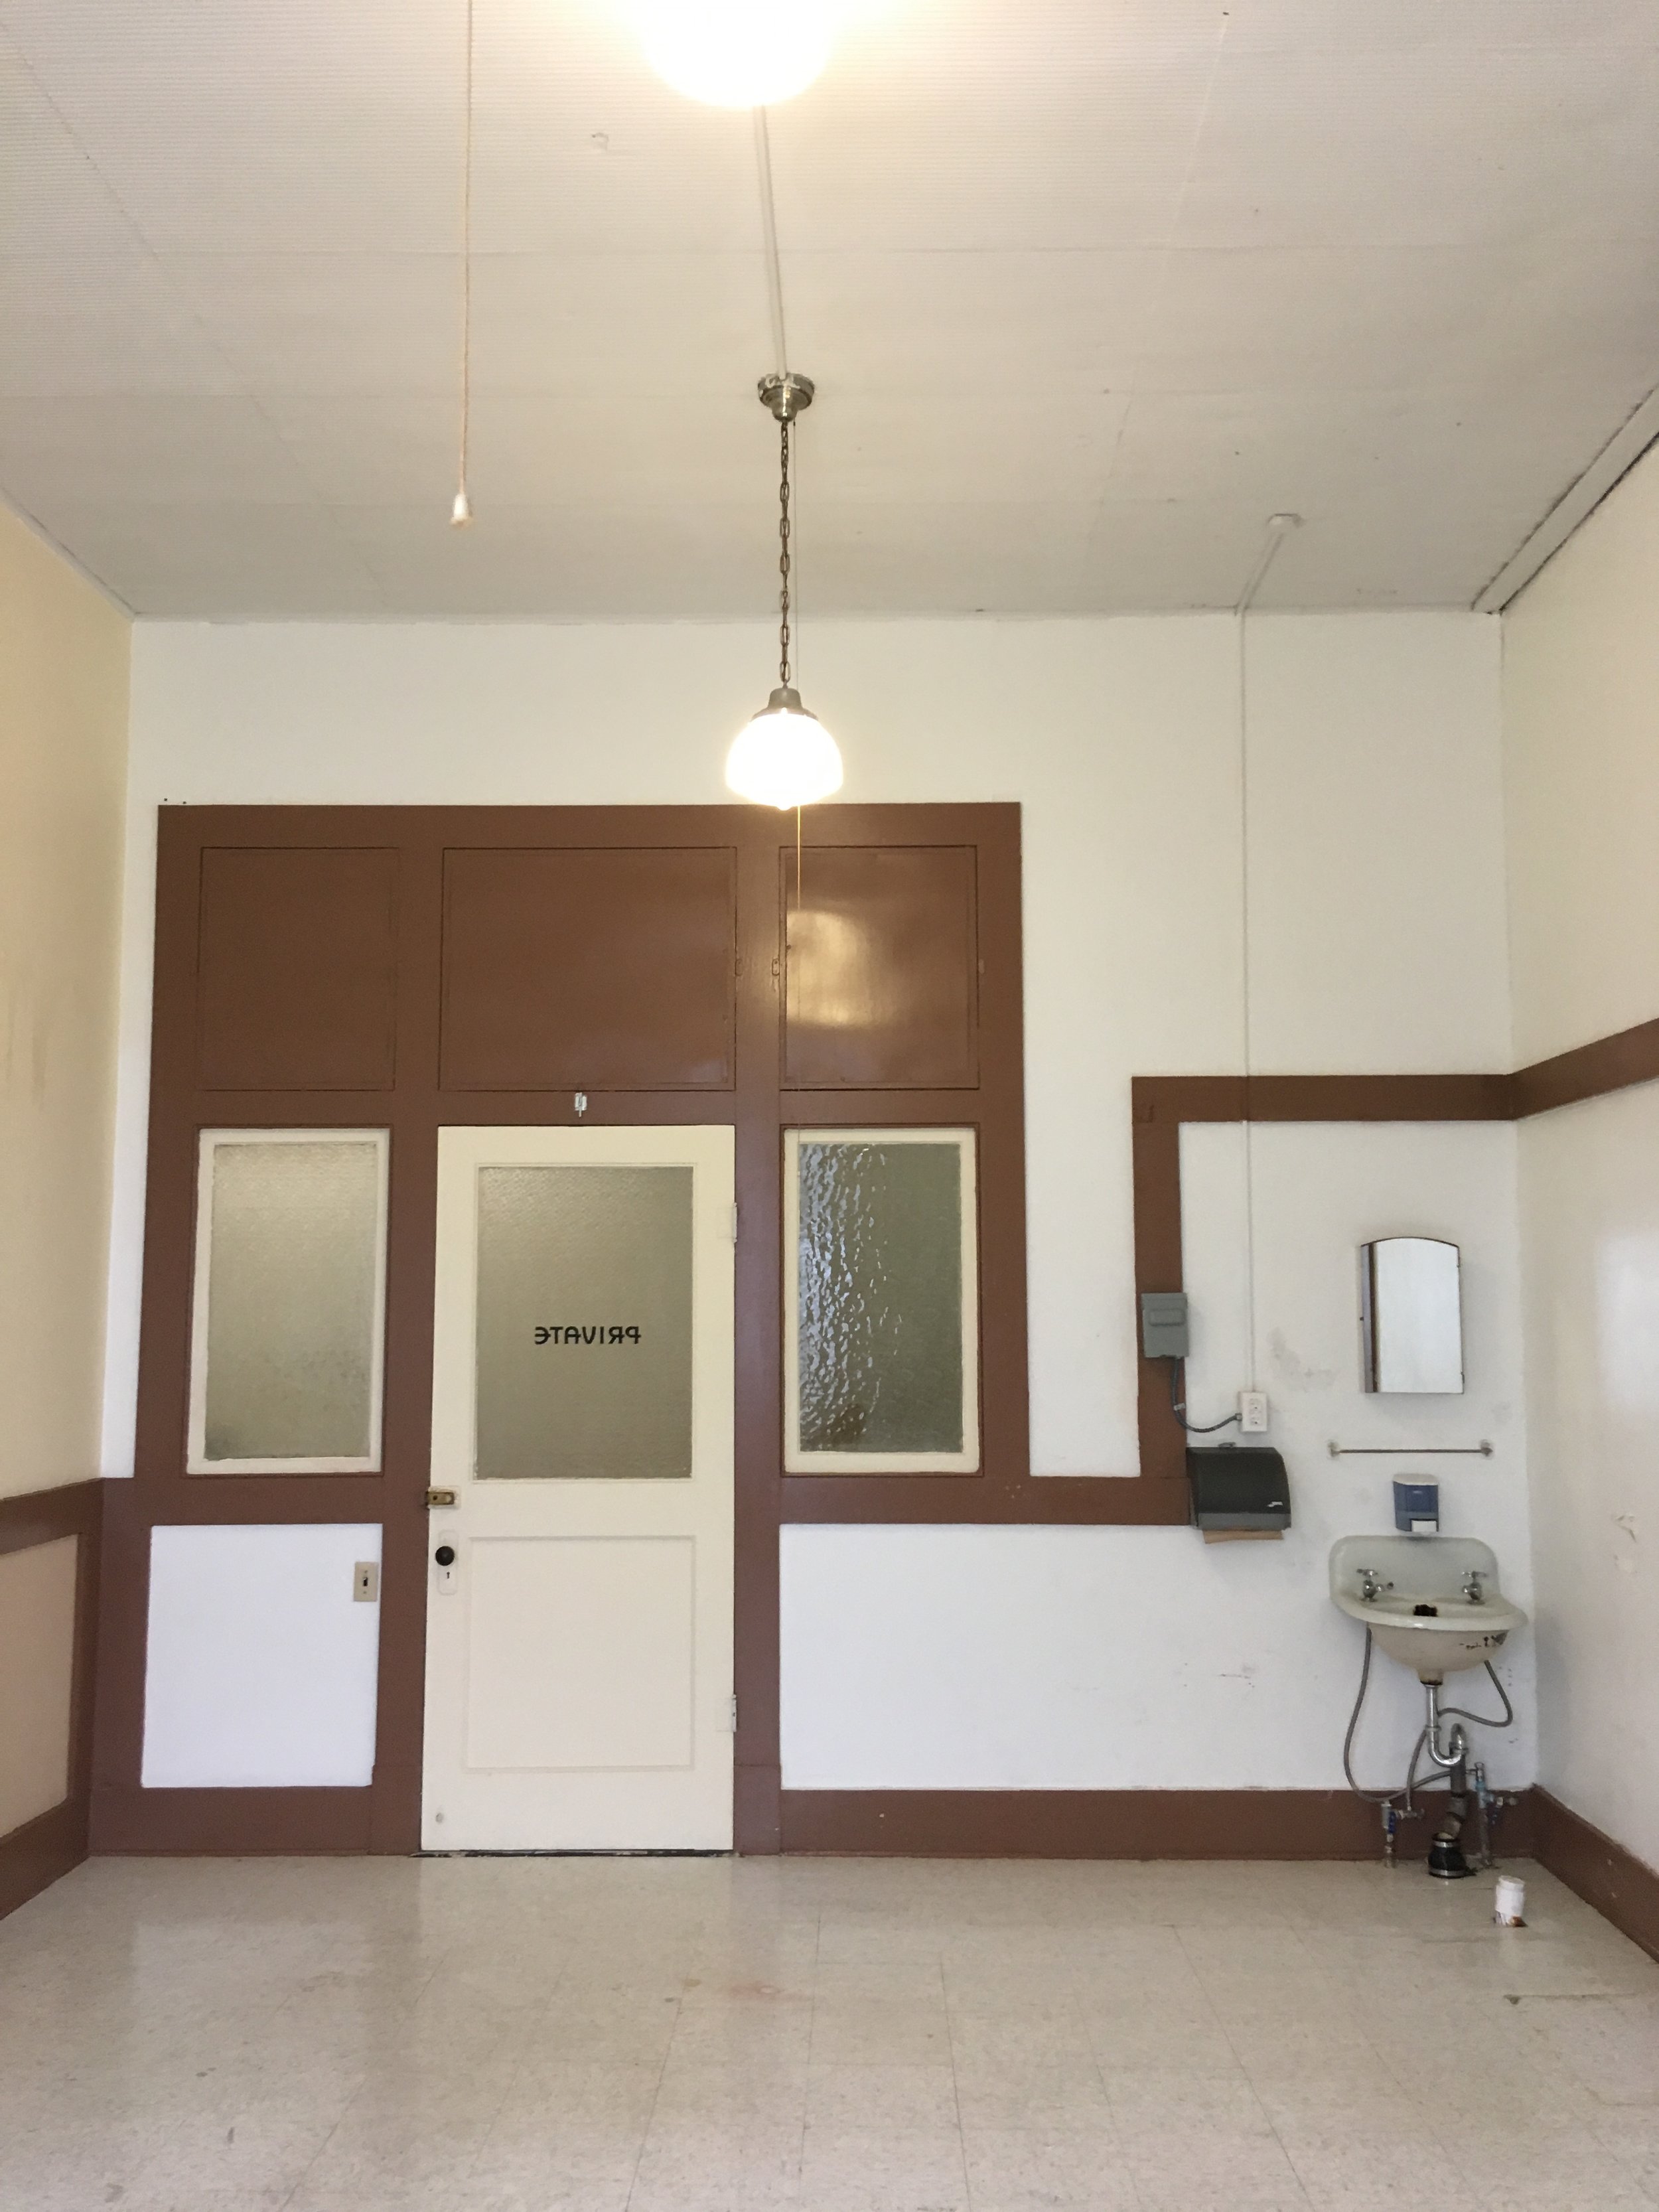
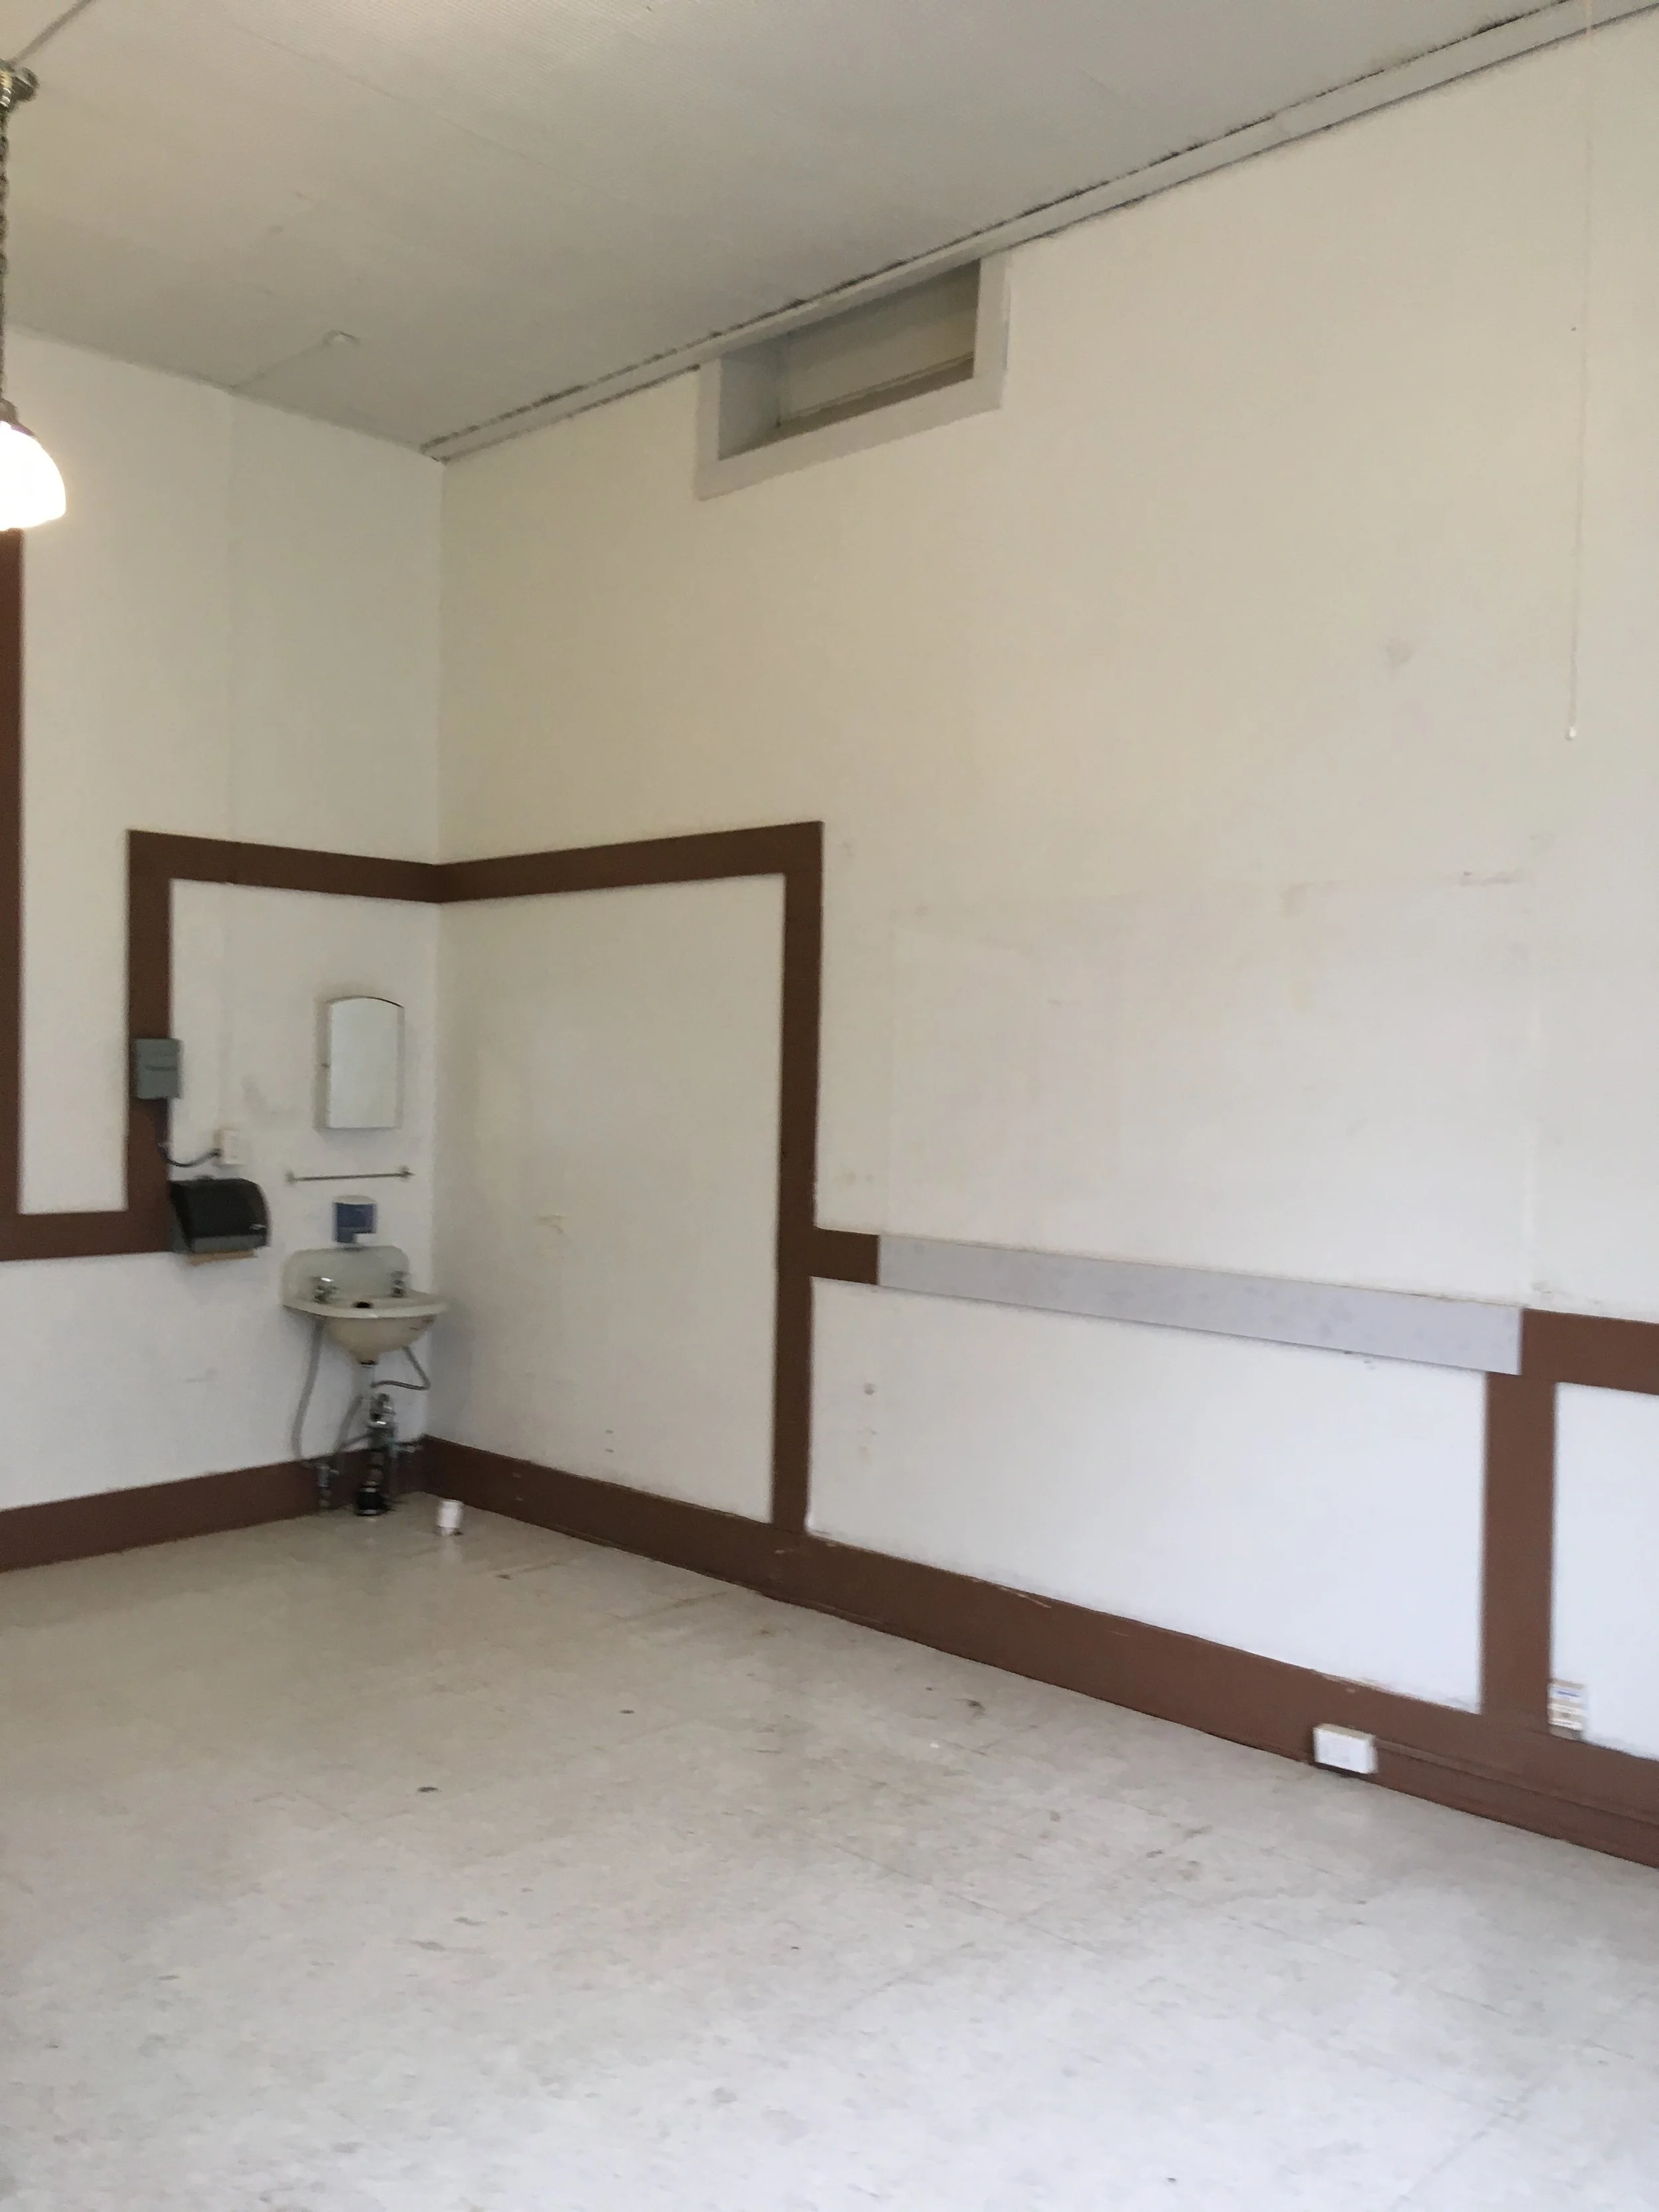
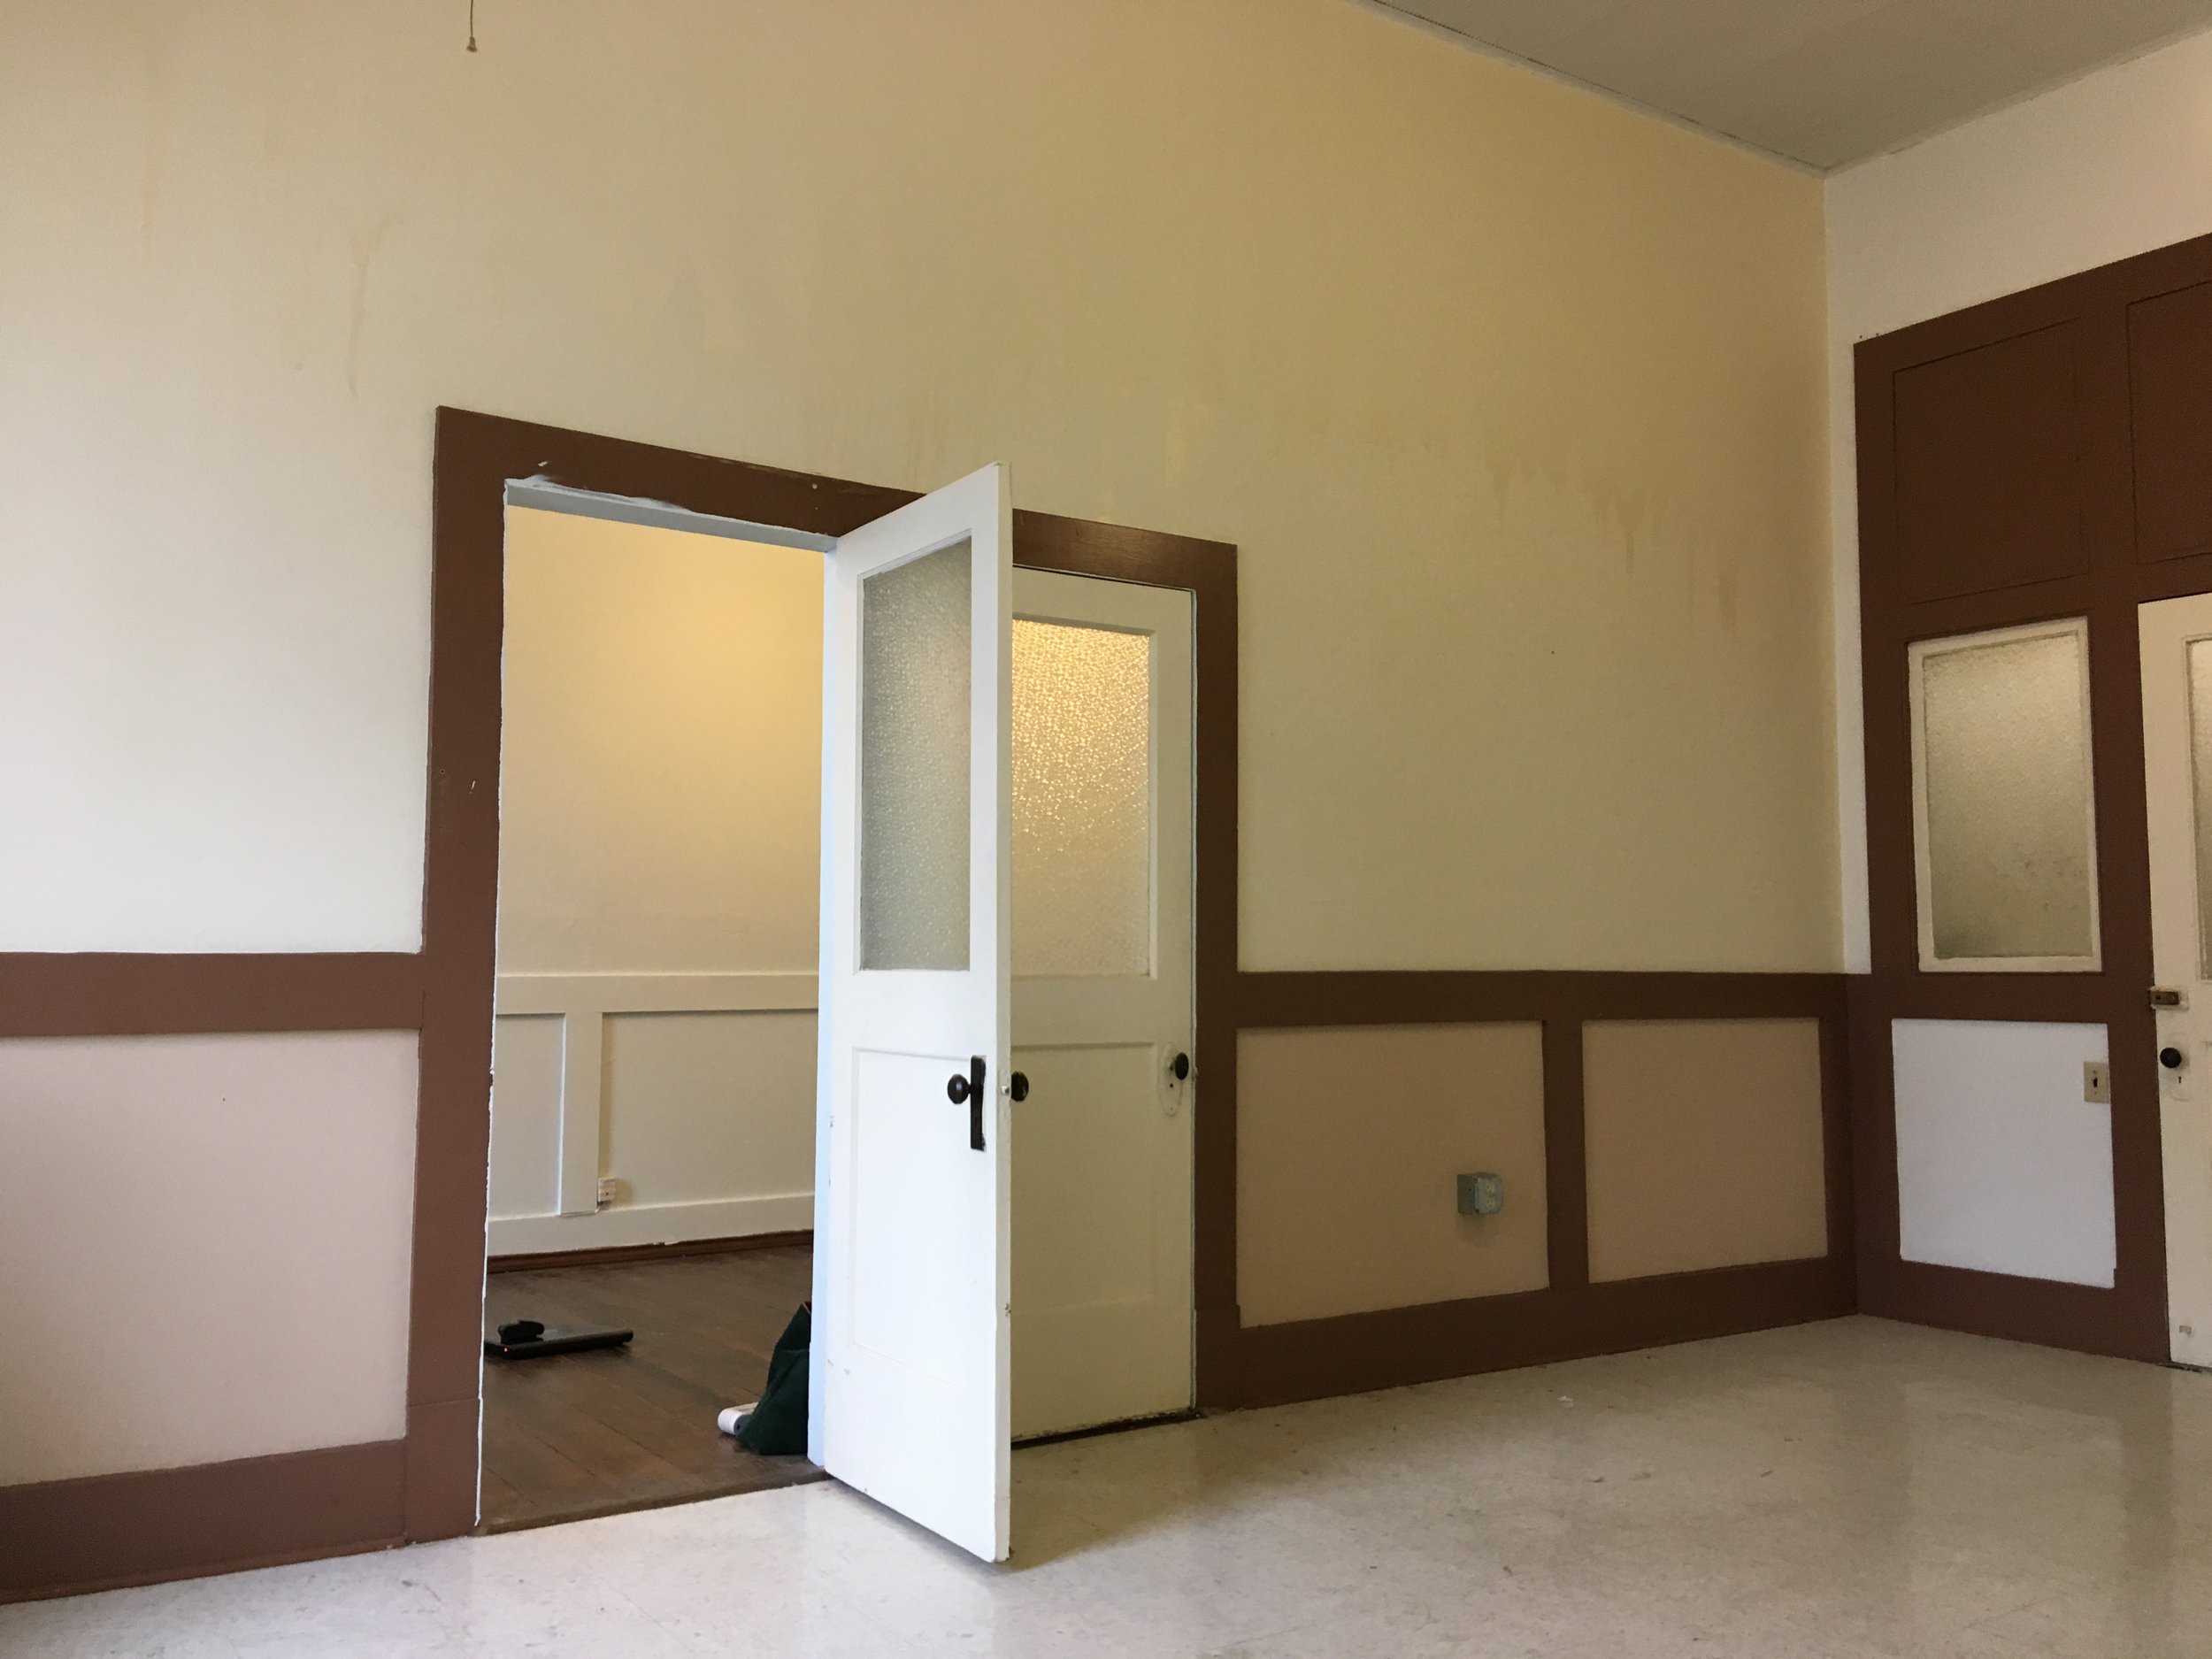
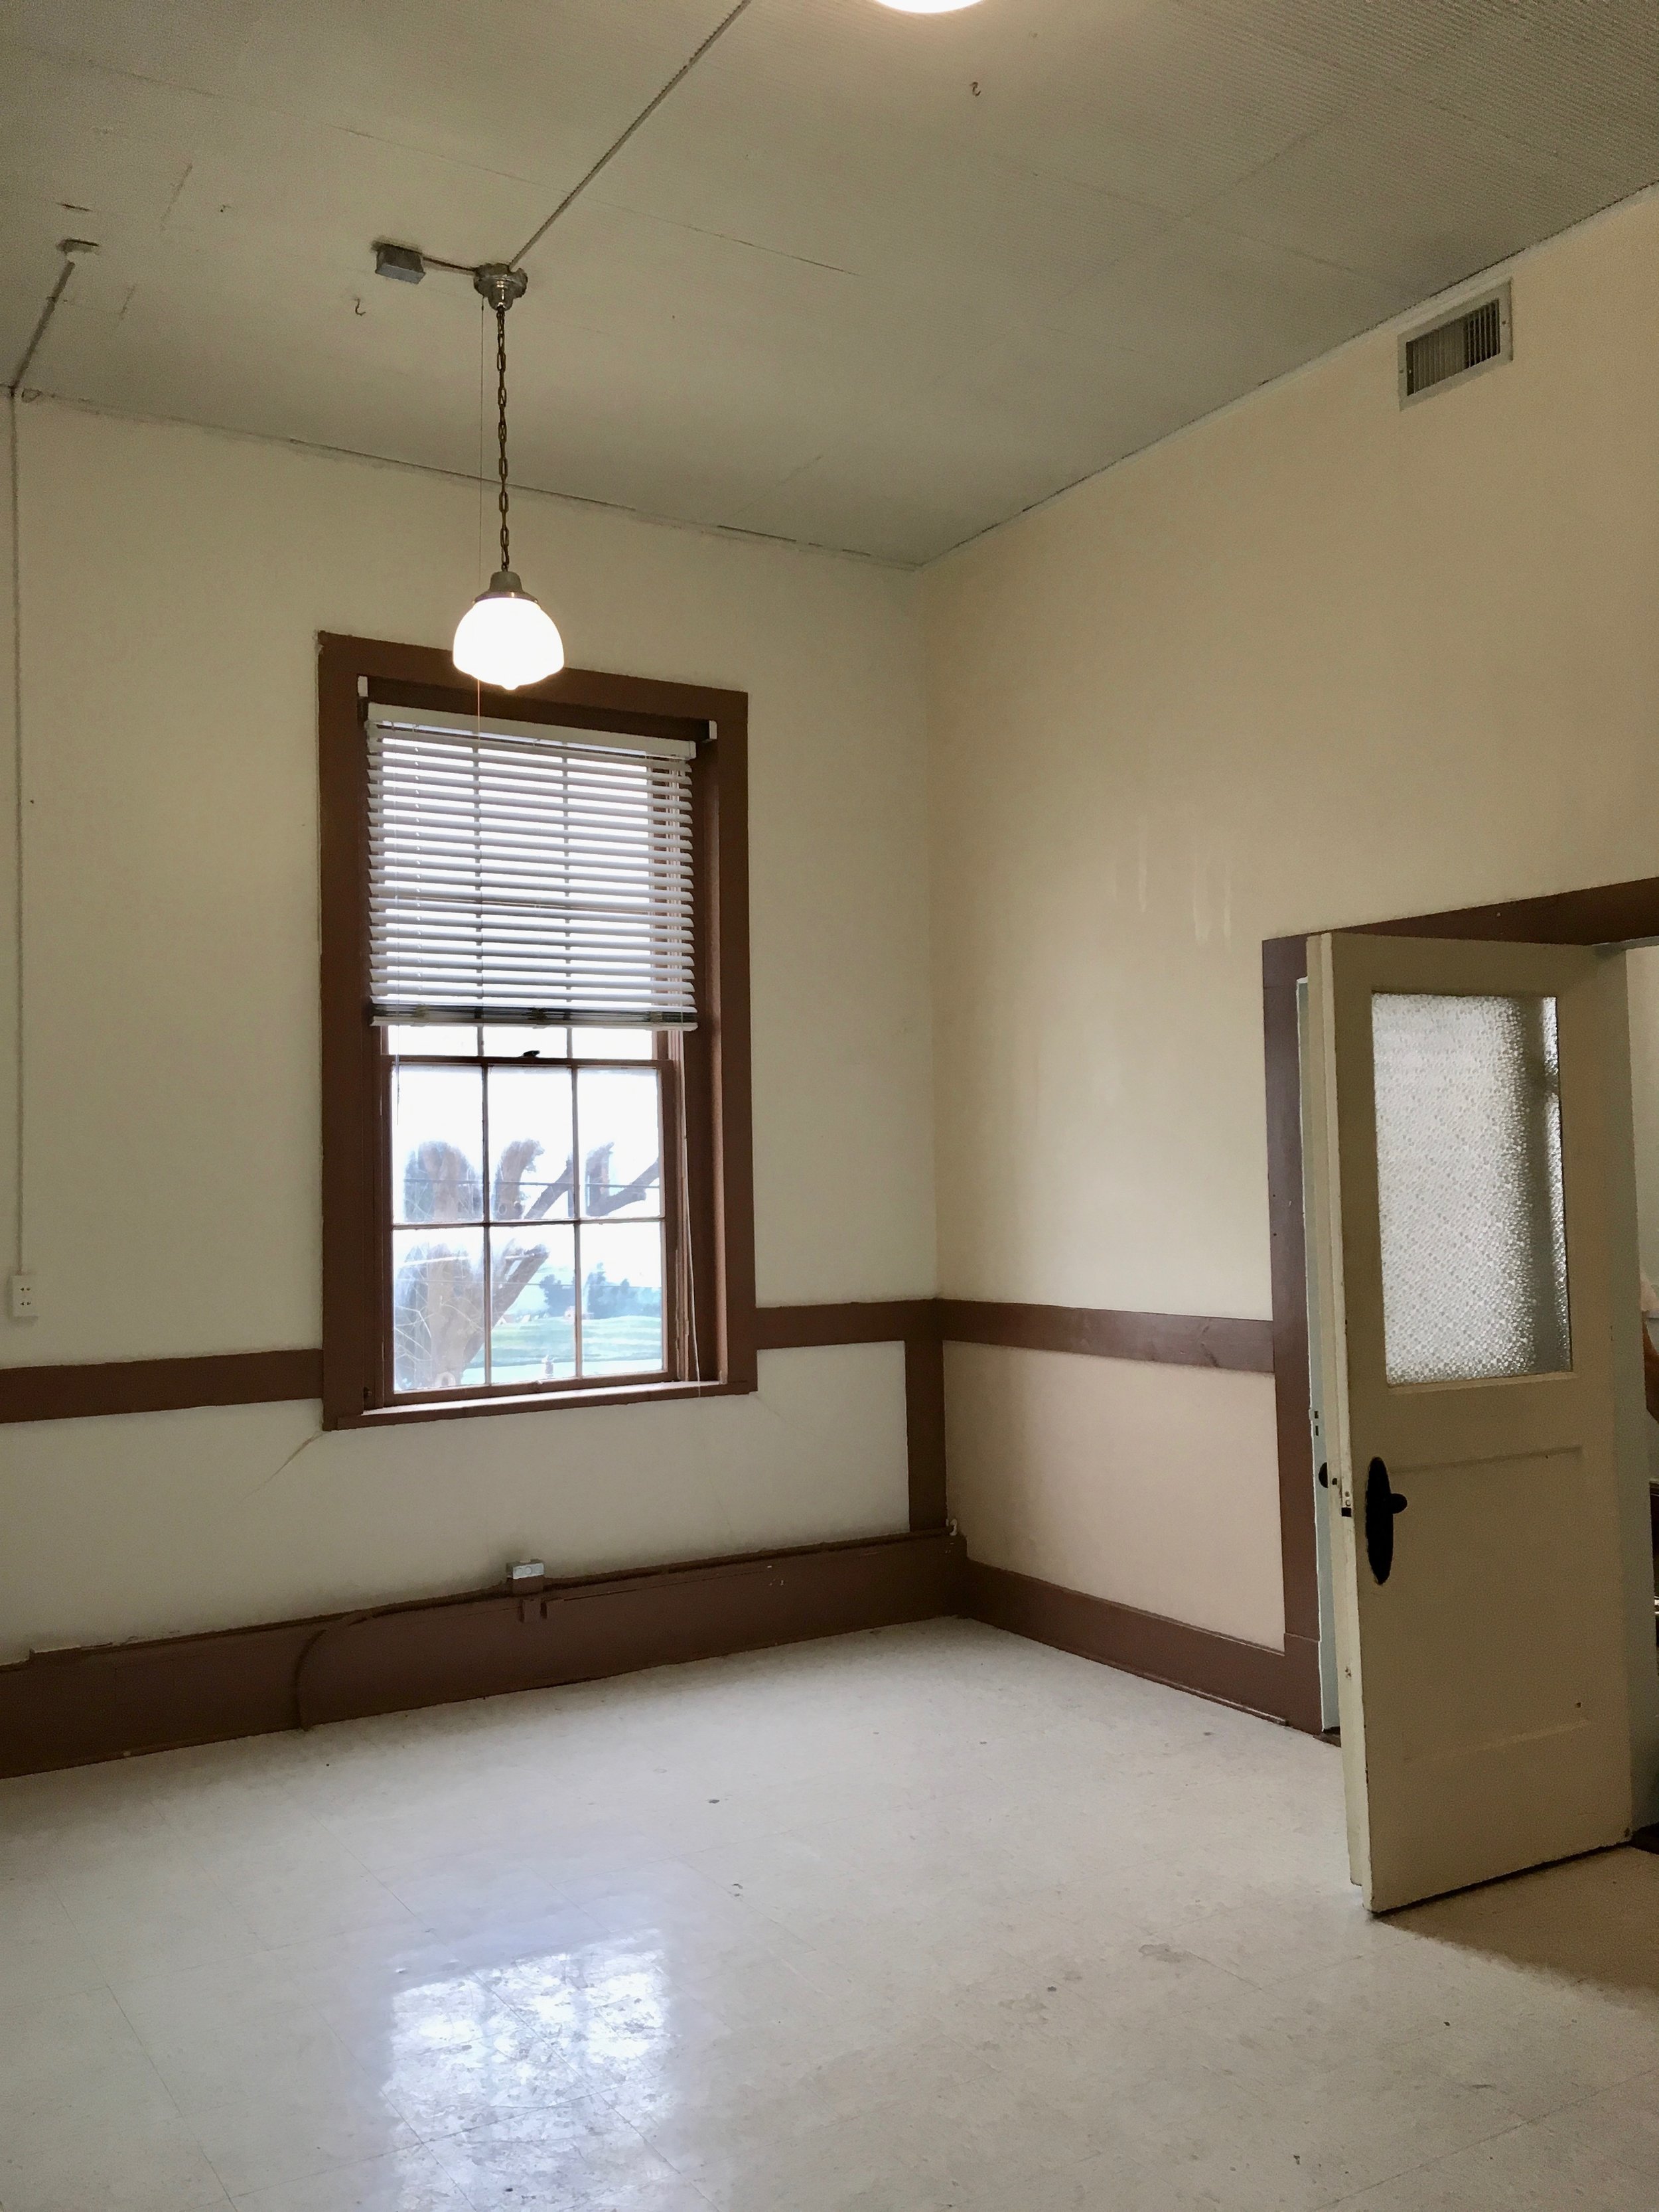
As we addressed the design style of the space, it was made easier by the fact that the brand identity had been completed (as previously mentioned). Cloud CFO is a modern bookkeeping business. We wanted to integrate their modern brand within their space. My initial consultation with Cloud CFO reflected the importance of creating a comfortable lobby area and separate office space. Our client had a vision of conducting business in a less formal environment rather than from behind a desk, as conversations about money can be difficult and vulnerable at times. Besides addressing the brand and how they wanted the space to function, there were obvious modifications to be made. In the space were, the wide board and batten wainscoting (although I think it is a stretch to call it such), the sink, the paint colors, some of the lighting and the extra doors in the space were changes that had to be made to achieve the updated look.
Let’s check out how we made their dreams a reality…

This picture is a wonderful example of how brand identity and interior design work hand in hand. This custom mural renders their brand within their new space.

View of the lobby. Comfortable and inviting for clients.

In New Braunfels, TX we say Prost!

I love how this space came together in a clean, minimal, and functional way.

View of the lobby space from the office. You are looking at Matt’s custom desk that we will discuss in greater detail on a future blog post!

Matt and Donna, owners of Cloud CFO.

Nothing better than natural light in your workspace. This is not your average bookkeeper.

Hooray Matt and Donna love the new space!
This project was so much fun. I love having the opportunity to work with people who love what they do and want that reflected in their design. This also gave me the opportunity to work with my talented husband. We love the chance to work together and create a total package for a business. Your brand is your identity and interior design connects the two in a cohesive and impactful way. If I haven’t said it before I’ll say it now…I love commercial design!
Stay True and Prost!
Allyson

An Interesting Dining Room
Let’s talk home improvements! When Austin and I moved back to New Braunfels, we had a very hard time letting go of Colorado, so we decided to hang on to a piece of it by keeping our house in Colorado Springs. We rent it out on a short term basis, which means we left it fully furnished. After buying our home in New Braunfels, a 1960’s ranch style house in need of a complete remodel, we realized we would need to be very careful with our funds. We needed to first off, furnish it and secondly, remodel just about every square inch. With our time and money resources limited, we decided to tackle a few projects every year. Today we are going to talk about one of these early projects.
Our Texas home is, well, “interesting”. That’s been the consensus when we’ve had guests over. As I mentioned earlier, it was built in the 1960s and was probably renovated in the 90s. Imagine lots of wallpaper, popcorn ceilings and heavily textured walls. It has also been added onto as much as four times, with some additions being better than others. One of these additions is what is now our dining room and the topic of today’s blog!
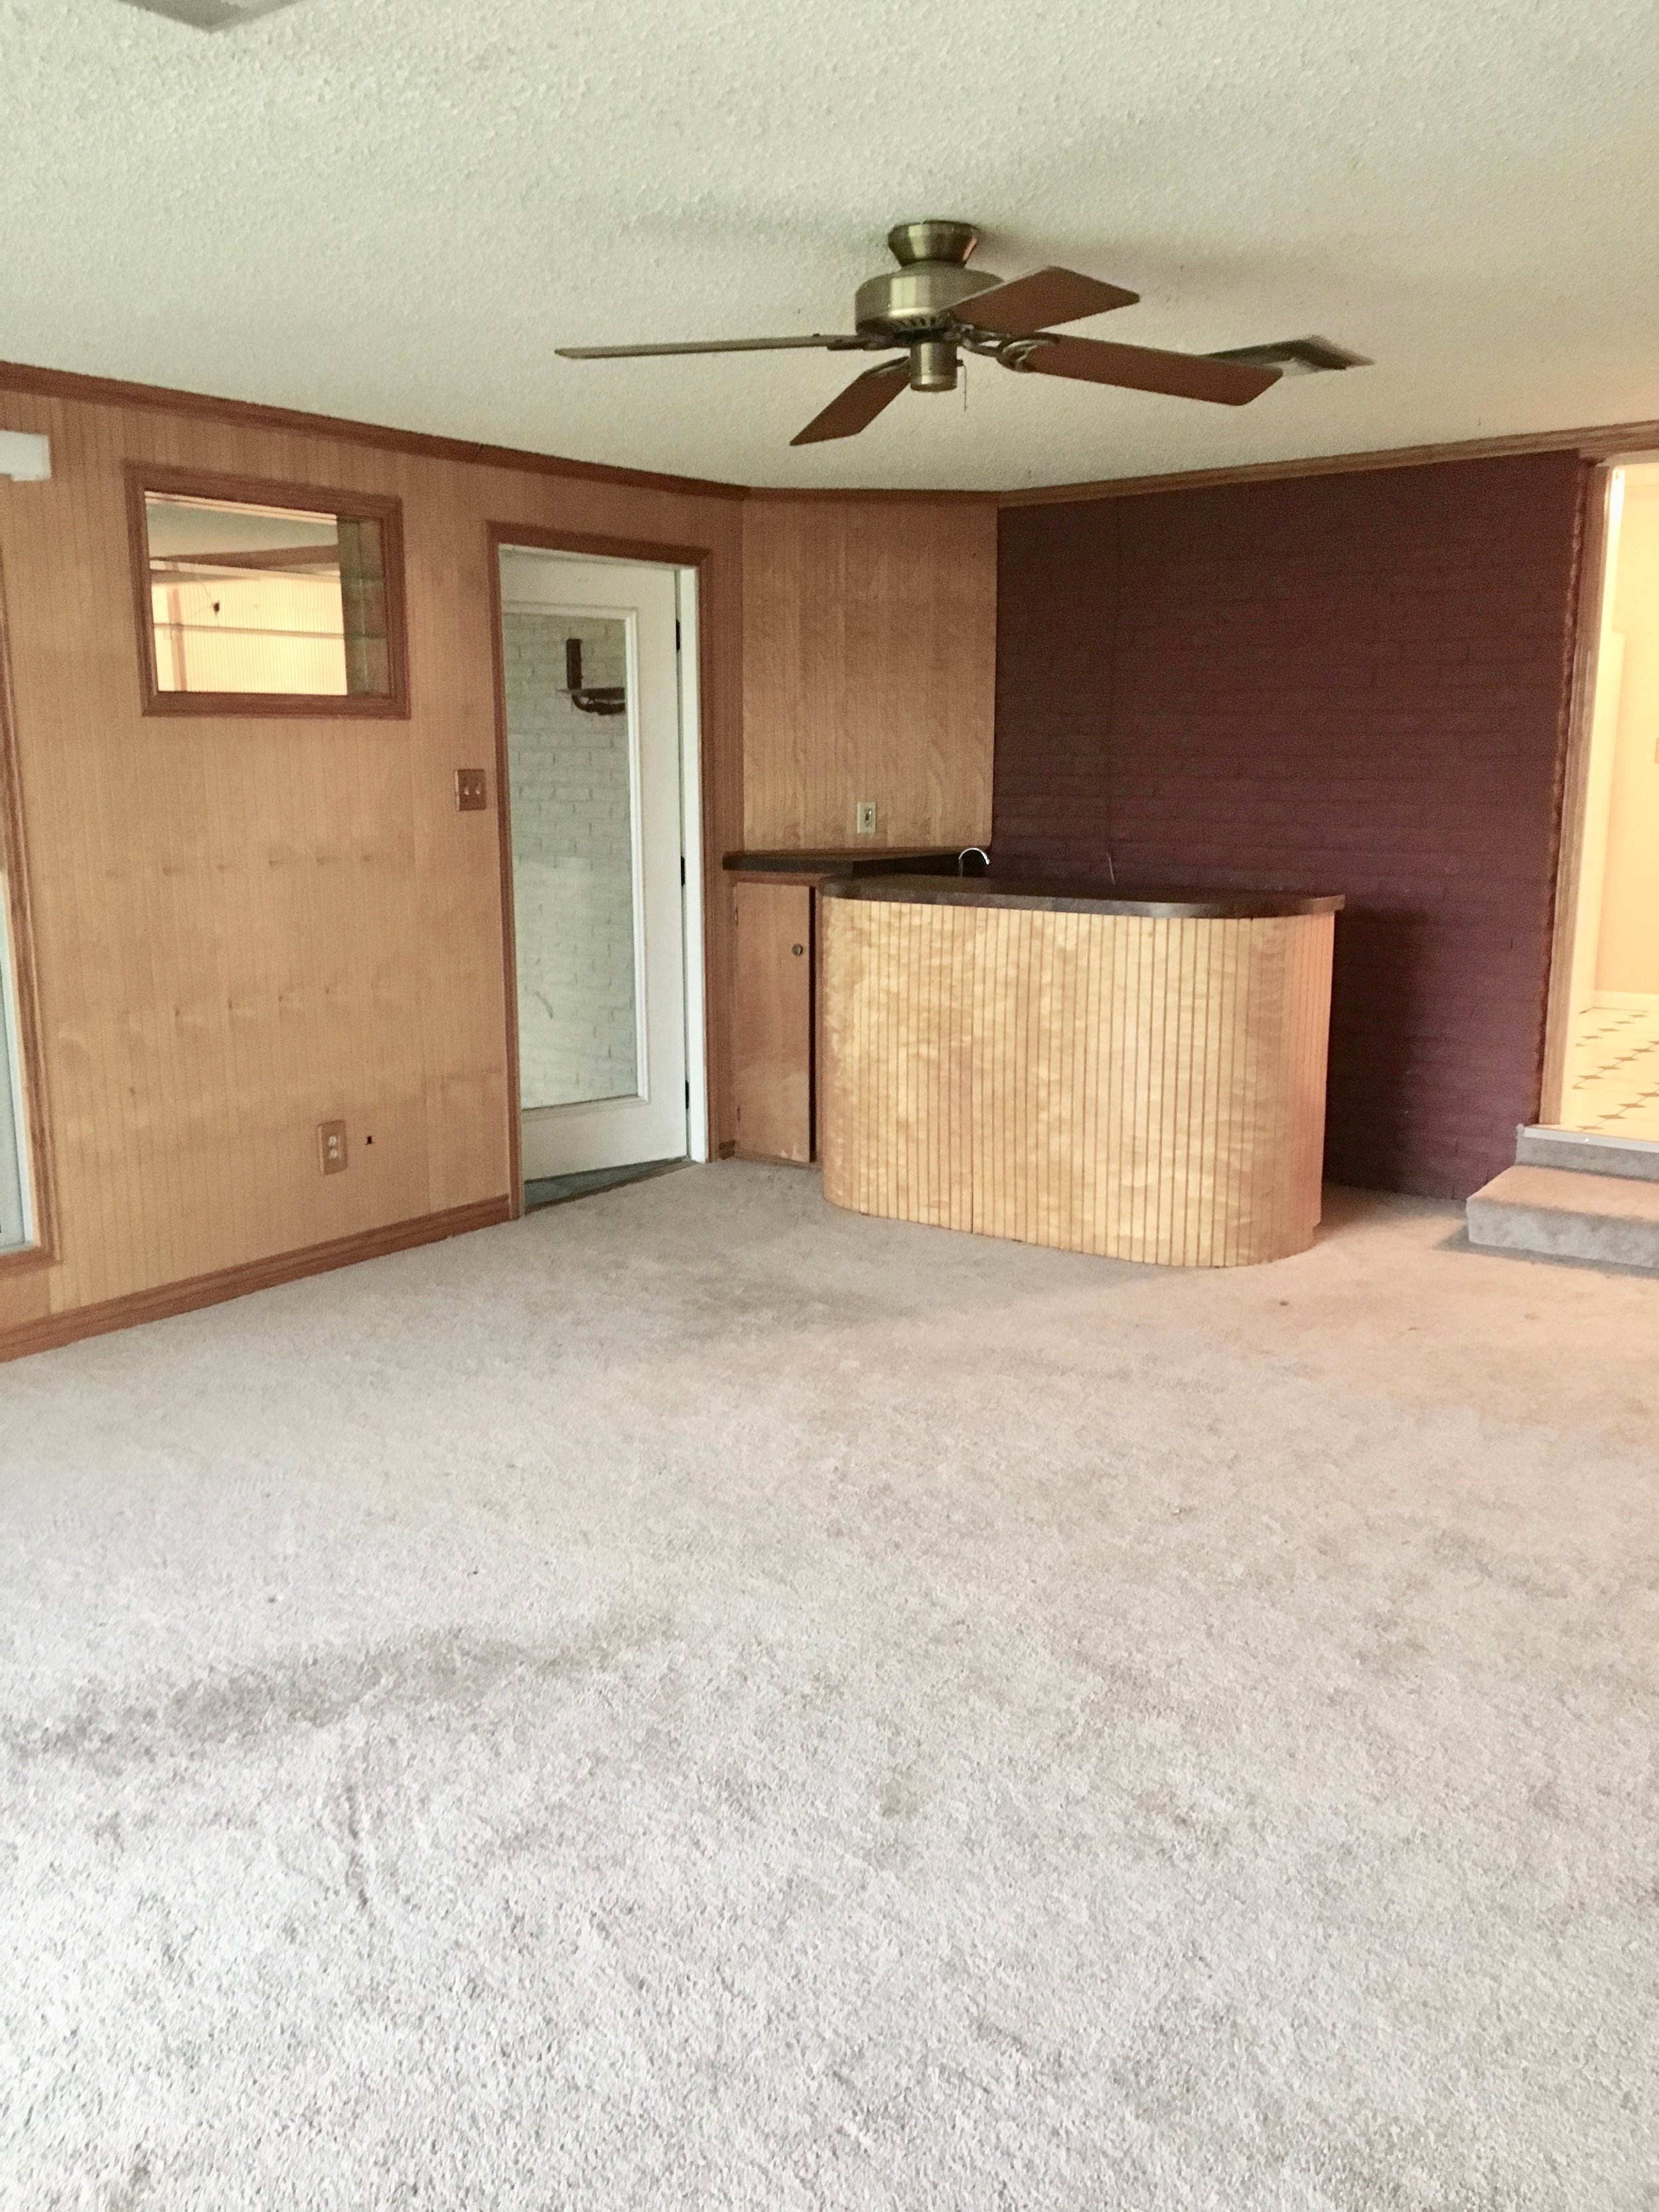
Our dining room was likely a….[fill in the blank here], maybe a living room, a bar, a game room, a swingers cocktail room??? Your guess is as good as mine. The gas fireplace was awkwardly placed and the wet bar was just, well, bad. Take a look at the early pictures from when we bought this little gem.
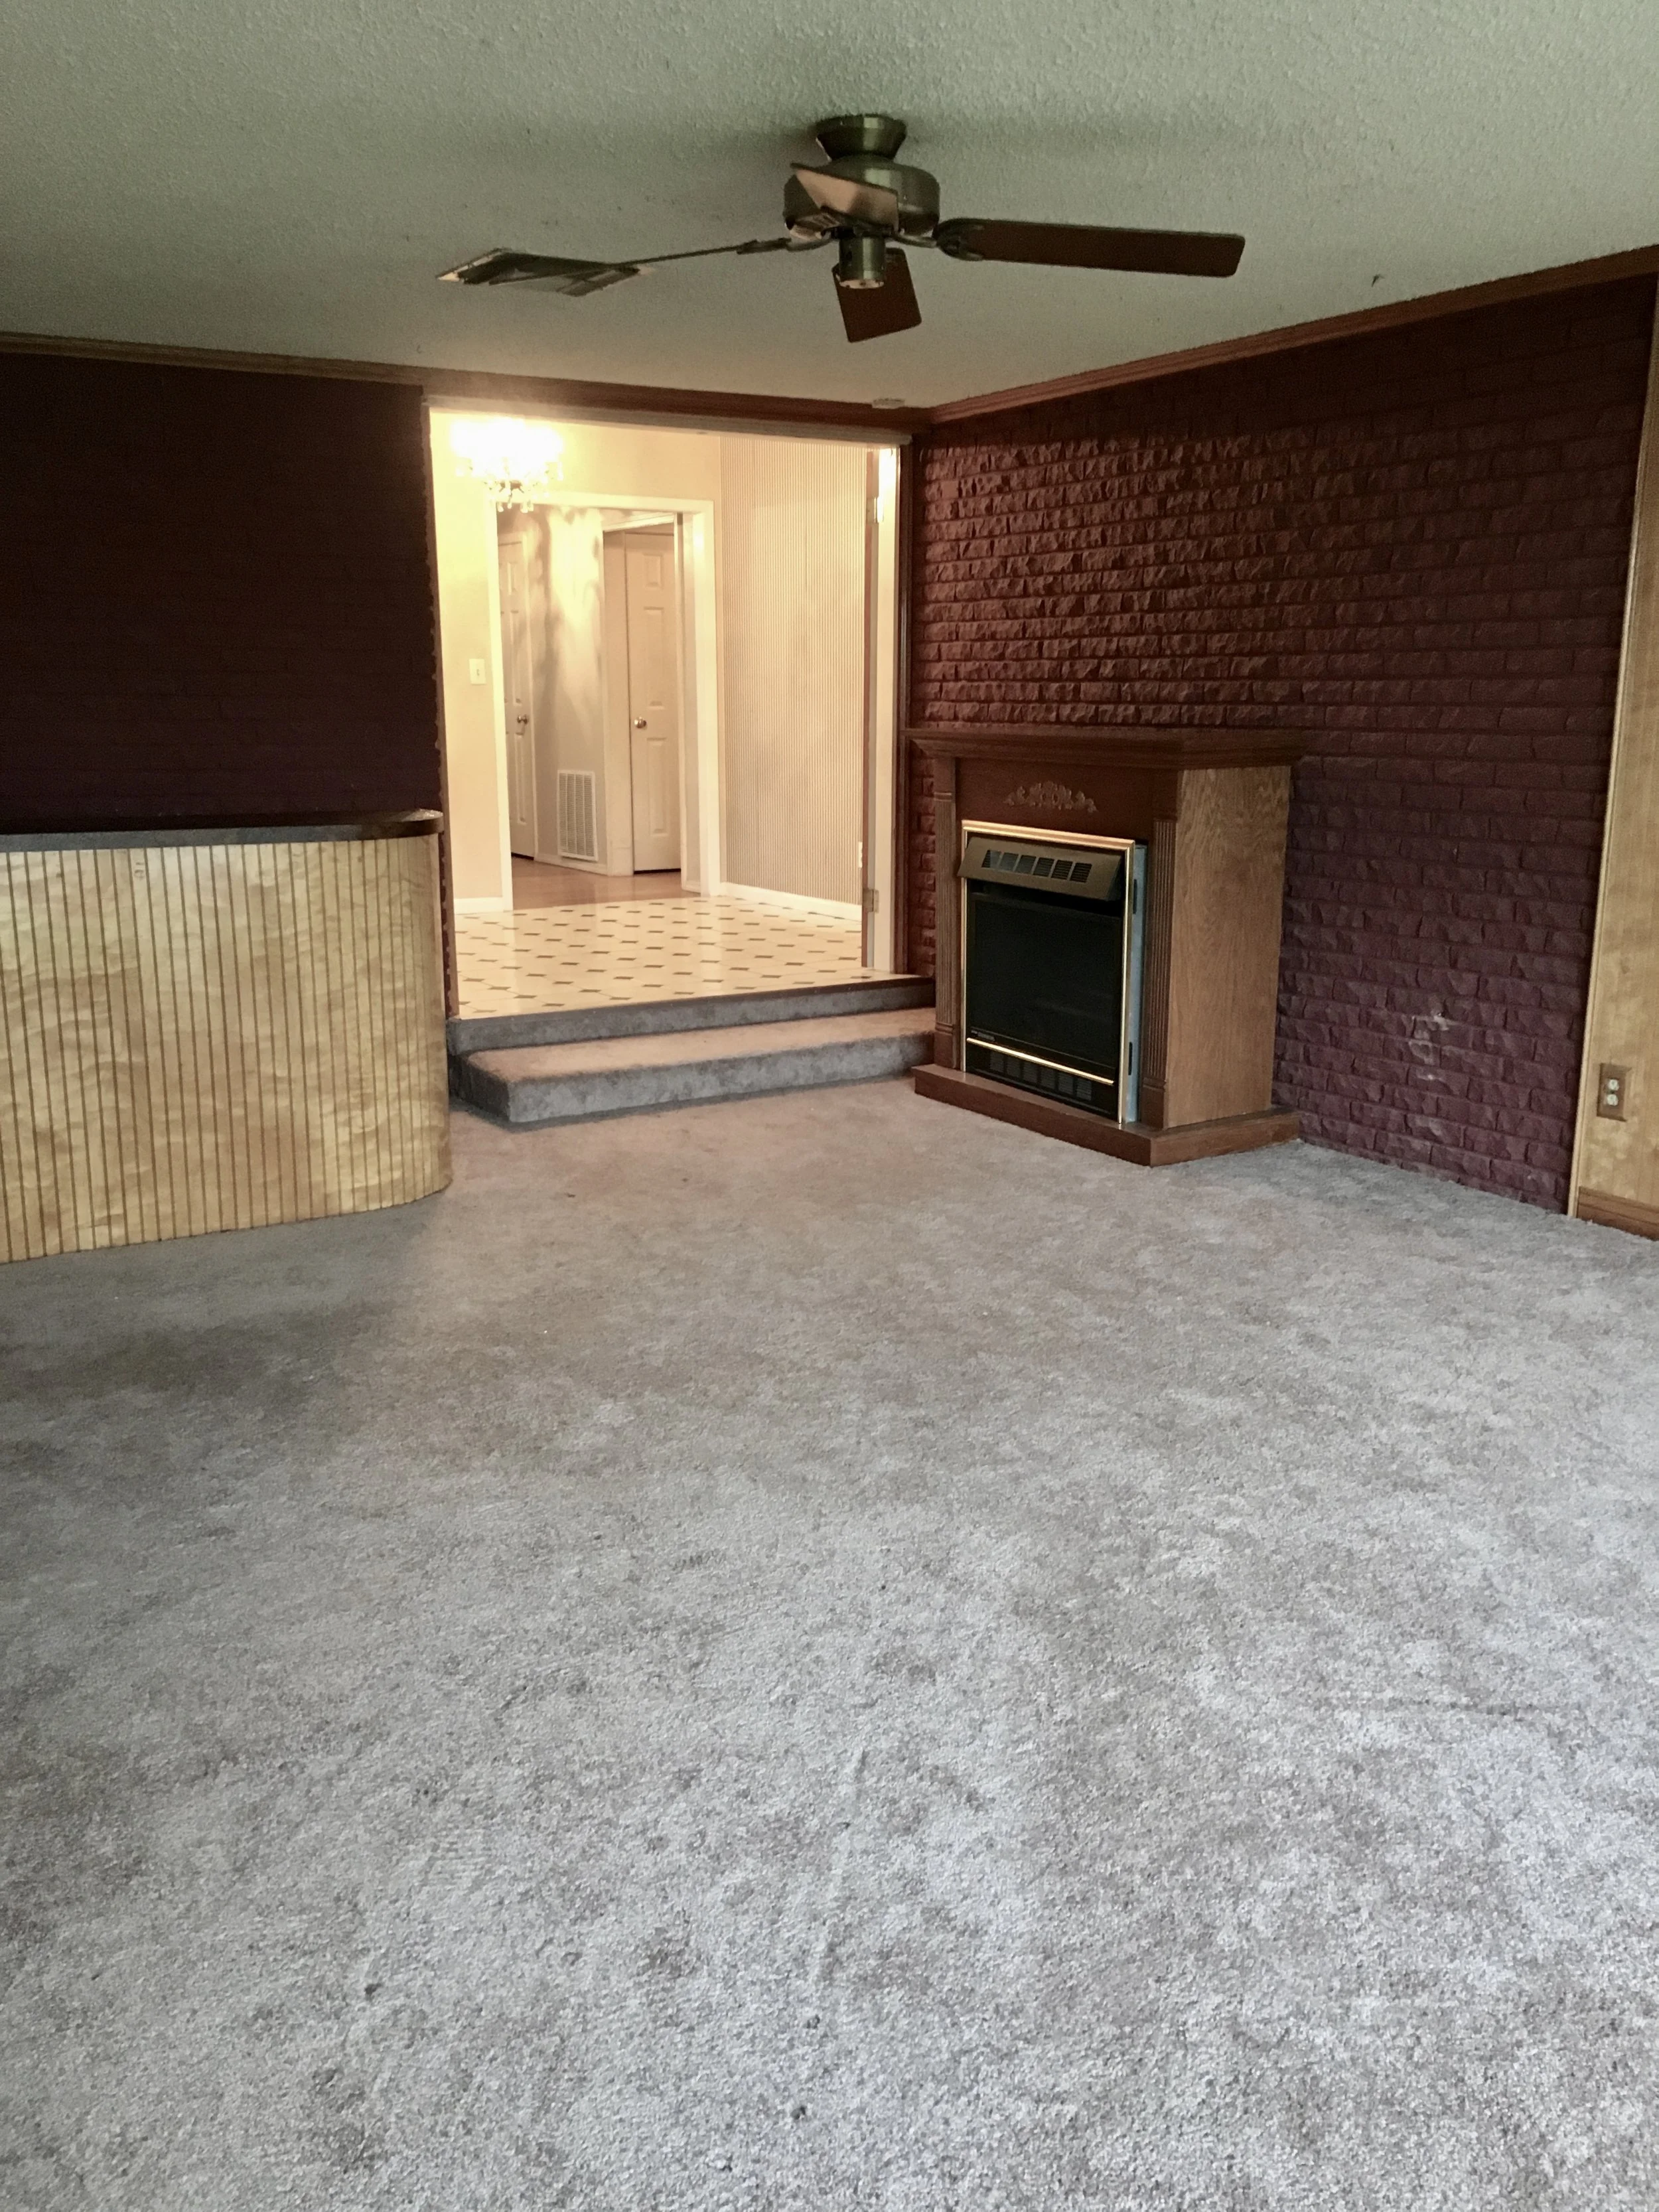
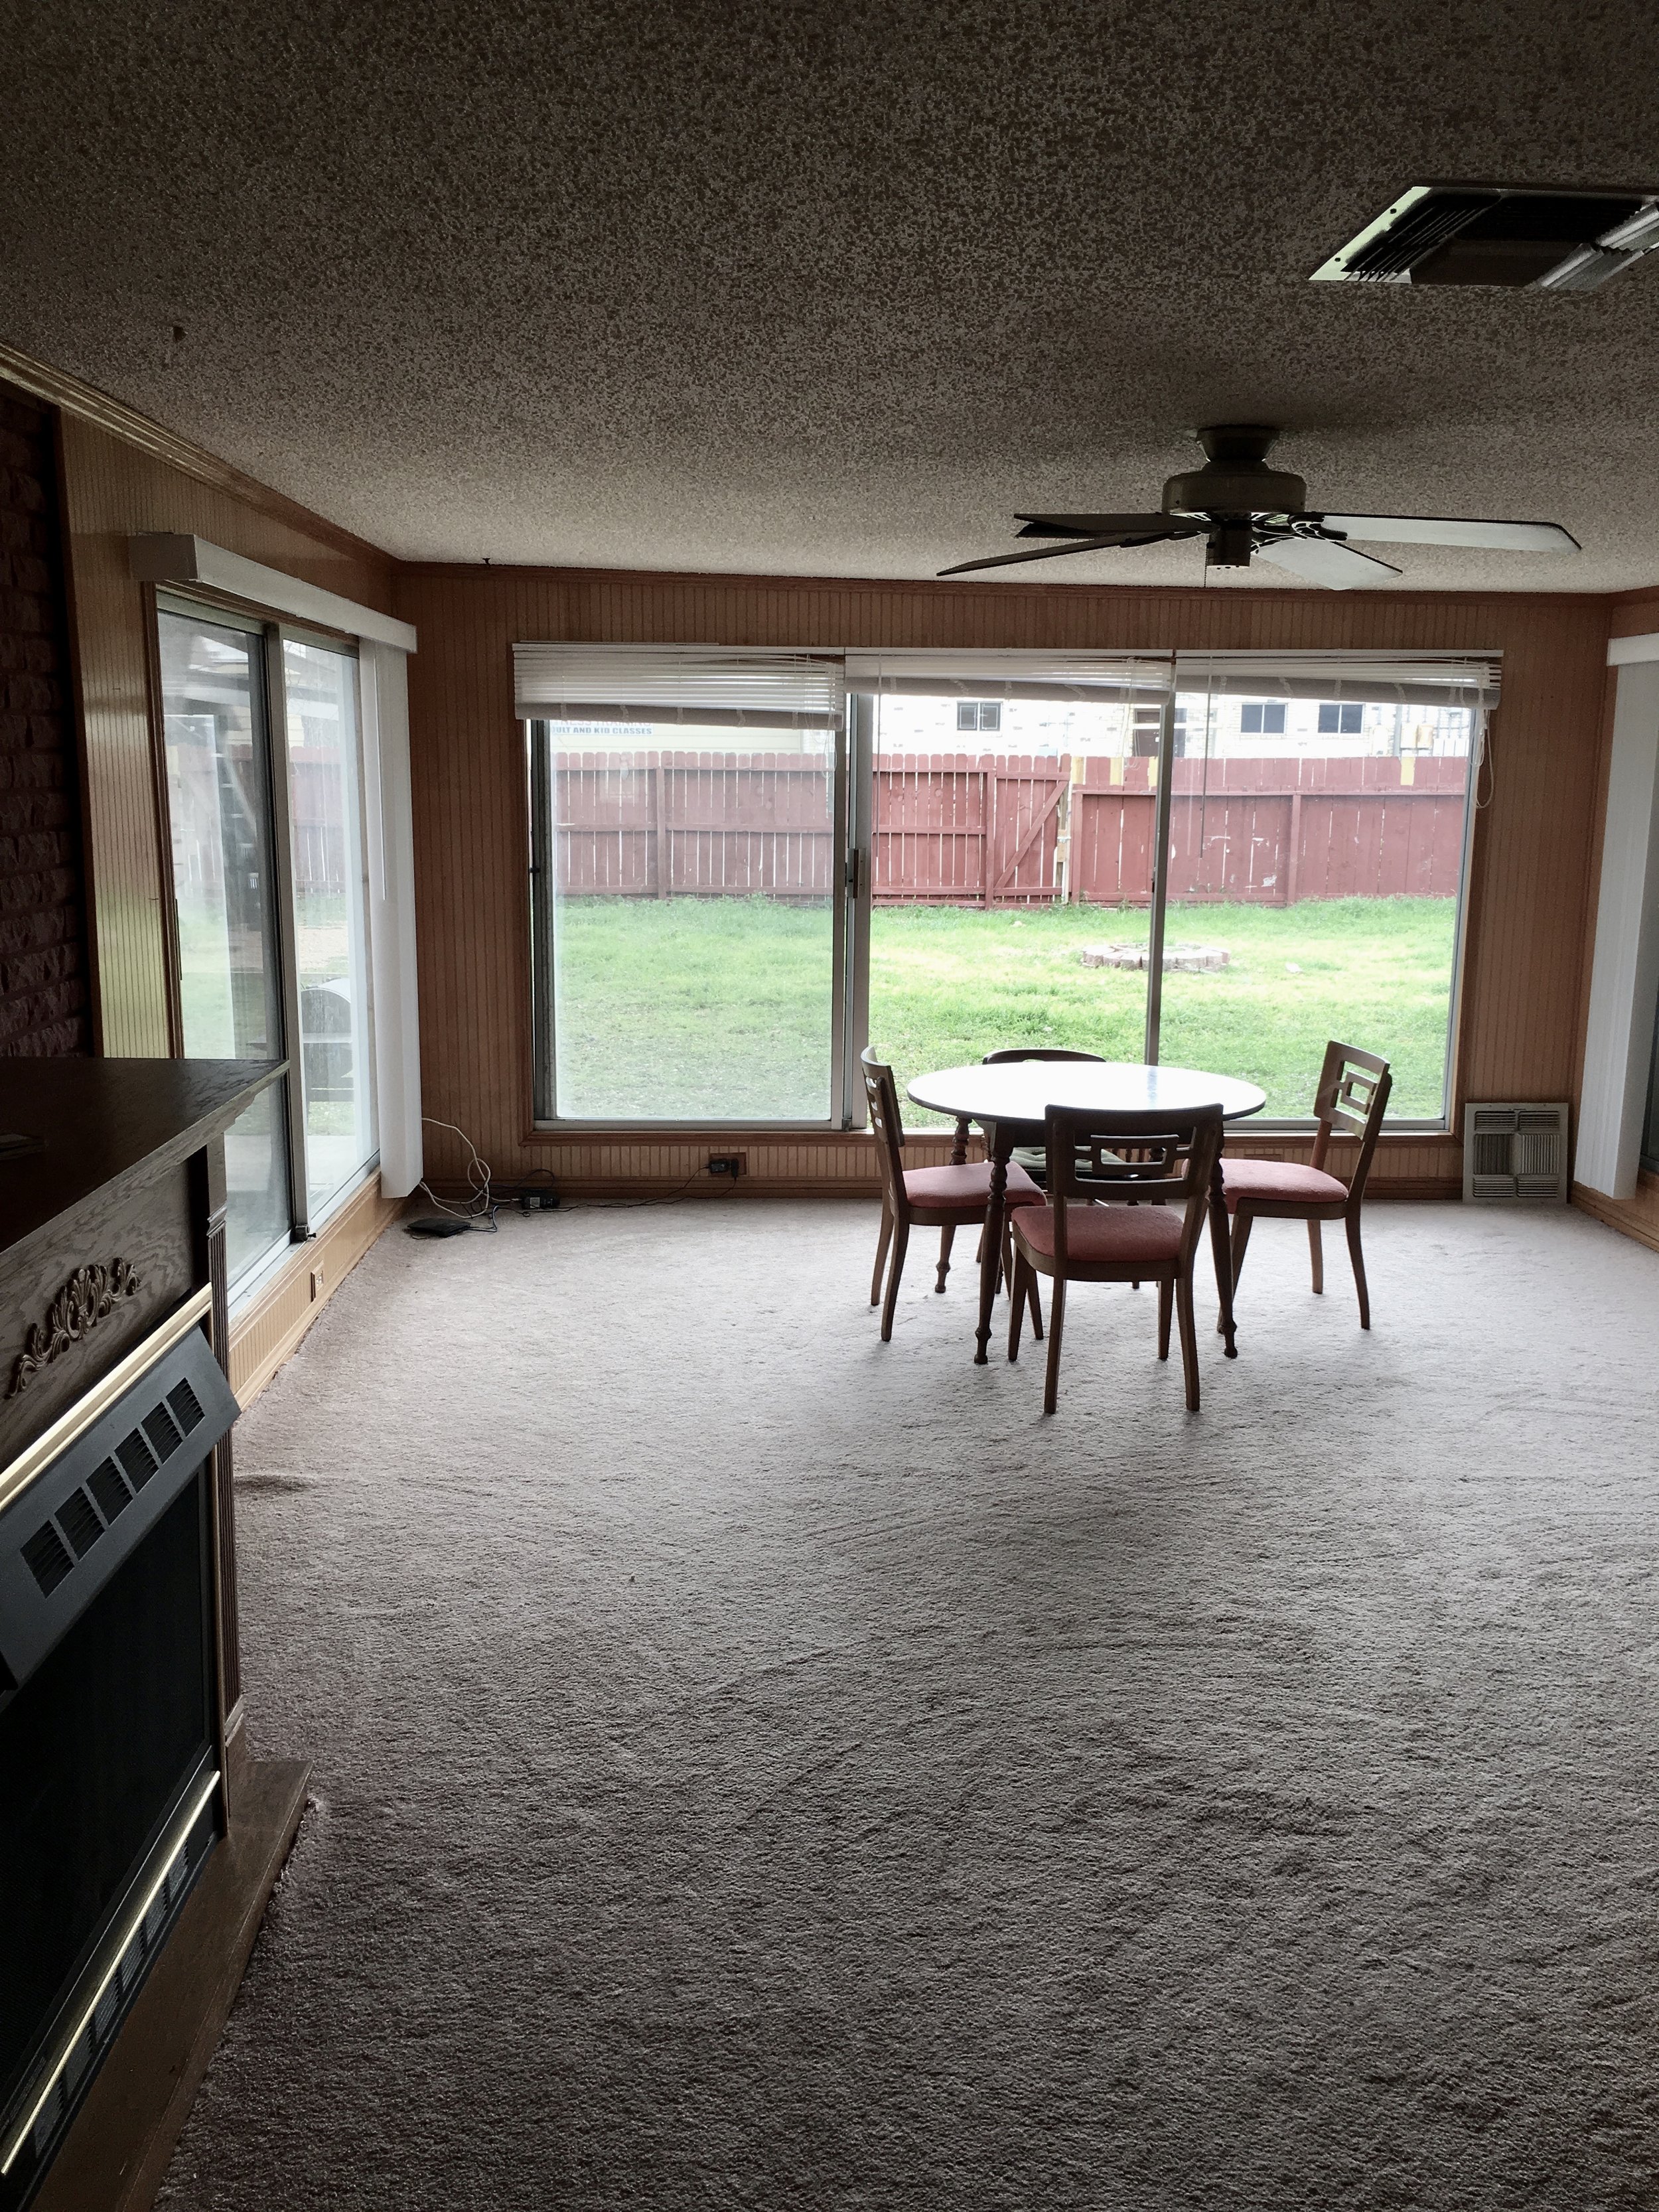
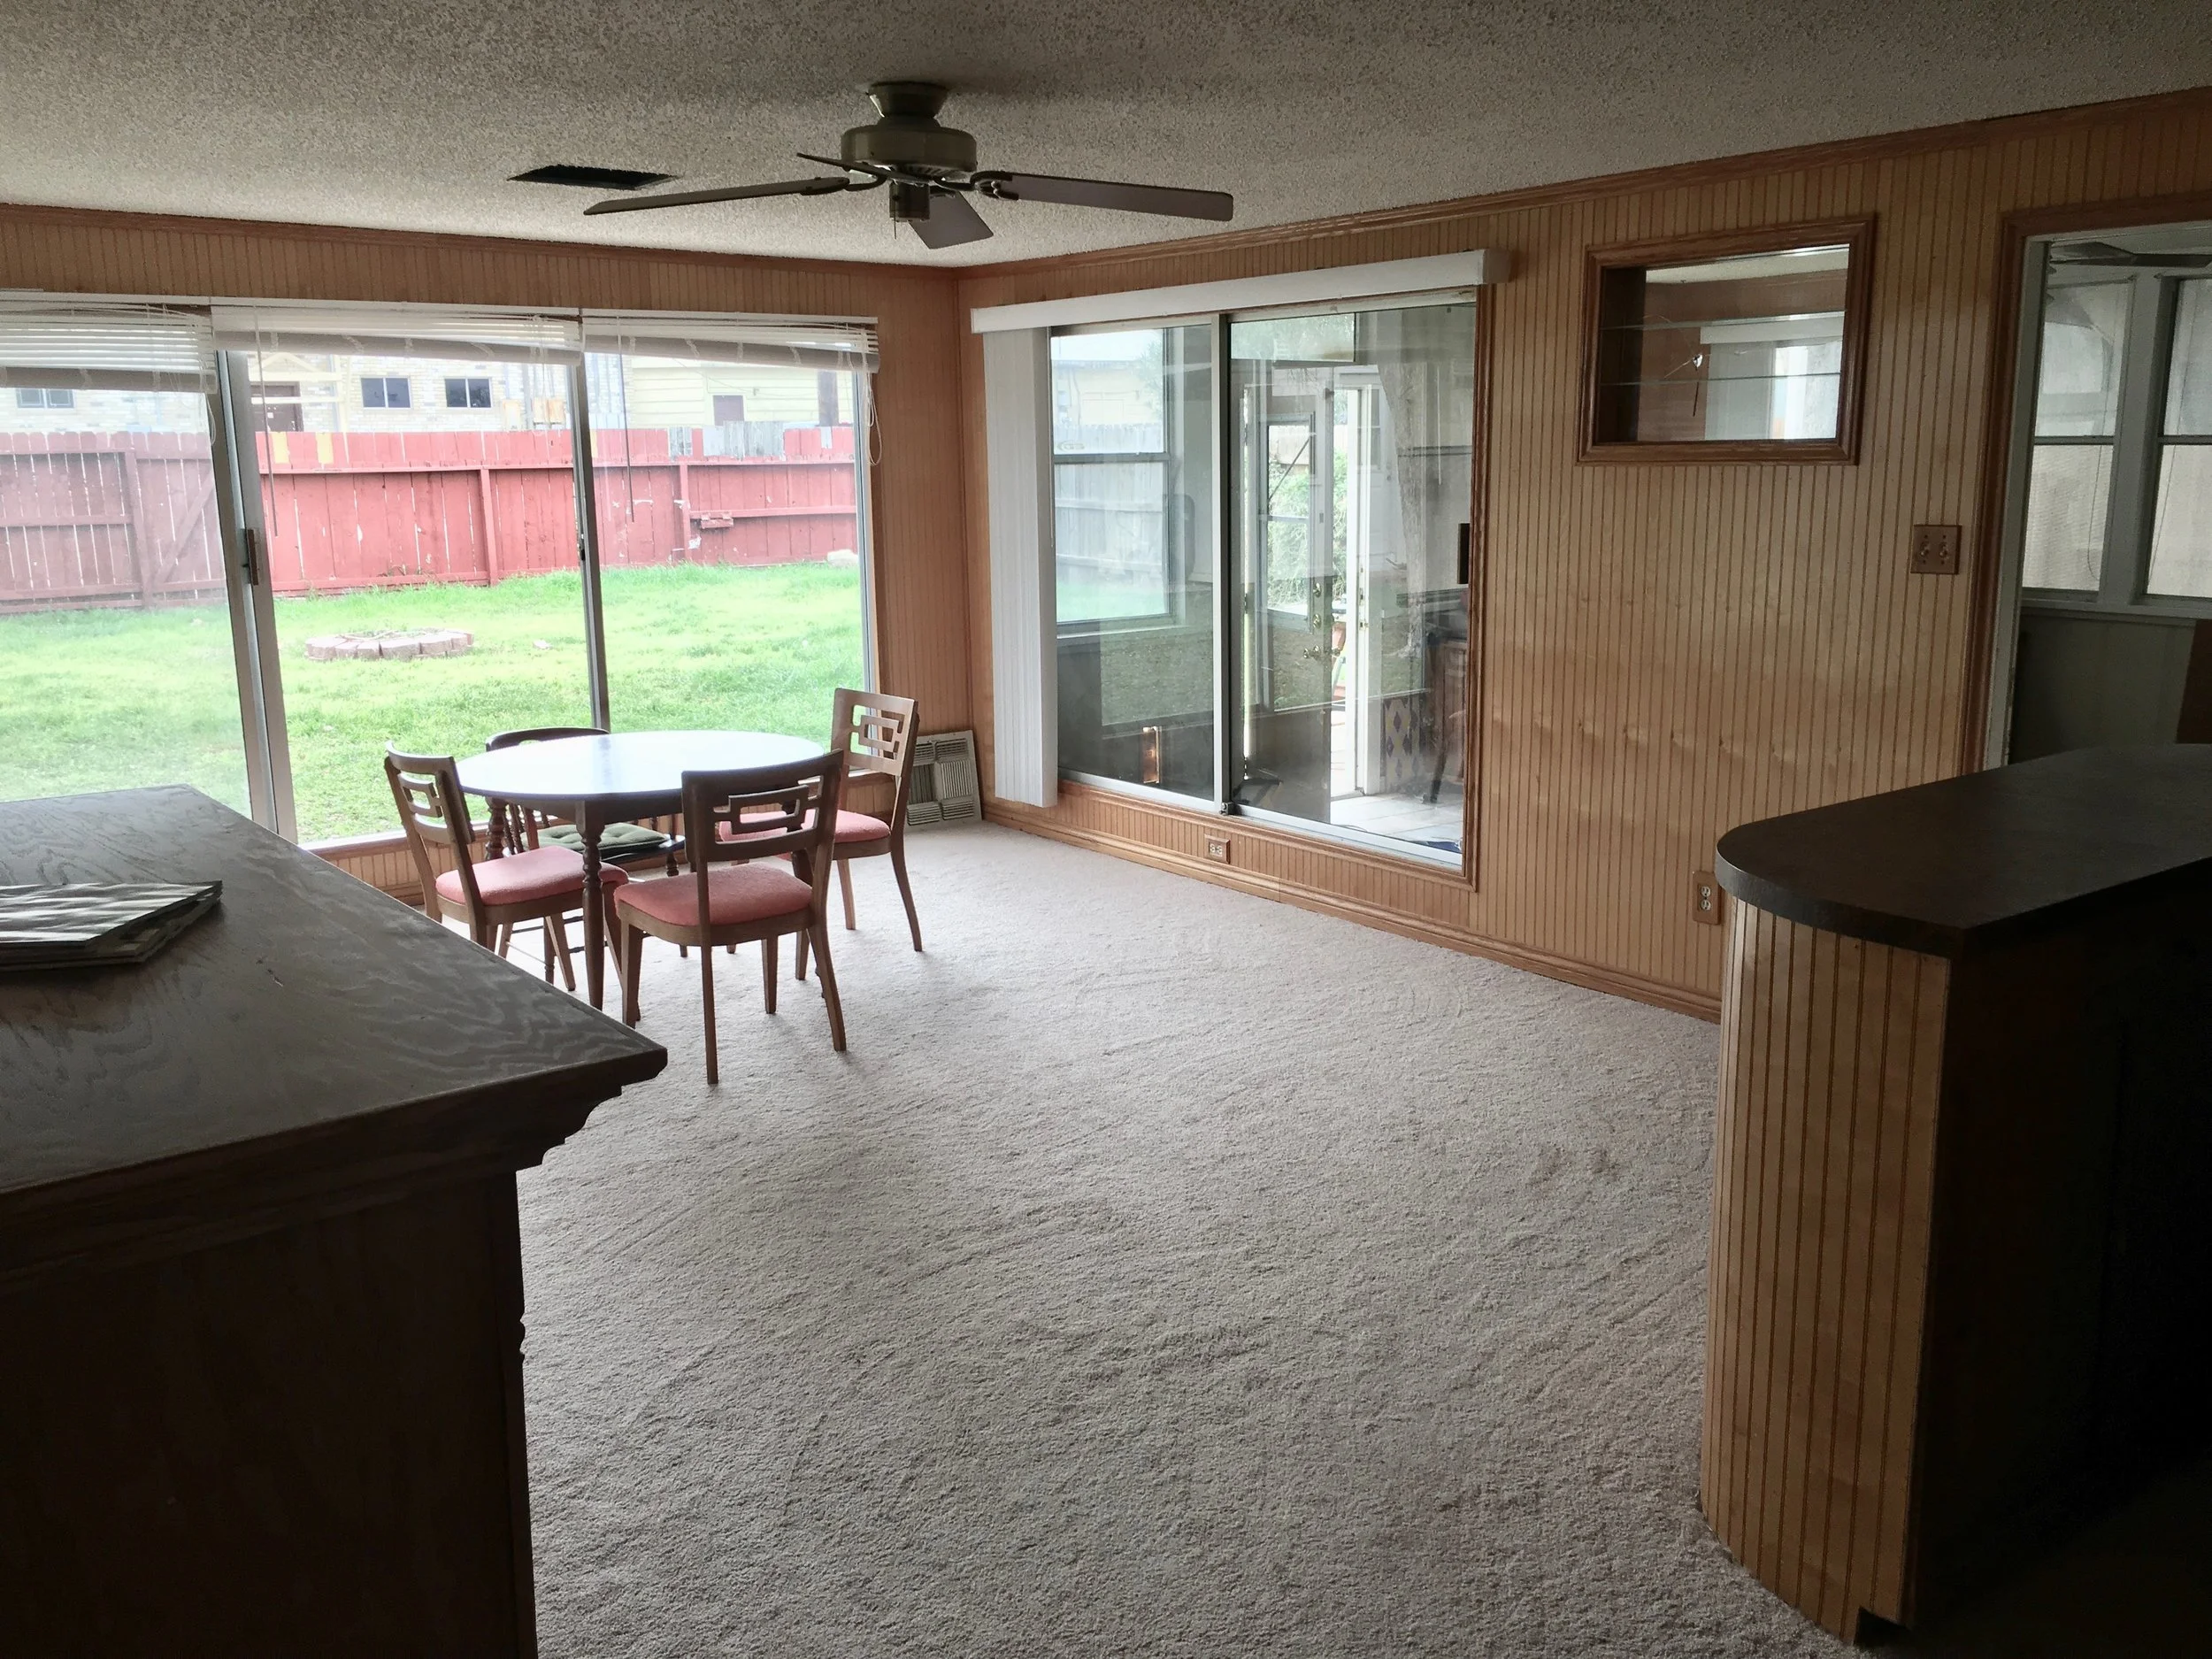
The ceiling height in the dining room was only 7’-6”, with the standard height being 8’-0”. The popcorn ceiling, wall paneling and low ceiling fan did not help our vertically challenged room. We were able to maximize the ceiling height in the room by eliminating the carpet and carpet pad, tearing out the drywall, and exposing the ceiling joists. Our joists are 6” high so it gives the dining room an illusion of higher ceilings. Bonus, the joists and plywood were already painted margarita green!
Once we finished up the demo phase, it was time to do some cleaning. Did I mention we did all of the construction ourselves? We may have had a little help…
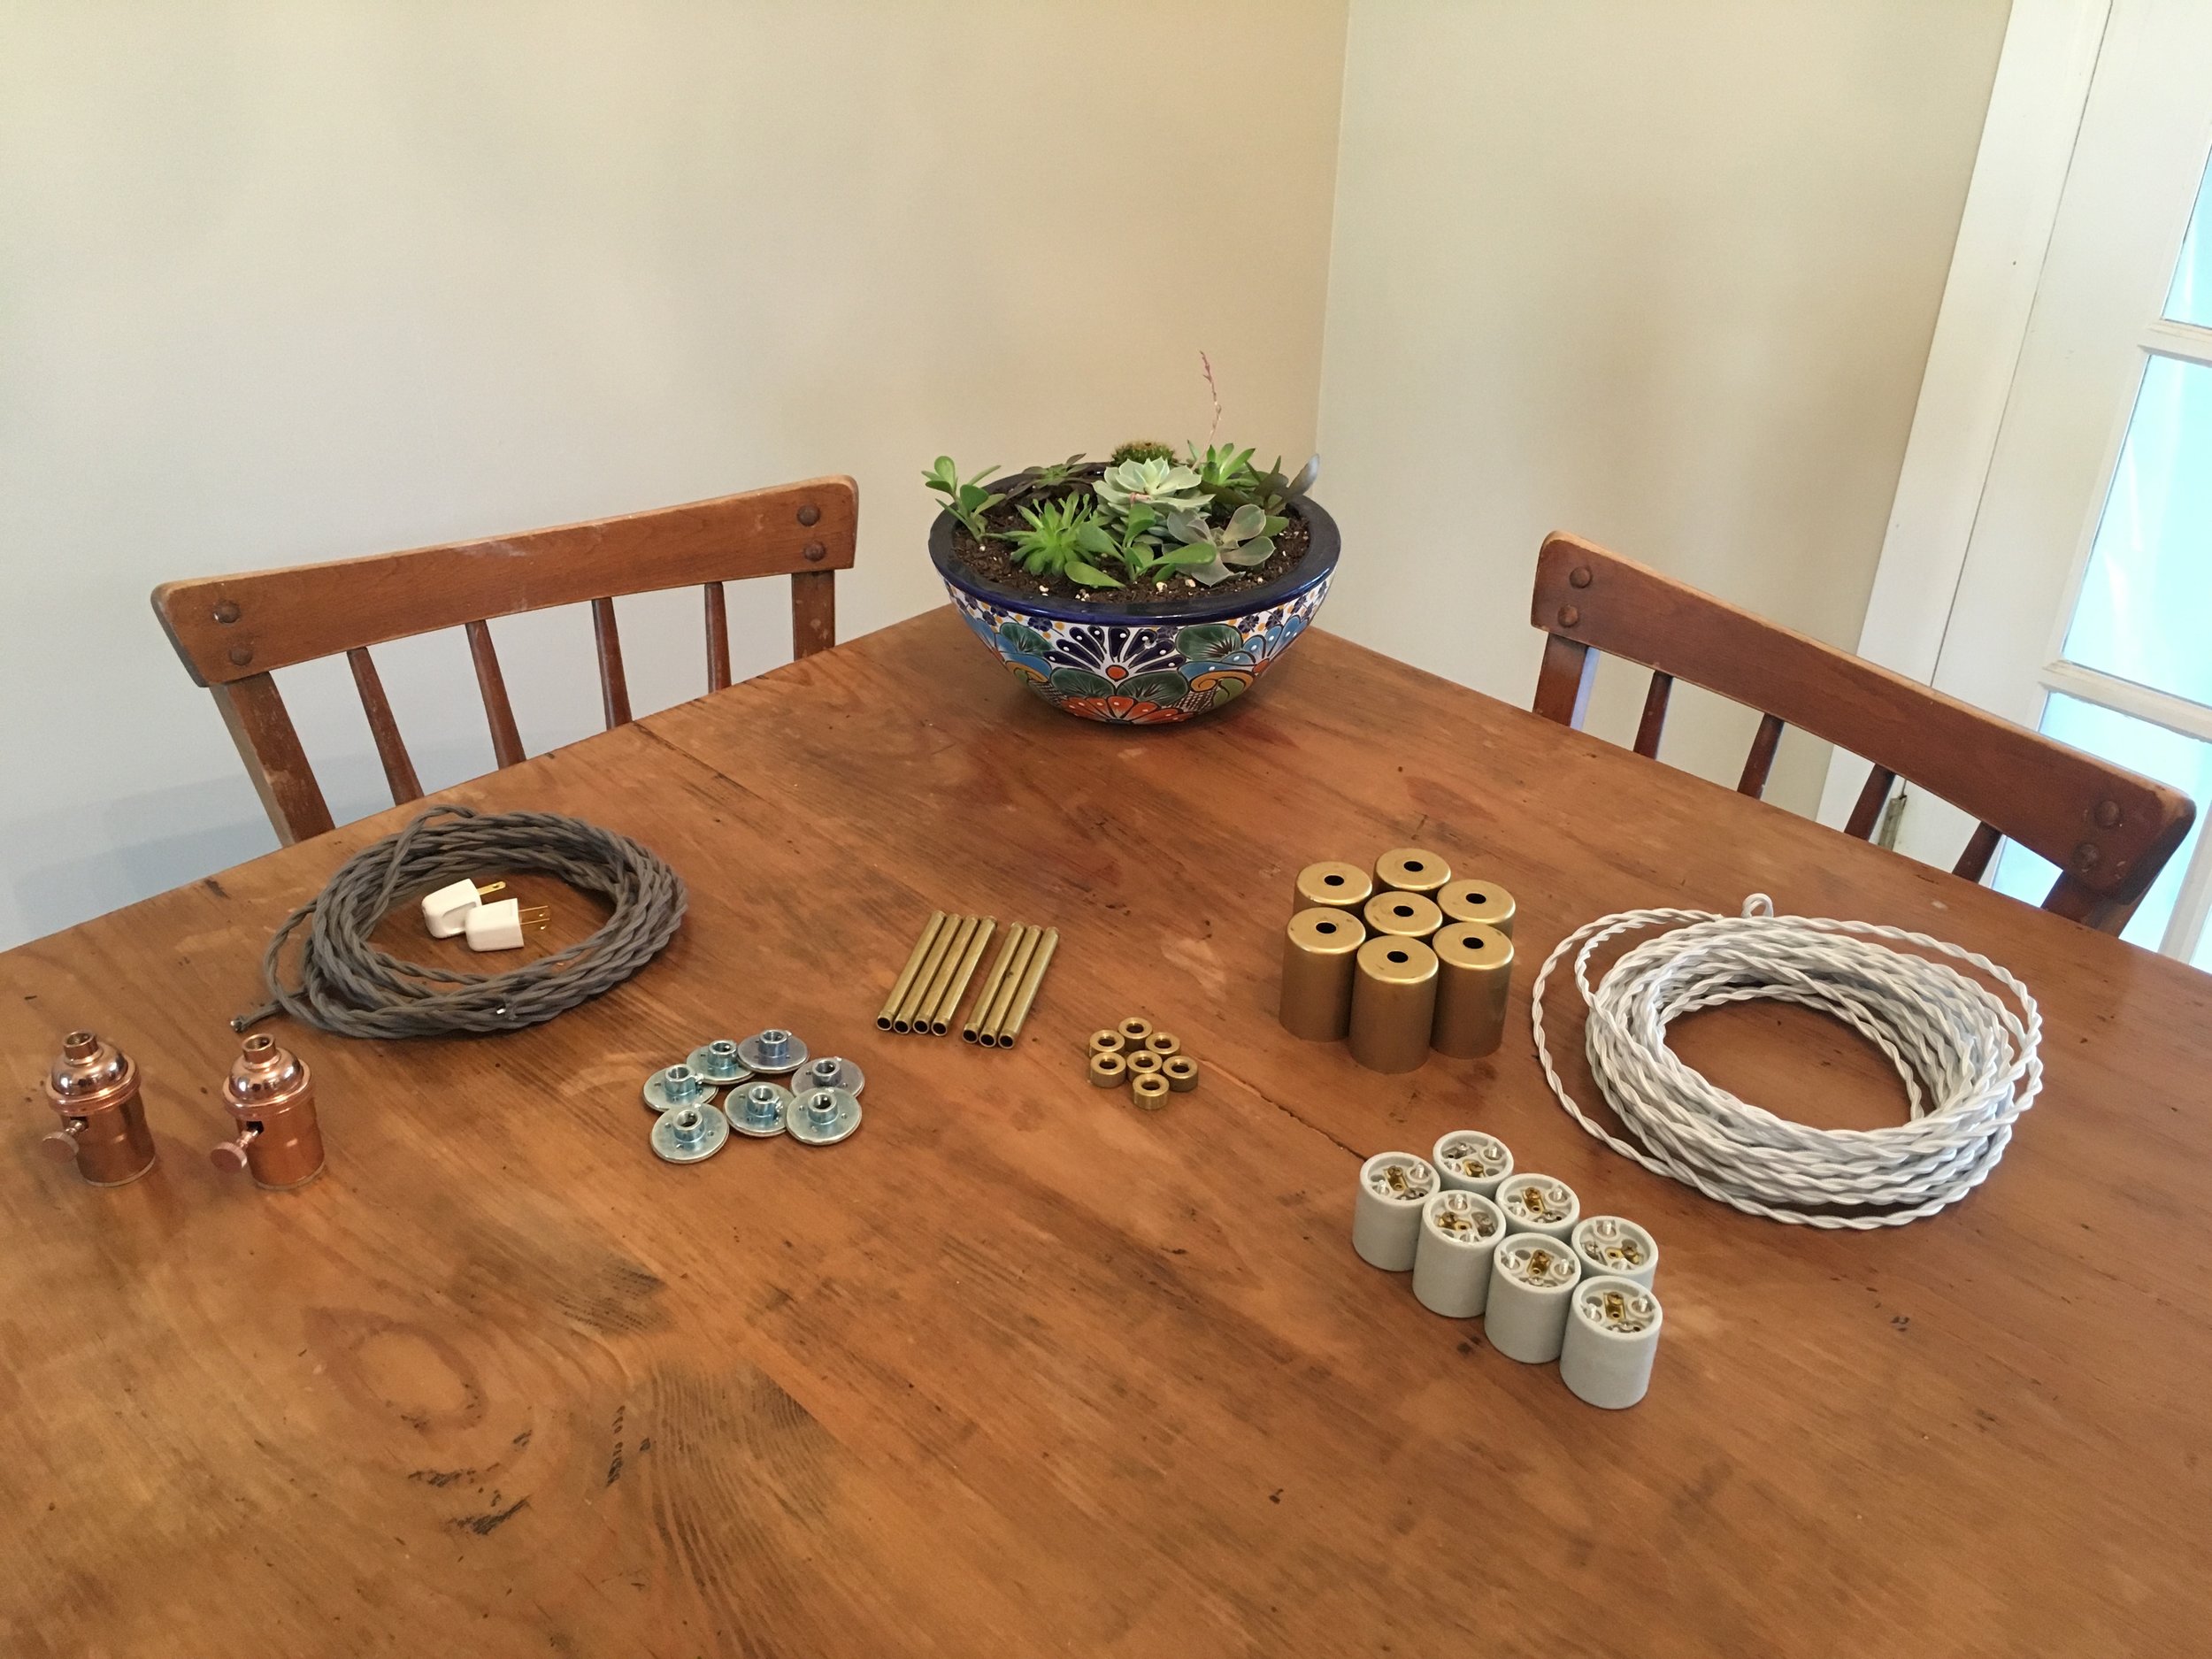
In order to save a bit of money I decided to make our custom pendant light fixture for the dining room. I ordered all the parts online through Grand Brass (see link below). This was my first experience with DIY light fixtures and I have to say it went really well! When your budget is tight, don’t be afraid to tackle a DIY for the look you want. Next up, I spent time playing with the finishes and colors of the dining room. We decided on staining the concrete floors, which was a learning experience to say the least, but worth it!
Before we get to the really good stuff, we have to talk about this table. Truthfully, I feel this table could be a blog post in itself because it has such a great story. I bought it at Max’s Haus. a great local antique shop here in New Braunfels for $250. This was an old work bench for a furniture maker and was covered in layers of urethanes. The height of the table with the casters, a fancy way of saying wheels, was at 36”, most dining tables are typically 30” high. I sanded the table down to the raw wood, refinished it and took the casters off for an absolutely perfect table for our new dining room.

I love making something old, new again!
The reveal……….

Tada!

I love the way the light flows. In the fall, I love to open up all the windows and let the breeze in.
Part of the joy of remodeling your house is the anticipation of hosting friends and family in your newly renovated space. Thanksgiving is around the corner so I must showcase some amazing pieces that I procured while planning for the big feast. I love simple and clean design in case you hadn’t noticed. I am not the kind of person who makes purchases for the sake of current trends or because I think it’s cute. I live by my brand by staying “True” to my style with things that I love. I want to use pieces that are thoughtful and intentional. I love meeting an artist who created a piece that will be in my family for years to come. Or giving new life to a table that was once used for furniture making.

Less is more for me. Let the pieces speak for the themselves and then let your guests speak about the pieces. Also, this picture really highlights the light fixture I created.

I fell in love with these bird cloth napkins I found on Esty. I love how they compliment my dinner plates from Buck Pottery. See links below for information on these peices.

This credenza was another fun DIY project my husband, Austin, and I completed together. We love the way the pegboard sliding doors offer a fun and different texture to our space.

Fireplace no more! Now the focus is on some beautiful pieces we have acquired over the years.
Renovation seems to be a never ending process around here. I think that’s why finding pieces that are important and working through the process is so important to me. I want this room to be functional for many years to come. Over time, the dining room has become a place for me and my family to gather. Not just for a meal but you can find us here crafting with my kids, blowing out birthday candles, laying out my next project, or just having coffee with a pal. I love that and I love this room! I hope you do too. I added links below for some of the pieces in this blog if you are interested. Till next time, have a happy and healthy Thanksgiving everyone!
Best,
Allyson


Ascending From Fast Food
Today on my blog, I wanted to speak on behalf of our love for commercial interiors! Our business is made up of roughly half commercial interiors and half residential interiors. Did you know commercial design was my first love and first job right out of college? Healthcare design to be specific. One aspect of commercial design that I love, is that clients tend to be more design risk takers. They are more willing to follow trends and be open to different design concepts.
Did you know that True Design does work outside of the New Braunfels, TX market? That’s right, we are ready to tackle any project near or far (I’m talking to you Fiji Islands, wink, wink). Today I am taking you to Denver, CO to discuss a wonderful project we were lucky enough to be a part of. We had an awesome team going into this project. So let’s get down to business and into the details!
The building was an old Wendys, which will come as no shock when you see the before pictures. It is easily identifiable as such. One of the fun design challenges of the project was making the exterior of the building to be more in line with the brand of our client and not Wendys. I love projects like this. Creatively, this was a blank canvas with the challenge of making new patrons not want a burger when they saw it.
The Architect decided early on that the existing “sunroom” would need to be demolished completely. So off to the drawing board we went. We came up with three exterior design options and ultimately the client decided on a clean, modern look. I can’t tell you how happy we are with the results! Man, what a difference!
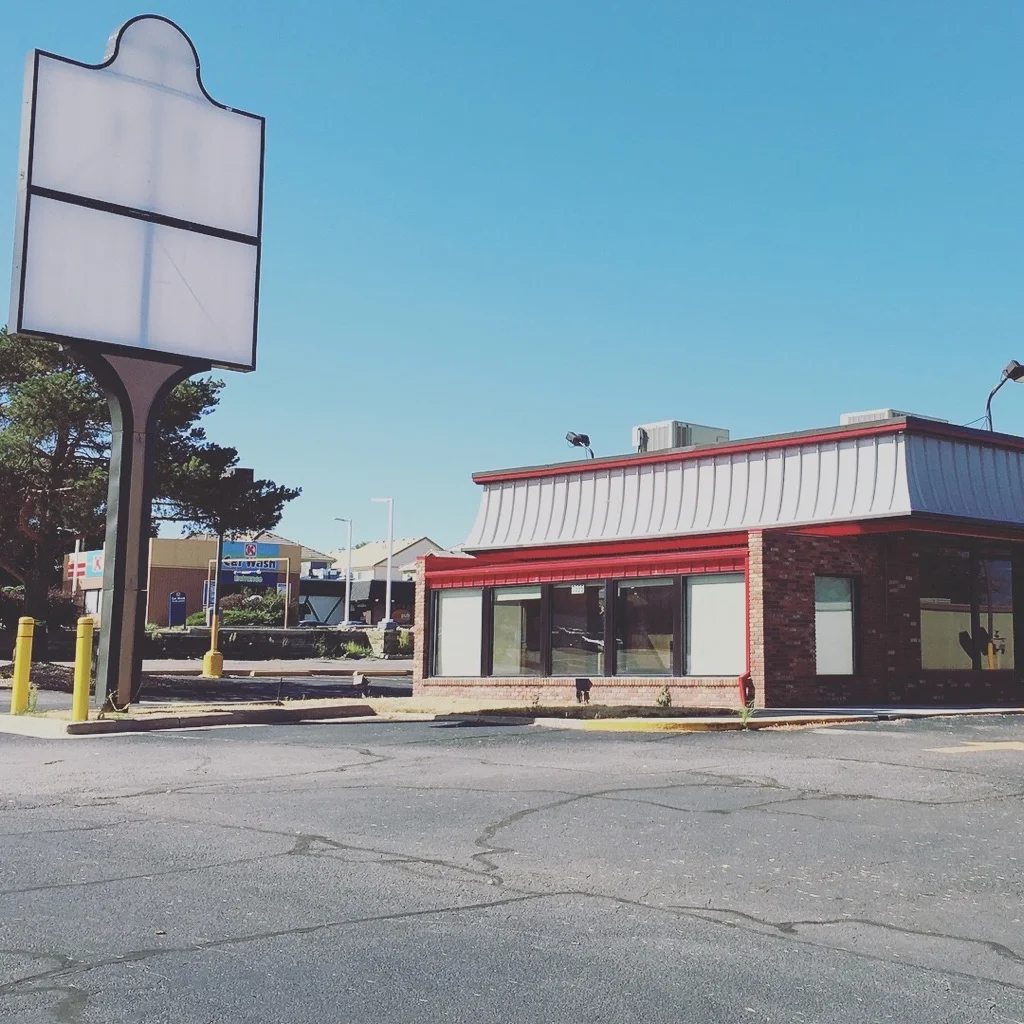
Before,“Where’s the beef?”

Exterior Rendering design.
I won’t bore you with a bunch of before interior pictures of the space because, get this, it looked like a Wendys and it actually smelt like one too. But here are a few to wet your whistle.

Yep, that’s an old Wendy’s.

Can you smell the burgers?
We worked closely with a graphic designer to tie in the brand with the interior and exterior design of the space. We understand the importance of brand experience in not just graphics, websites and packaging but also in our client’s space. Everything must be cohesive for it to work and work it does! Much of the inspiration for the space came from the logo.

Logo by my hubby Austin Buck.

Lobby area.
Within the retail area, we feature product in custom display cases with integral lighting. The custom wood trellis above the display cases acts as not only wayfinding for customers but also provides a more intimate point of sale.

This space was thoughtfully created for a better retail experience.

Additional retail space.
Brand merchandise is showcased through a custom wood and steel display. All of the wall graphics utilize photographs taken by Austin Buck at Ascend’s green house location. The photographs depict their product and their team.

Clean and modern retail space.

Tada! Burgers no more! She is a beauty.
This project really showcases True Design’s versatility. I am motived as a designer to find projects that challenge my skills and desire to create functional and beautiful spaces. I had the opportunity to work with a great team and together we created a space that is more sleek and modern than fast food.
Enjoy!

A Charming Bathroom
Happy Friday y’all! Ok, so today is not technically a Friday but if you live in New Braunfels, TX, it sure feels that way. It is the last day of the school week for our little ones to celebrate the Comal County Fair! Yeehaw!! My family and I are taking advantage of the three day weekend and going camping with the in-laws. Which brings me to the topic of my blog post. Their bathroom!!
My in-laws have a beautiful victorian folk house that they have pretty much always been renovating. They joke that by the time they get to the end of their to do list, they might as well just start it over again. Yes, it is true, it is a lot of work to own an older home but the character and the charm are unparalleled.
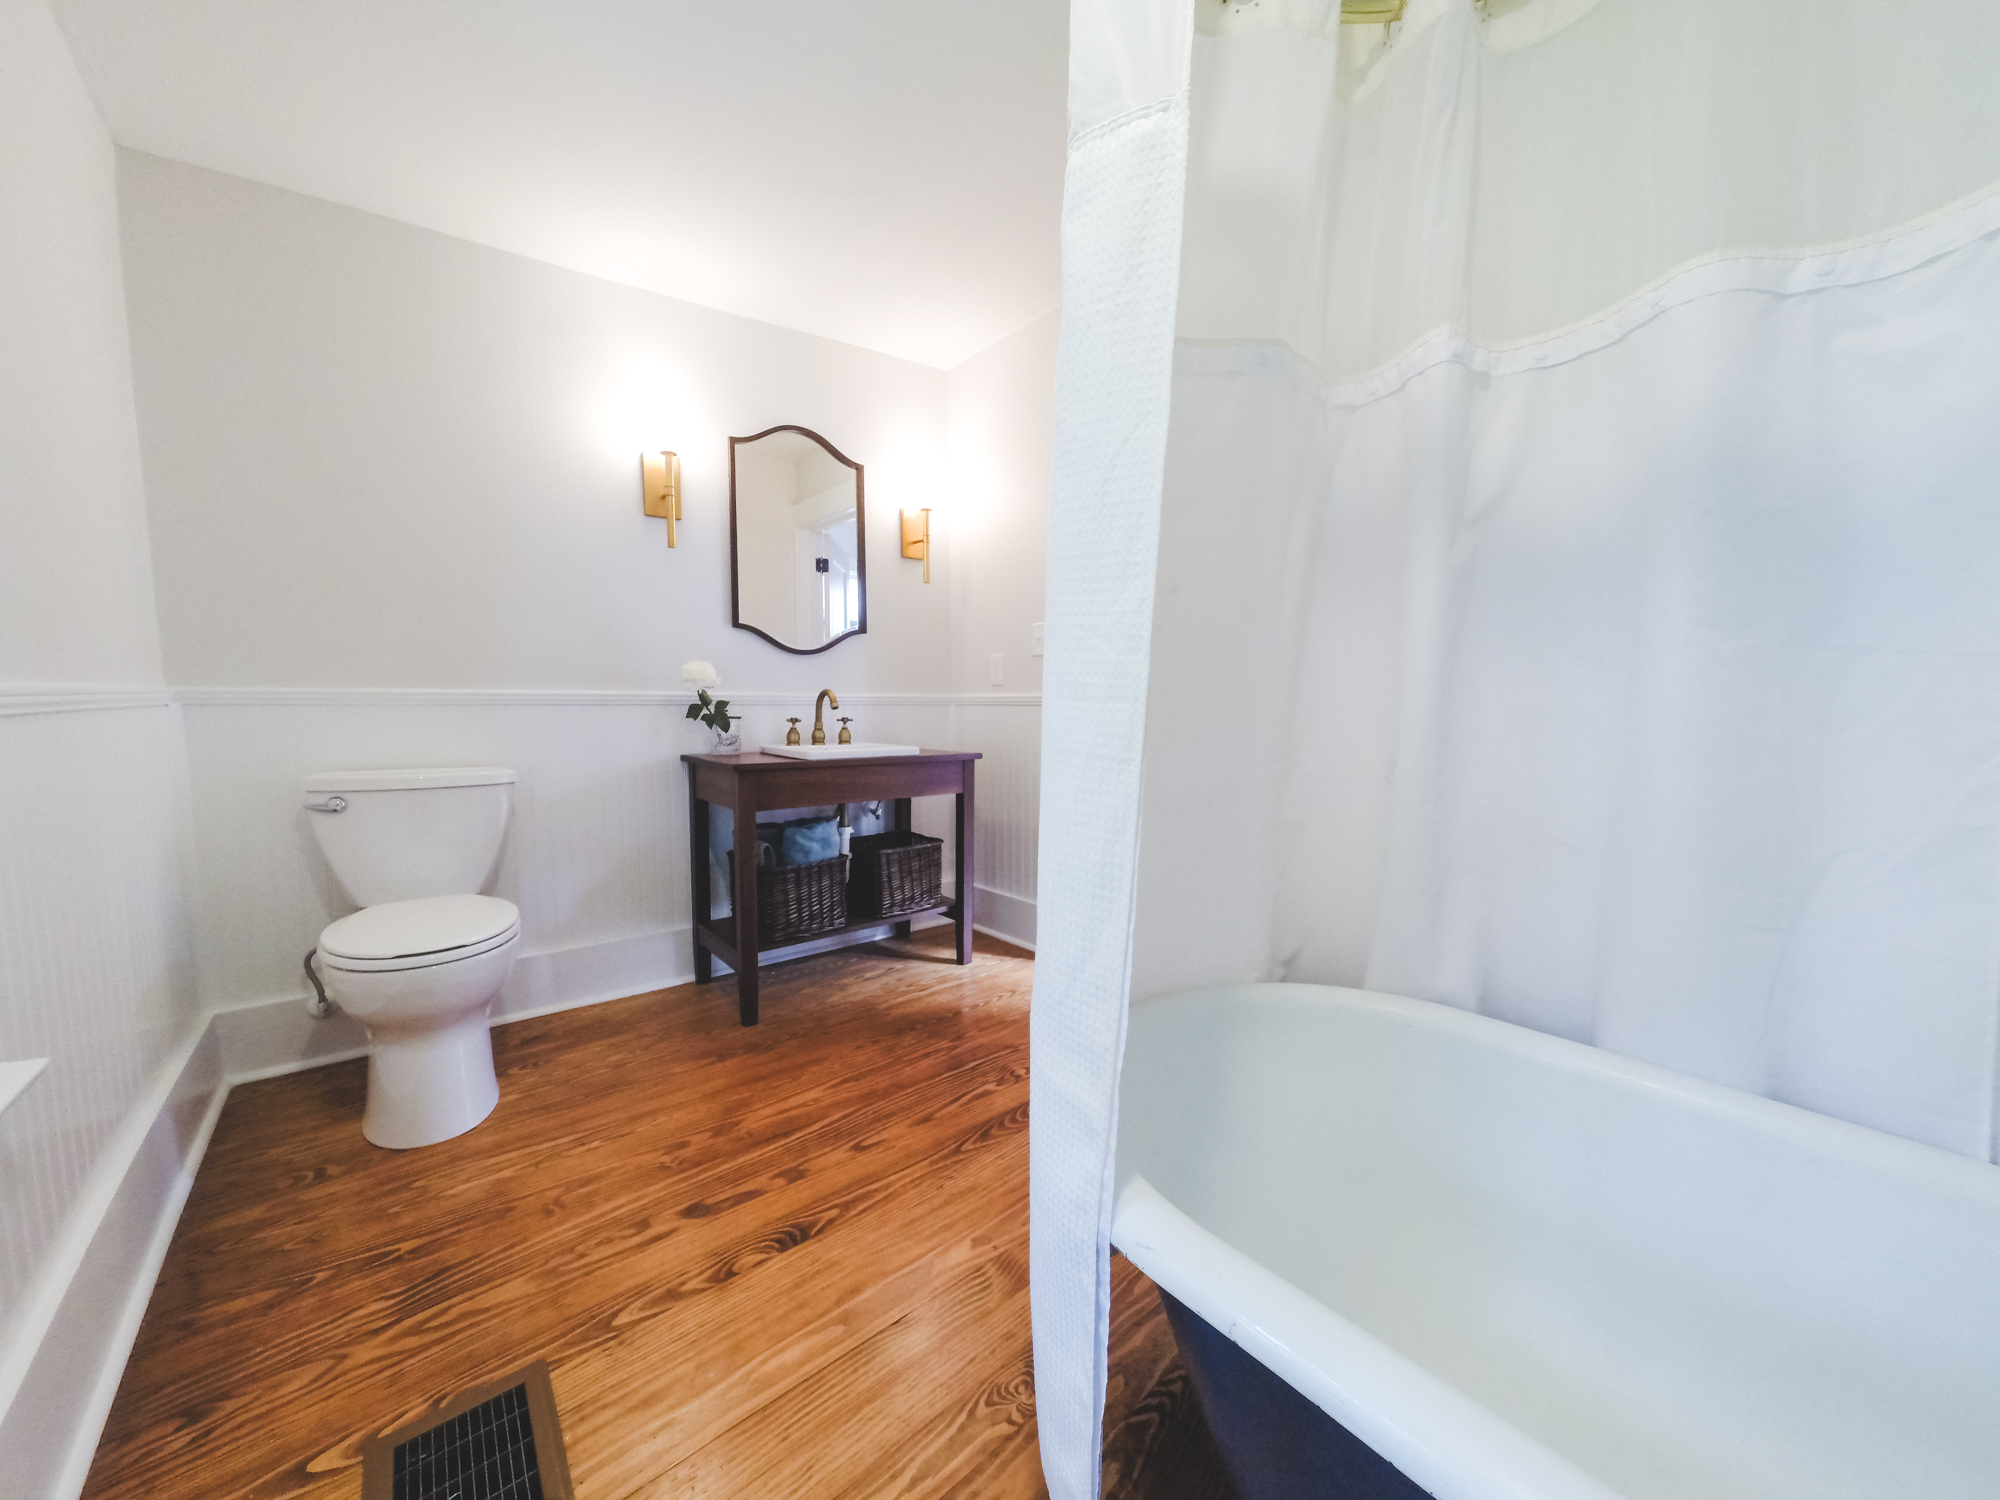
In the late 80’s the attic of this charming home was converted to two bedrooms and a bathroom. Due to low ceiling heights and limited space, the bathroom was and still is very small. It has worked really well for them over the years but recently they have decided to simply update it. The goal of their bathroom renovation was to create a clean lined, modern look with accents of traditional elements.
Take a look at the before pictures!

The dark wainscoting mades this space look smaller and darker. The old vinyl is a definite blast from the past.

The space was dated and dark.

The shower was old and closed off making the space look much smaller.
As you can see in the pictures, space is limited. We really wanted to try and open up the space as much as possible without moving any walls. To accomplish this goal, I recommended a glass shower enclosure in lieu of the pre-fabricated all in one shower. The footprint of the shower actually stayed the same but with the updated glass walls, there is the appearance of more space overall.

The glass shower really brightens and enlarges the space.
I also liked the idea of keeping the vanity wall “light” in appearance, as opposed to the heavy natural wood cabinets that were existing. Some other tricks of the trade are painting the walls a lighter color and either painting the wainscoting the same color as the wall or loosing it all together. When you have a low ceiling height, wainscoting will emphasize the height by making the ceiling appear even lower. The original plan was to keep the beadboard wainscoting but we quickly realized we would not have enough to finish the job and frankly, they just don’t make beadboard like they used to. It would not have been cost effective to match the existing beadboard, as it would have to be custom milled. As a side not when this happens it can be a good idea to save these materials for future projects, especially when you have an older home.
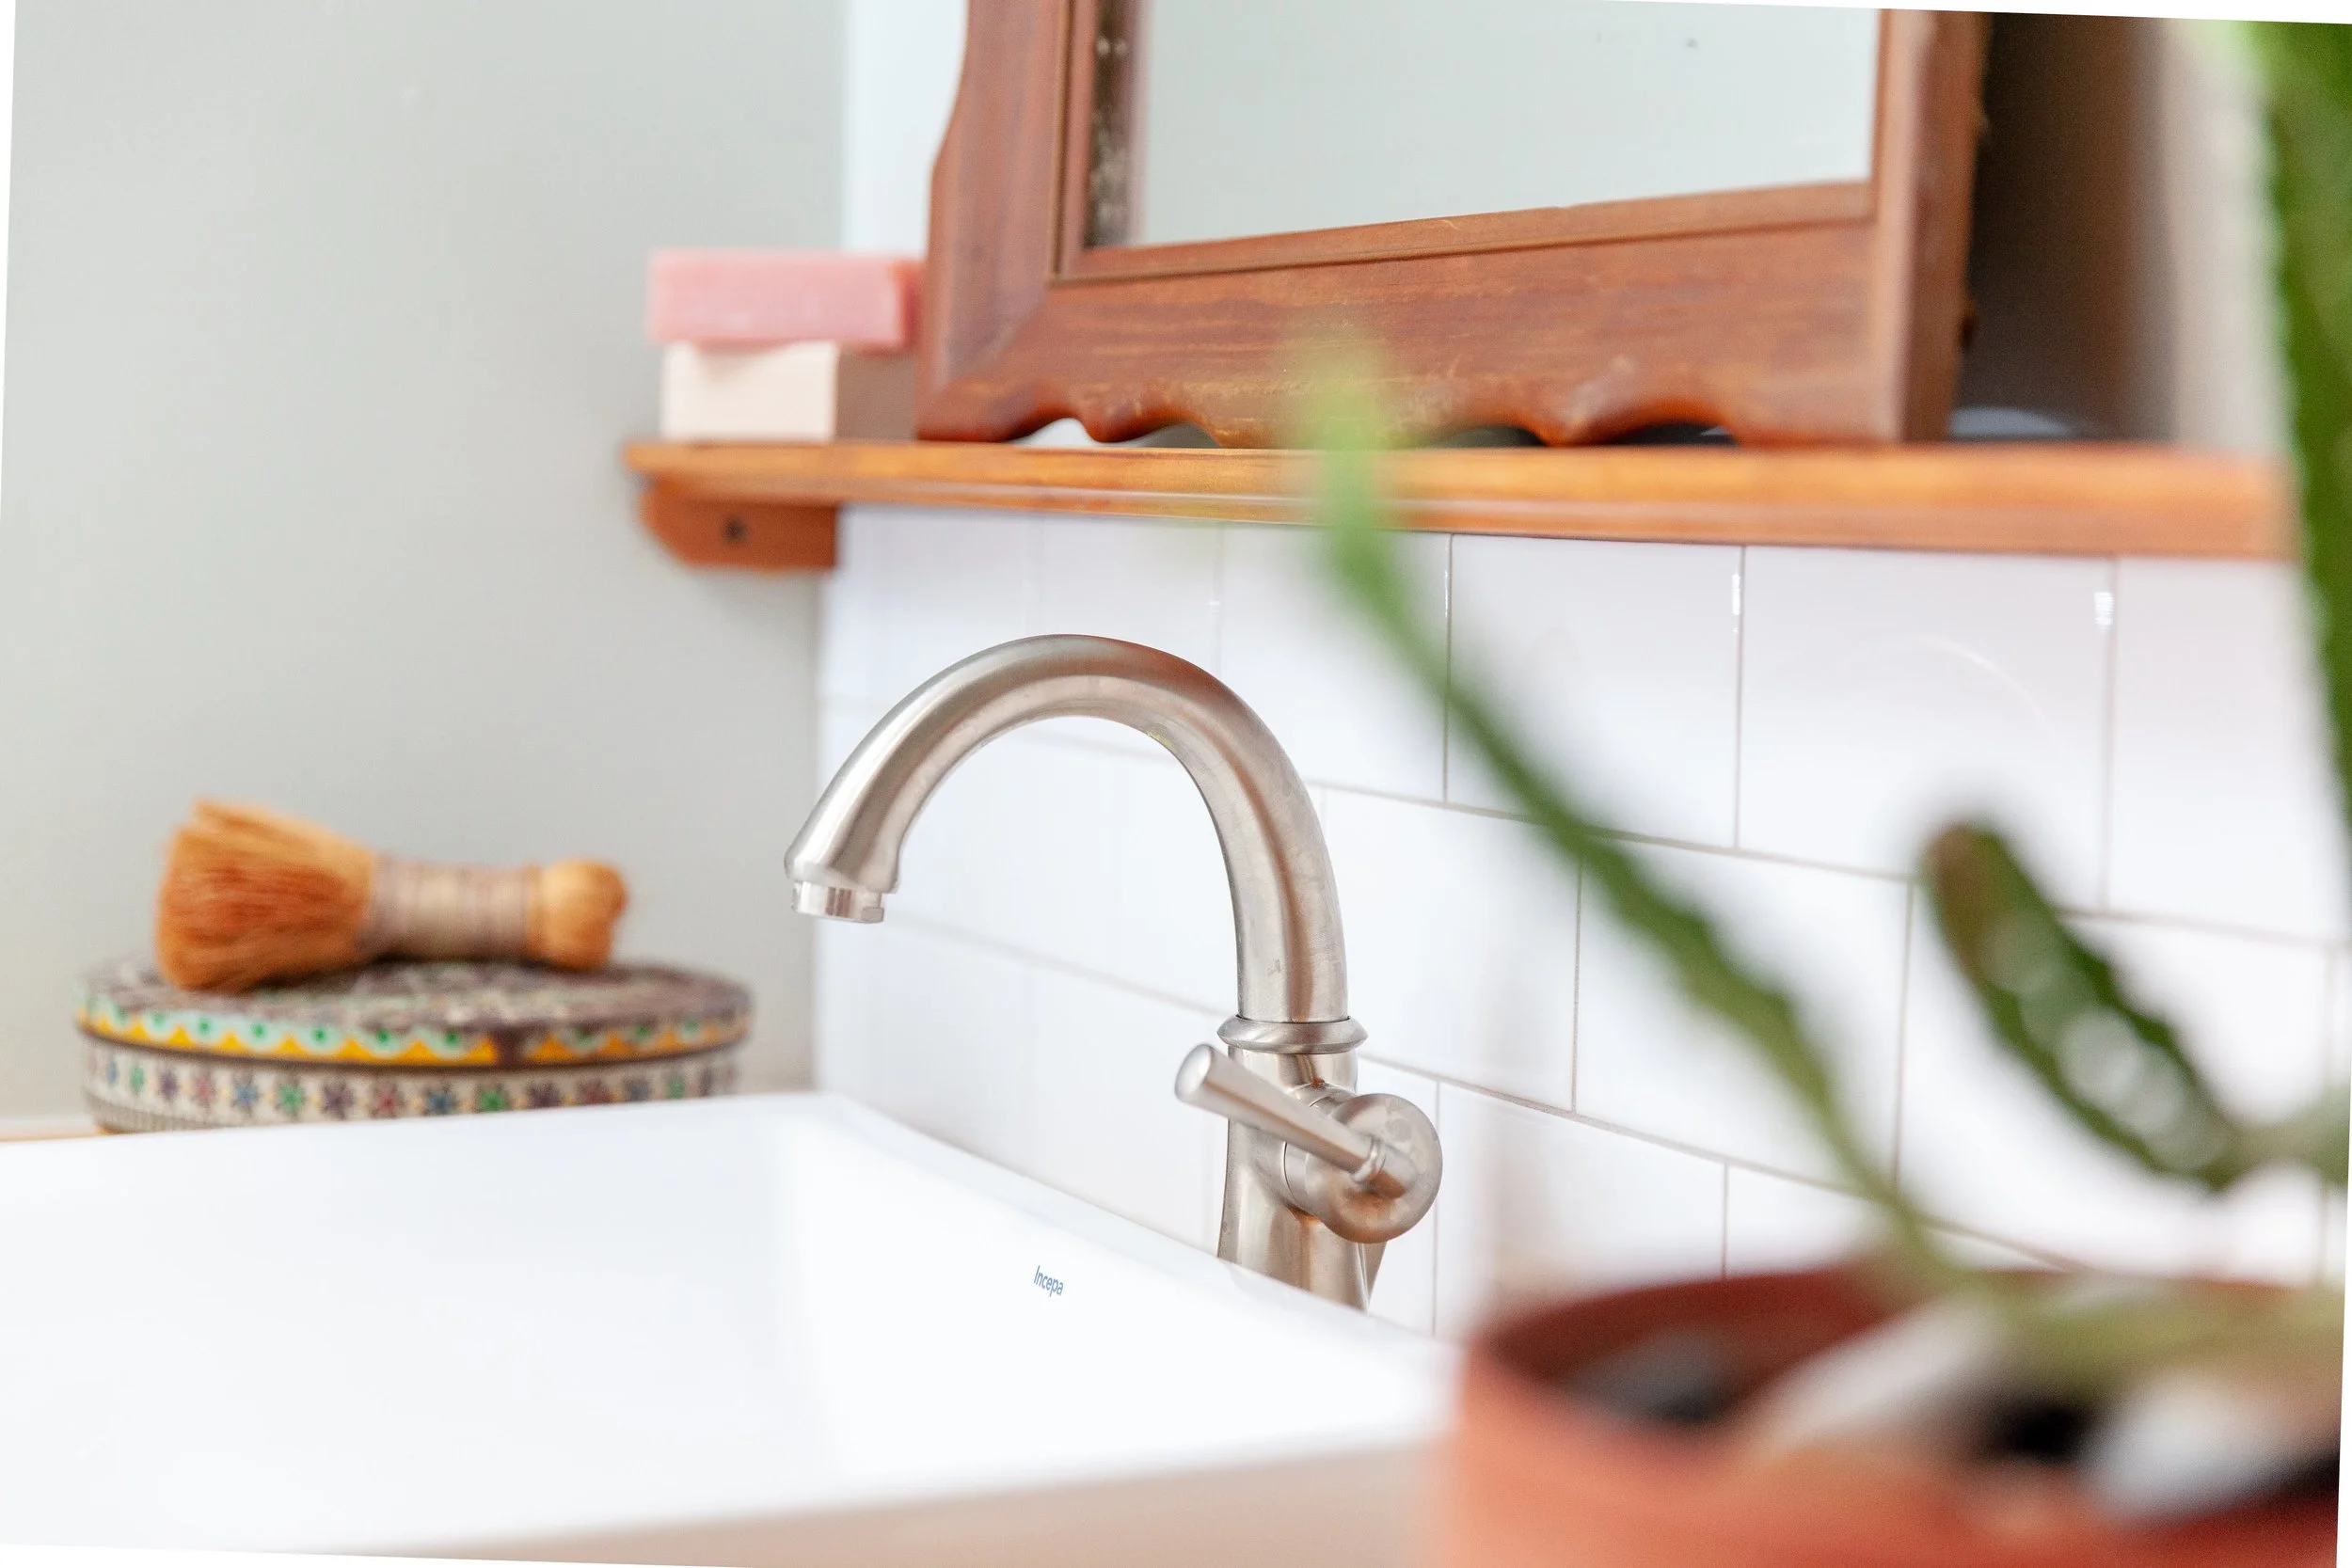
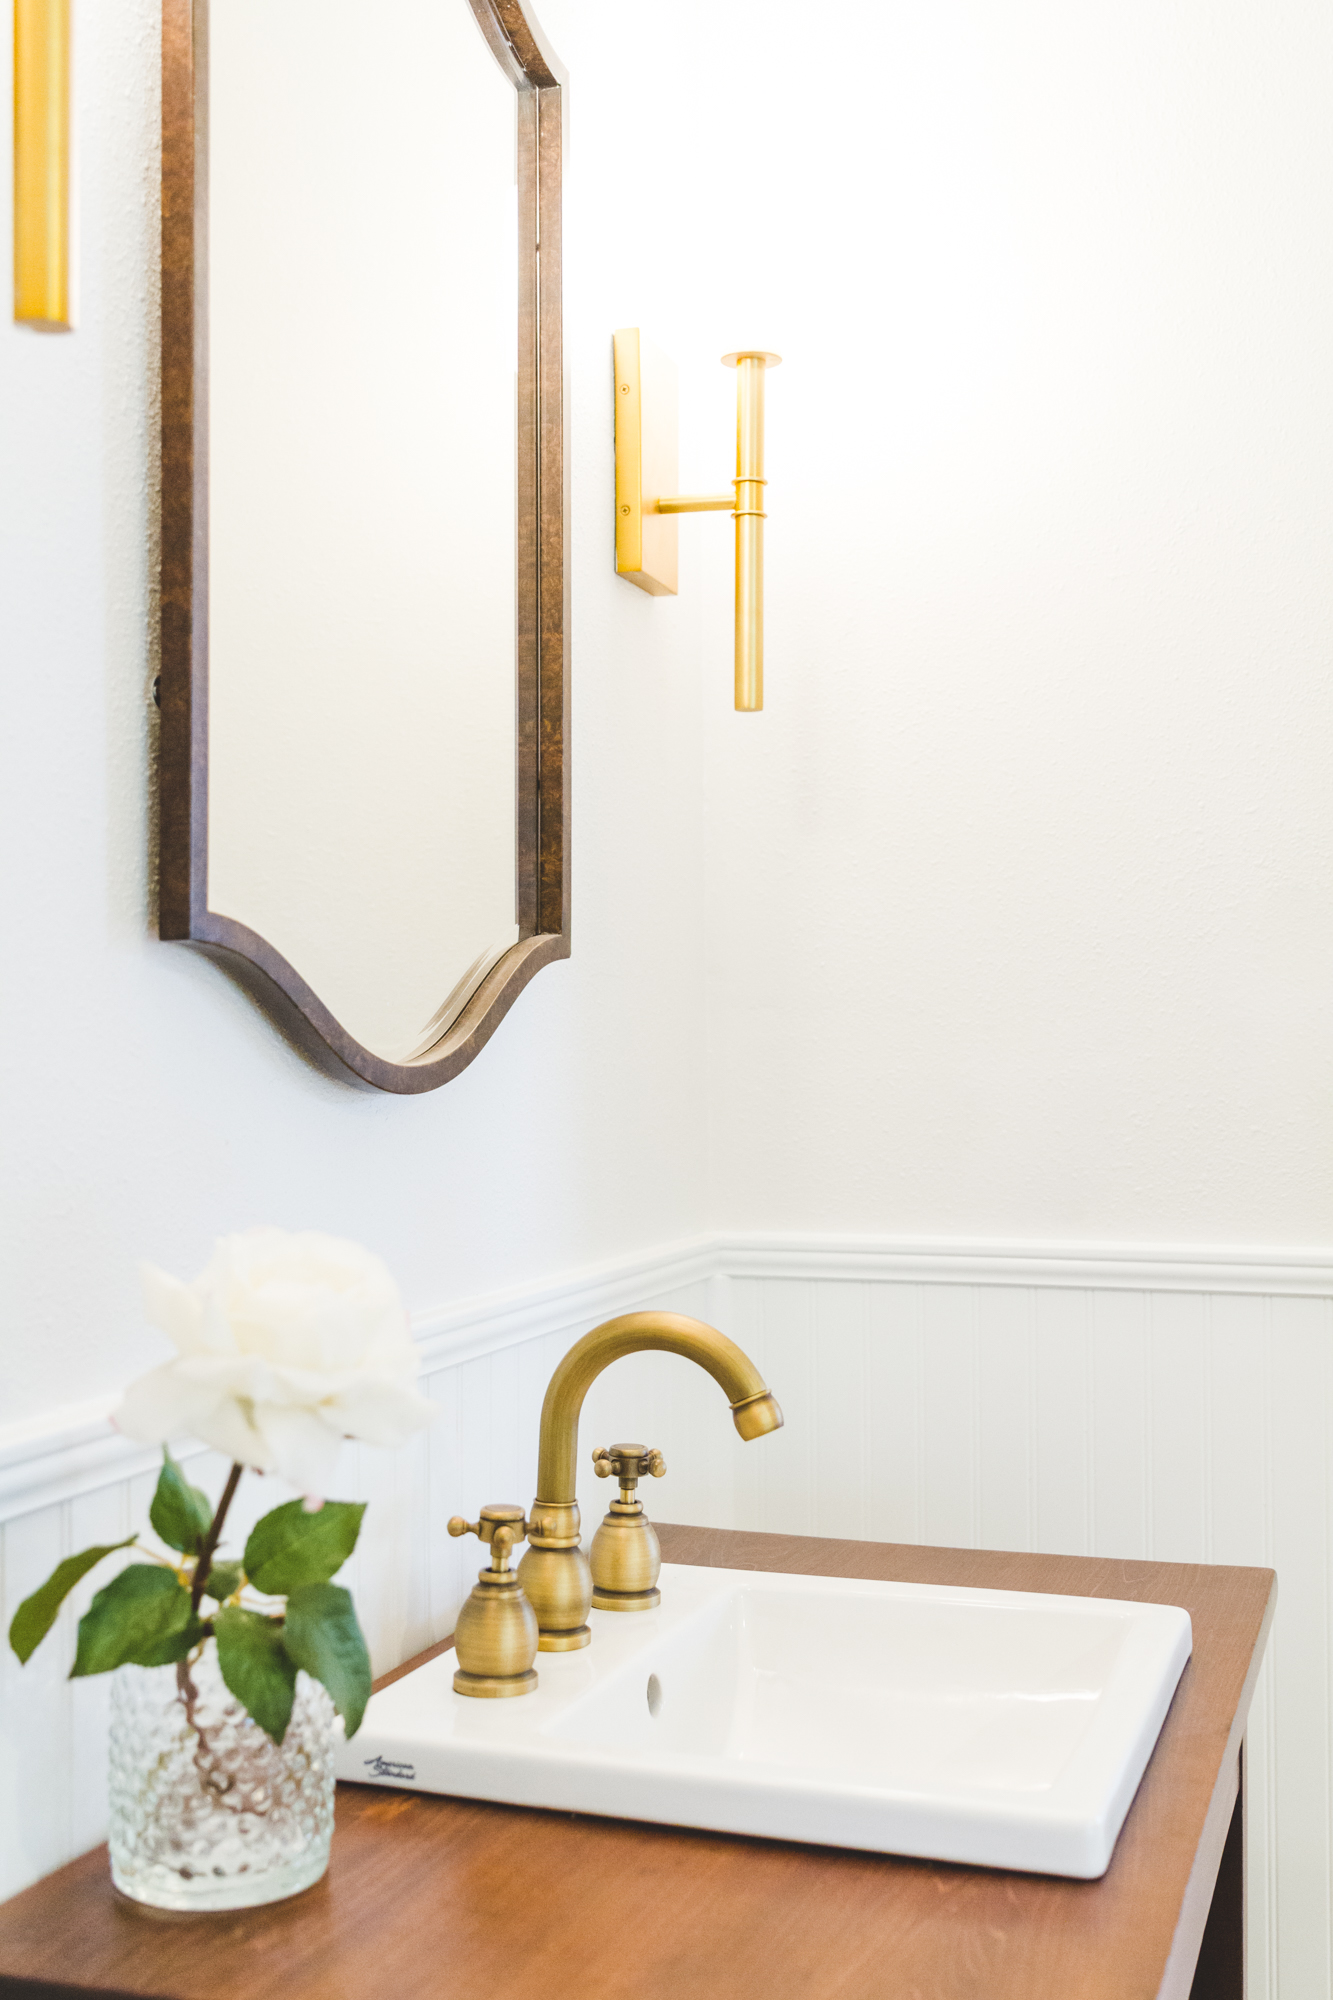
One of the other design obstacles we encountered, is that the maximum depth of the vanity is 15”. The standard vanity depth is 22”, so you can see this is not an ideal situation. To compensate for the shallow depth, I used a apron sink that is much deeper than the vanity. So now you have a full size sink on a very shallow counter.

Beauty and function for limited counter space.

Bringing in the traditional elements to compliment the more modern and clean design.

The ceiling height has a harsh angular edge so I opted for this adorable curvy mirror that softens and warms the space with its wood trim. I also love that I found it one of my favorite antique shops, Max’s Haus in New Braunfels, Texas

Styling for photos.
Let’s talk tile! The existing flooring was vinyl. To update this space we found some beautiful 3” hexagon tile for the bathroom floor mixed with a 2” white hexagon tile for the shower floor. We used white subway tile in the shower and we incorporated the subway tile as a simple accent above the countertop.

Three inch hexagon tile from Travis tile, one of our go-to tile shops in San Antonio, Texas.

Having the shape of the tile be the same may have been less effective in this space. However, I love how the contrast in the color actually makes it stand out.

Subway tile makes a space look clean and modern.

Final touches for our photo shoot.
All-in all, we love the way it turned out! Together with the input of the client, in this case my in-laws, we gave an old outdated bathroom new life. My hope is that this design will live on for many years to come and their guests will enjoy their newly renovated space.
Here’s some more pics of the bathroom that we can’t help but include.

Another view.
Simple accessories.
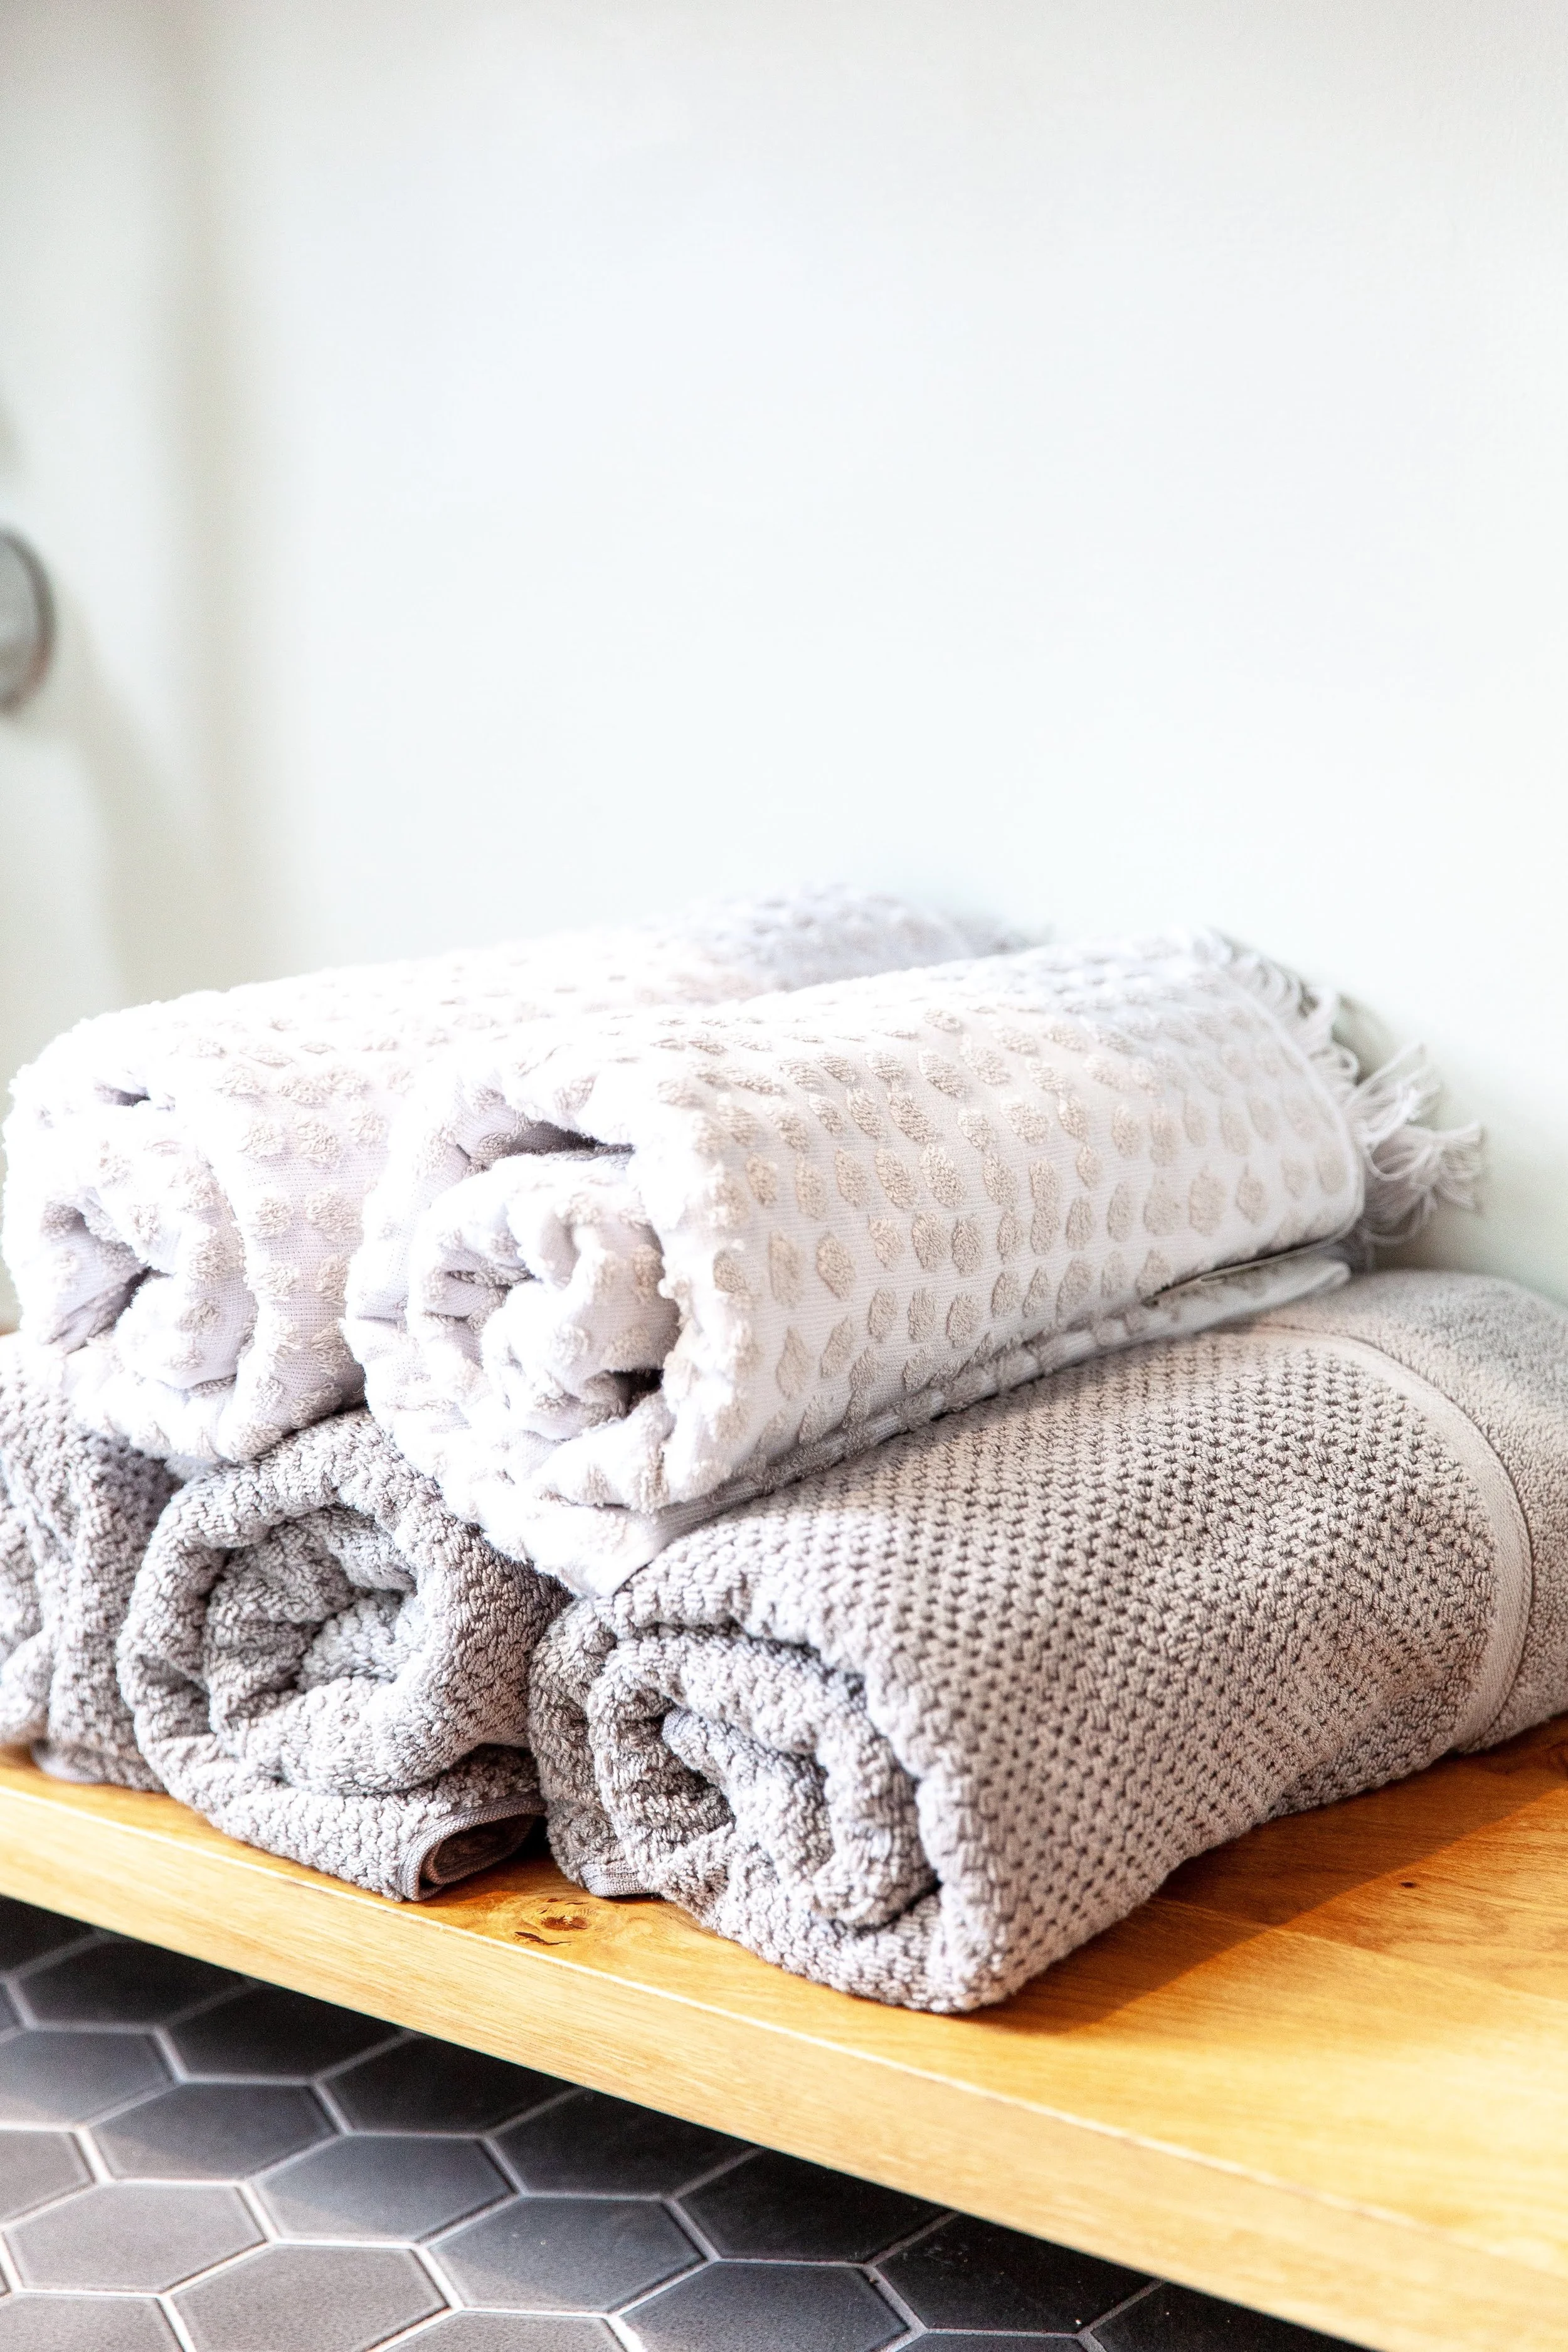
Plenty of space below for storage.

One last thing.
We hope you enjoy these photos of a project close to our heart. We’re off to the woods for s’mores and campfires!!
Until next time, if you happen to got to the Comal County Fair don’t forget to put your boots on and have some funnel cake for me.
Stay True!
Allyson

Summer Inspiration 2018
True Design on Road Trips
Well summer is over in our neck of the woods, although the heat still lingers. Today, I wanted to take a hot second and reflect on some of my summer design adventures. My husband and I are in this sweet spot with our kids. Their ages are 5 and 7 and still like being around us. We are taking advantage of these few years we have before they are adolescents and decide they would rather be with just about anyone but their parents. Exploring and traveling are a big part of what makes me who I am. Much of my design inspiration comes from my travels. So this past summer, we let my current design jobs dictate the journey. From Dallas to Durham and everything in between, we worked, we saw, we explored. For three and half weeks we were on the road and spent the last five weeks in Colorado Springs, CO.
The journey began with several job site visits in the Dallas area. From there, we went to Bentonville, AR. The primary purpose of this portion of our trip, was for my husband to ride his mountain bike through the hundreds of miles of mountain biking trails throughout the city. I kind of wrote off Bentonville as “husband time,” but was pleasantly surprised to find that much of my inspiration came from this time of our trip, specifically at Crystal Bridges Museum of Art. The art was spectacular but for me, the architecture was the real amazement! If you have not had the pleasure of stepping into one of Moshe Safdie’s architectural wonders, please take the time and do so! The mix of concrete and wood made me weak at the knees.

Concrete and wood, courtesy of Moshe Safdie at Crystal Bridges Museum of American Art
The grounds of Crystal Bridges are a work of art in themselves, not to mention the actual work of art, “Fly’s Eye Dome,” by Buckminster Fuller. His philosophy is my current inspiration. From Crystal Bridges website, “he popularized the belief that we all must work together and share limited resources in order to survive on earth. With this in mind, he created housing designs that would benefit the greatest number of people while utilizing as few resources as possible.” As a designer, I also appreciated the reminder in Buckminster’s original sketches, that good design does not just happen over night. It is a methodical practice that runs into many failures before reaching success. Read more on Buckminster’s work at crystalbridges.org.

Fly’s Eye Dome, by Buckminster Fuller at Crystal Bridges Museum of American Art

Ruth Asawa, Crystal Bridges Museum of American Art
Crystal Bridges Museum of American Art
I’ll continue to highlight some of my favorite moments on our road trip over the next few months via my social media outlets. Also, stay tuned for project updates on my Dallas and North Carolina designs. In the meantime, I’ll leave you with this…
“We are not going to be able to operate our Spaceship Earth successfully nor for much longer unless we see it as a whole spaceship and our fate as common. It has to be everybody or nobody.” - Buckminster Fuller
Stay True!
Allyson

Carolina house flip in downtown San Antonio

The Before
I became very excited about this new project that would quickly be named “Carolina.” The house was located in the historic district of Lavaca in downtown San Antonio, Texas on Carolina St. It was a mess, but I could see under that musty stench, we were standing on something with real potential for beauty. Built in 1905, this house had character. Now, we just had to tap into that potential.

Front view of the house before the remodel.
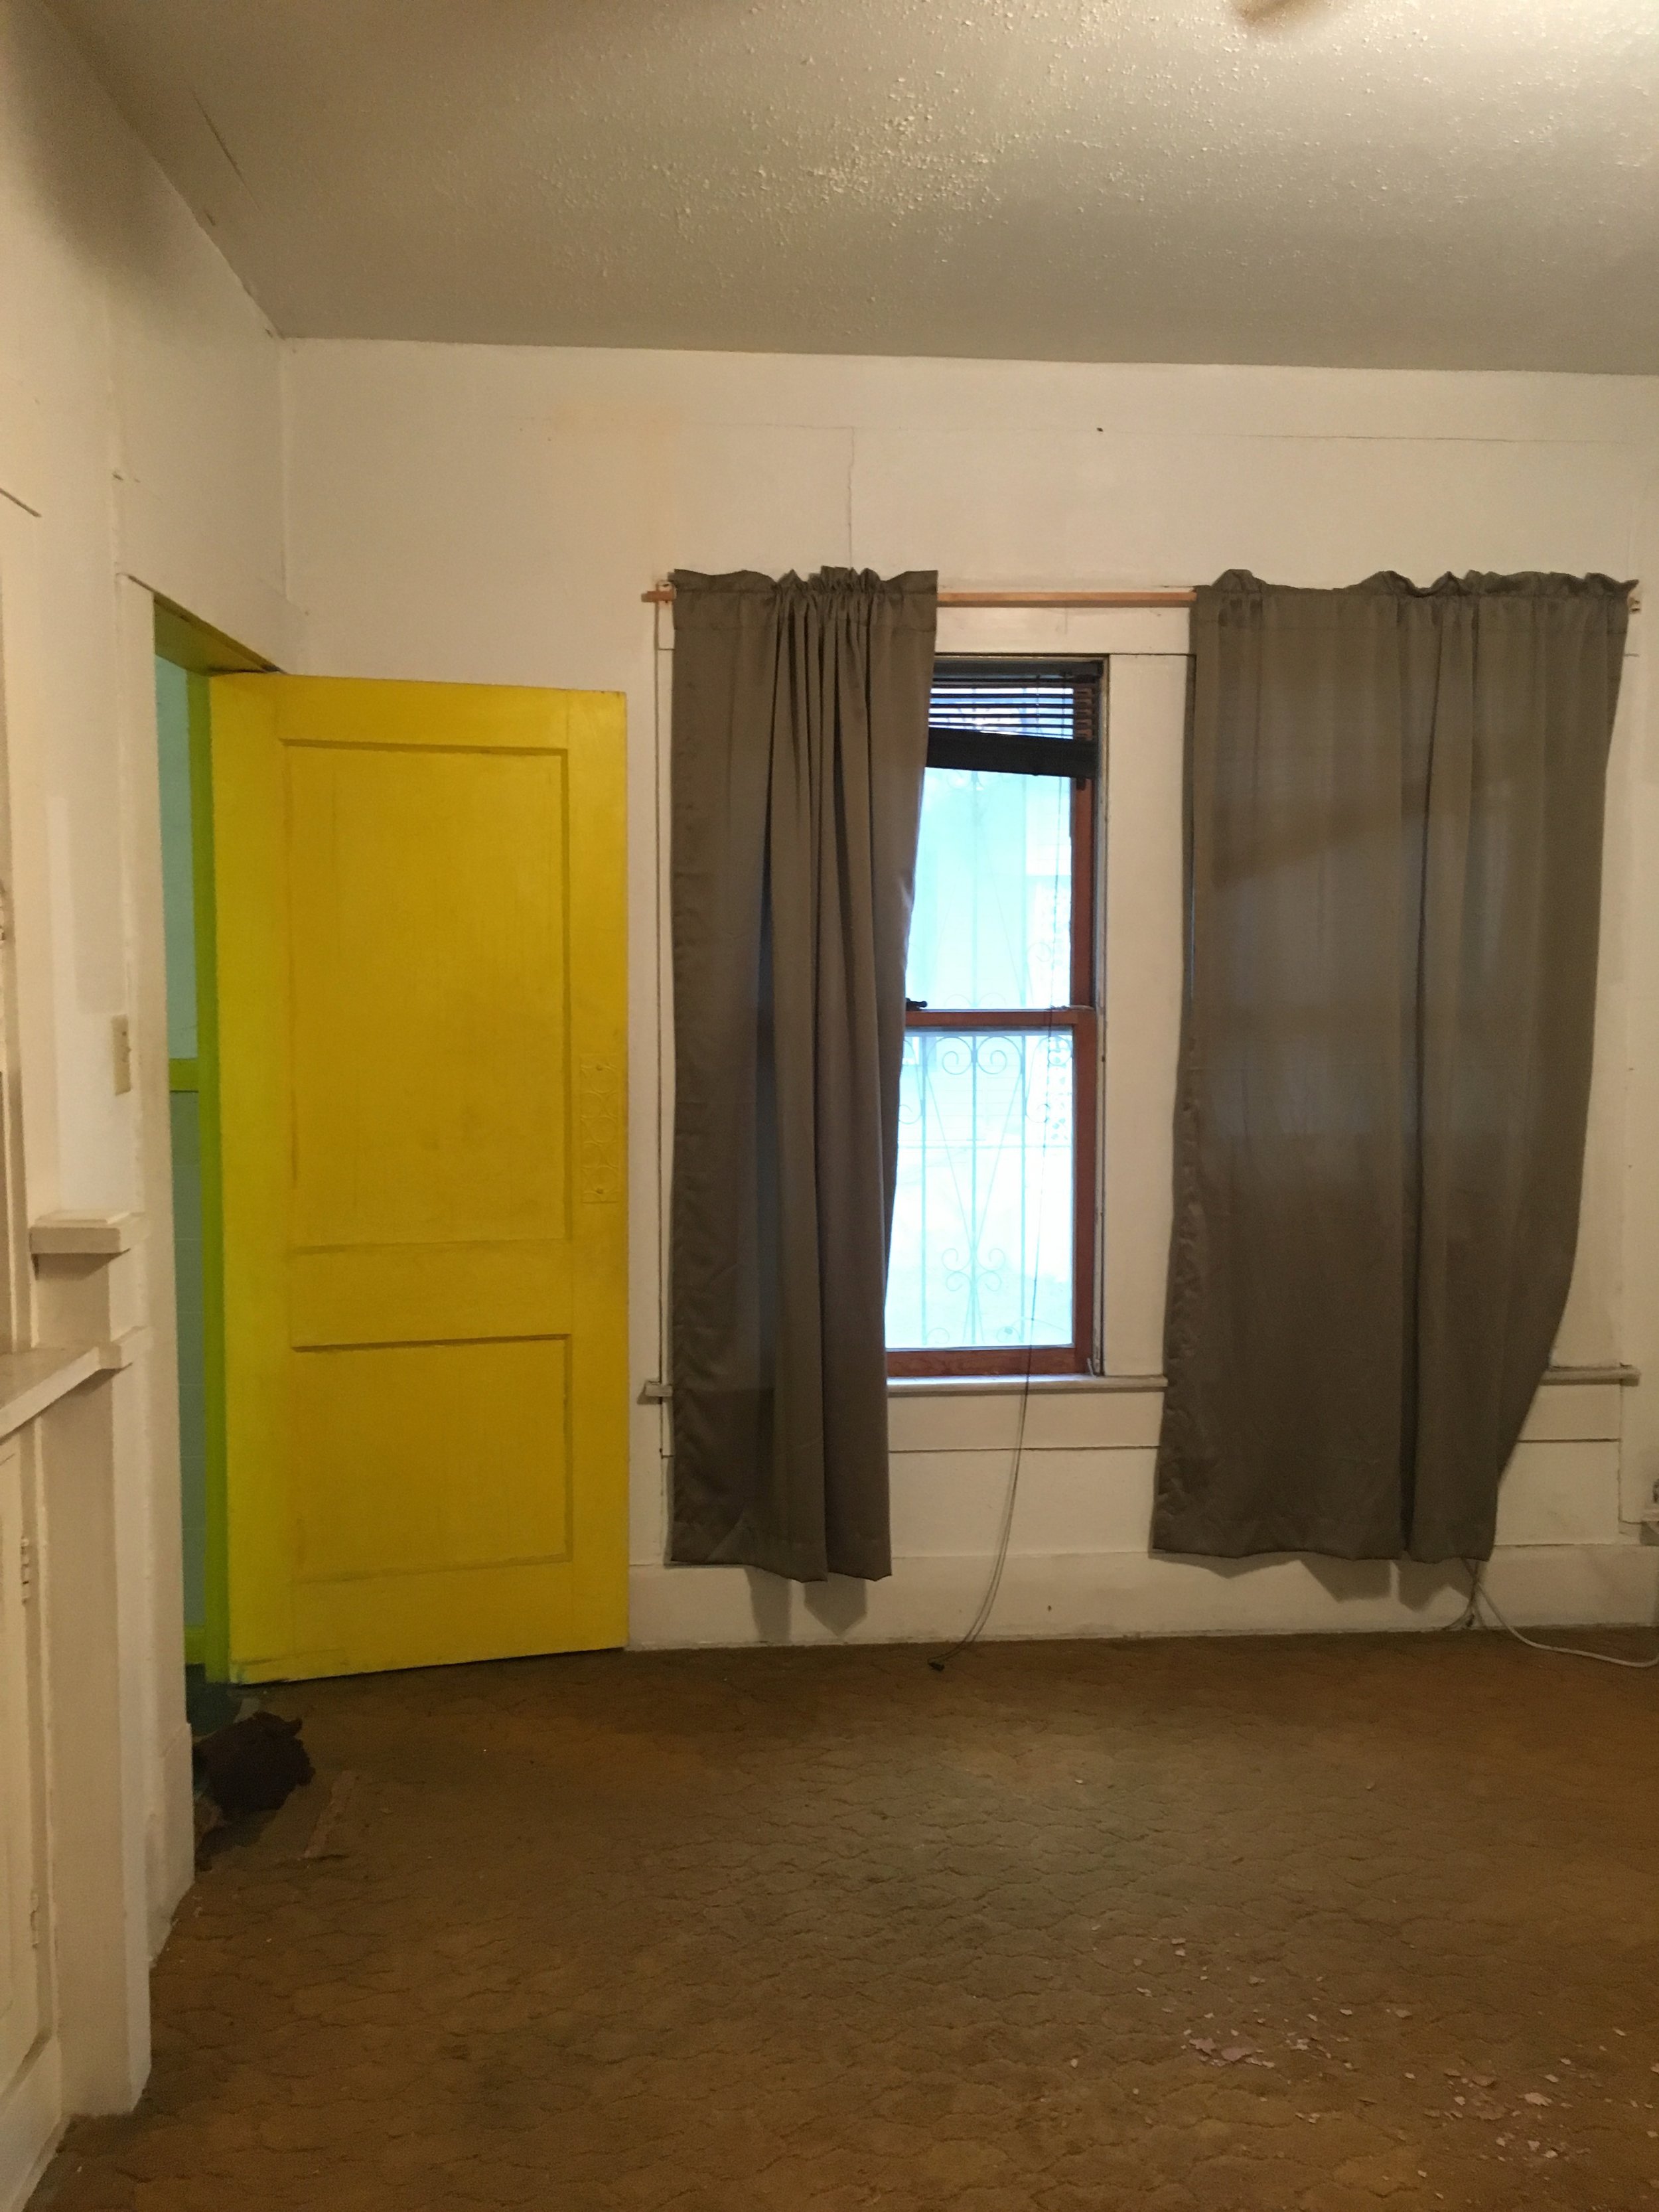
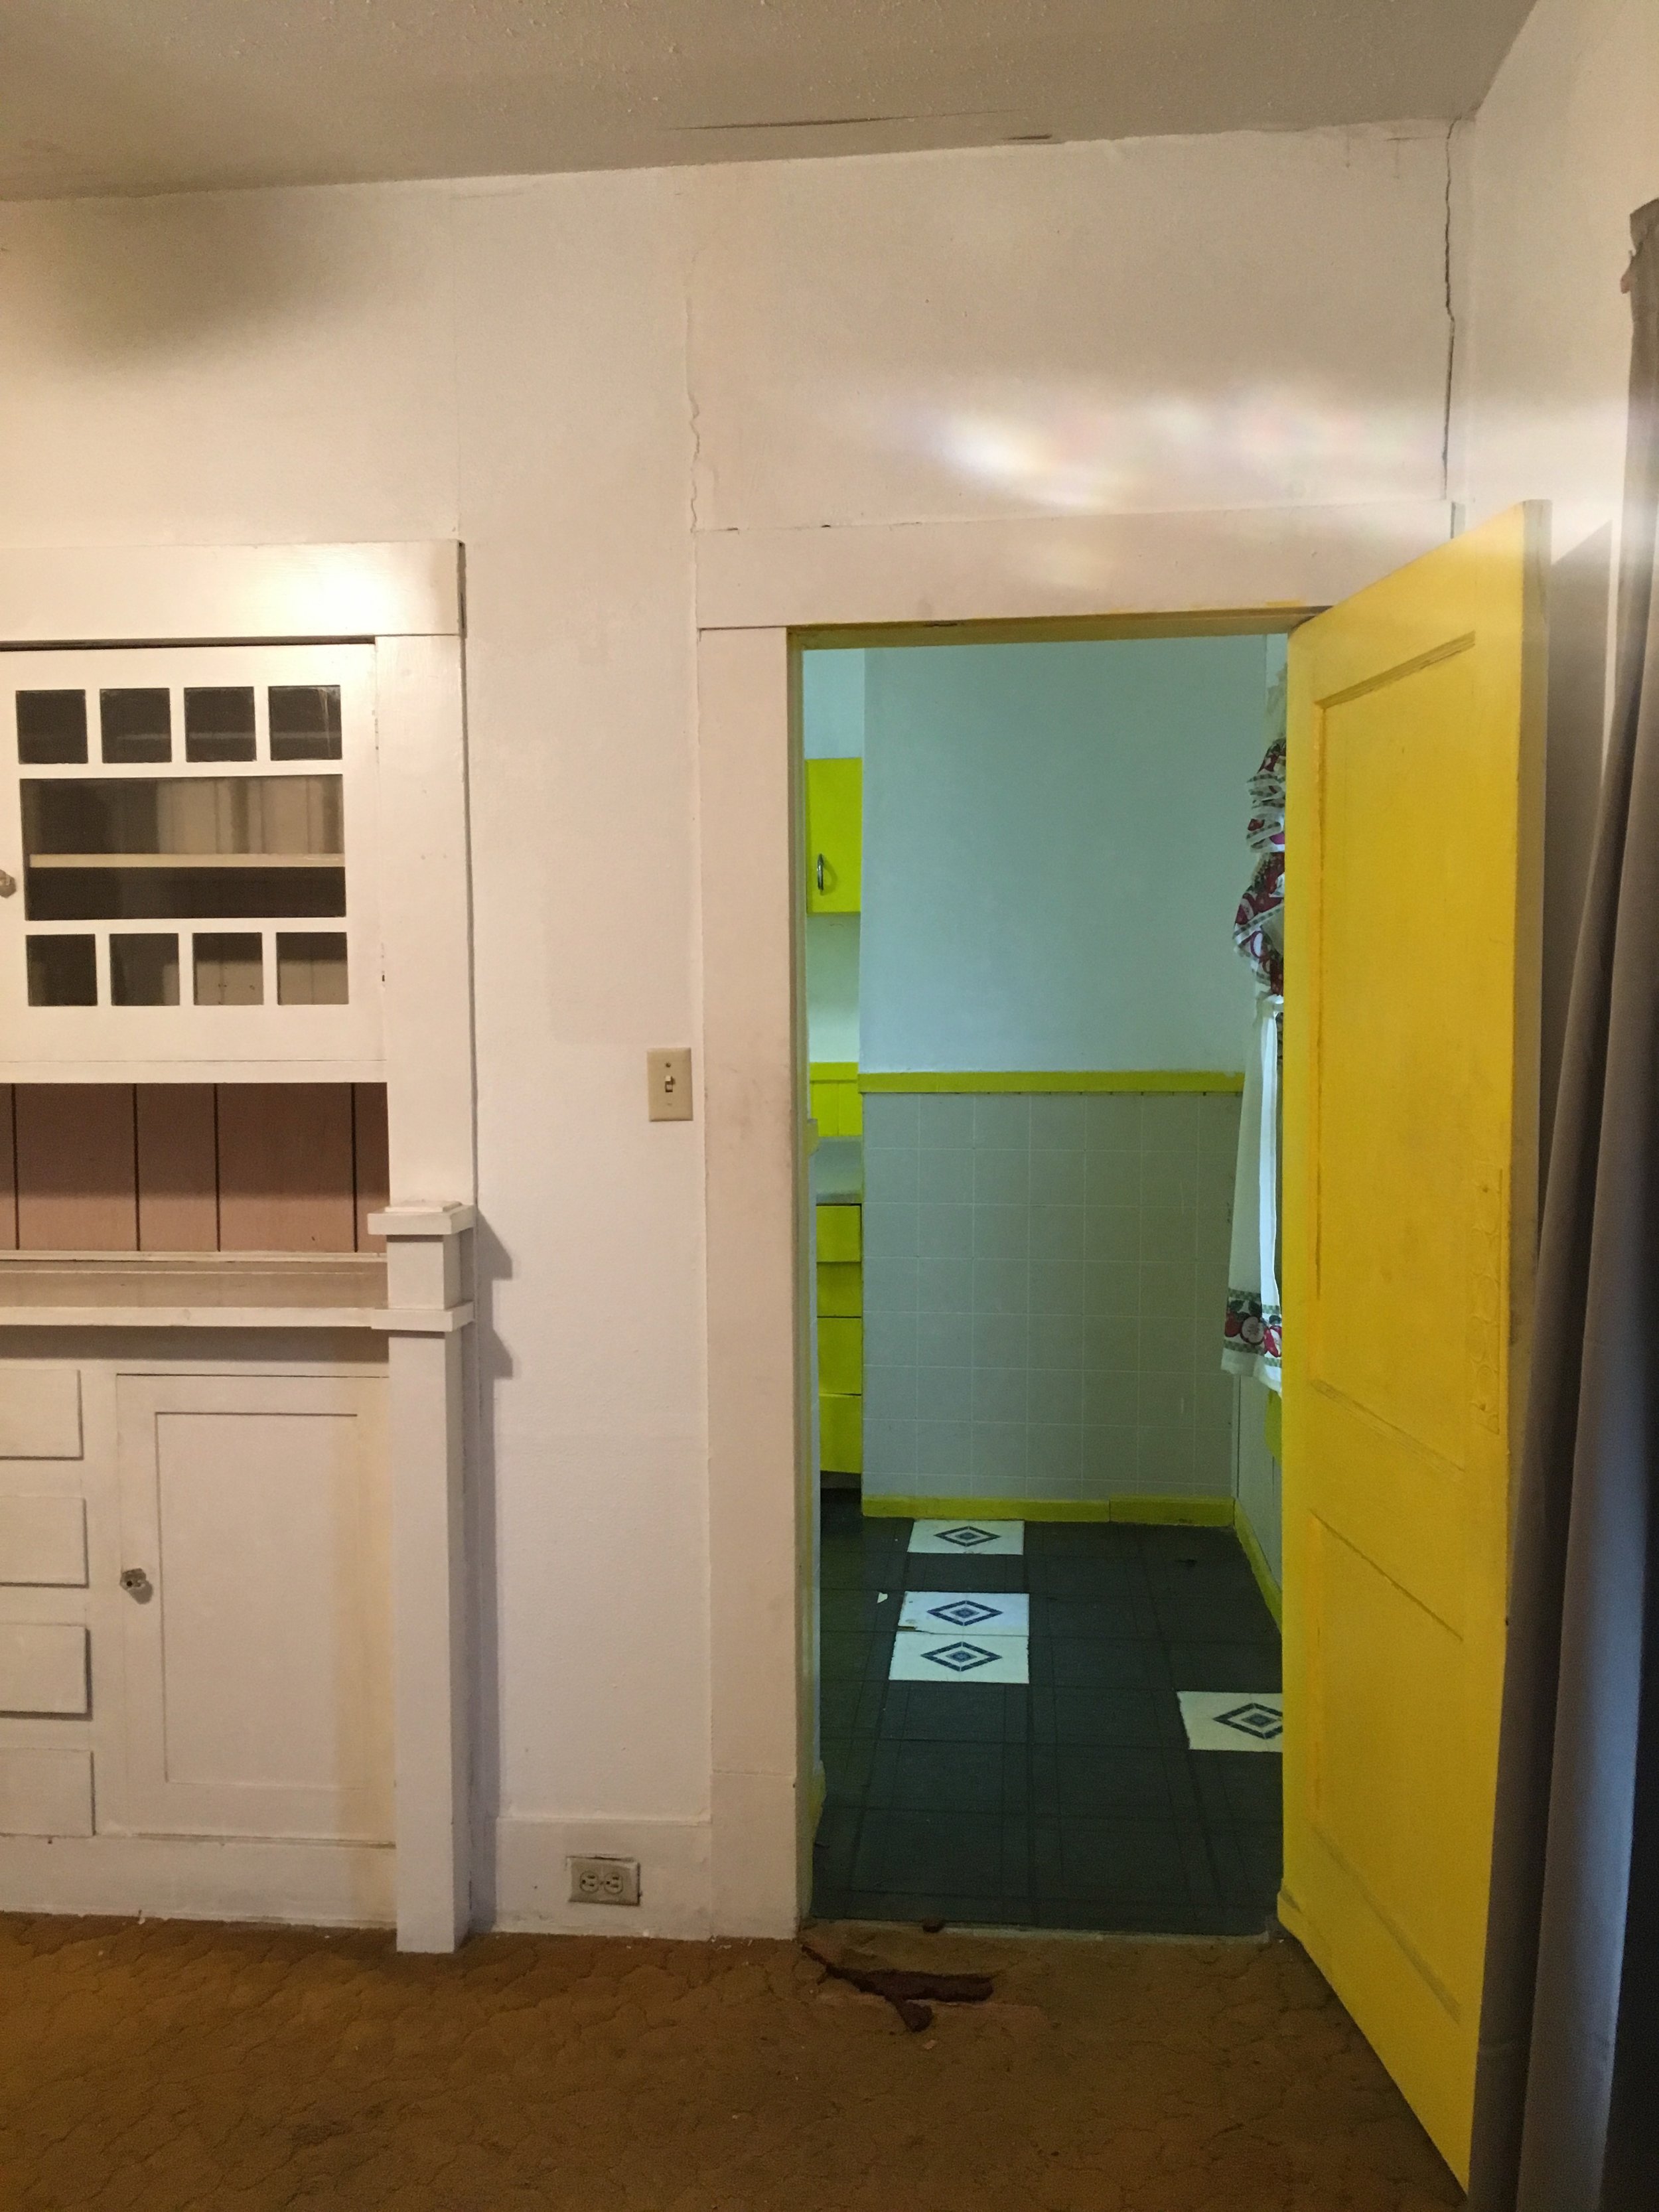
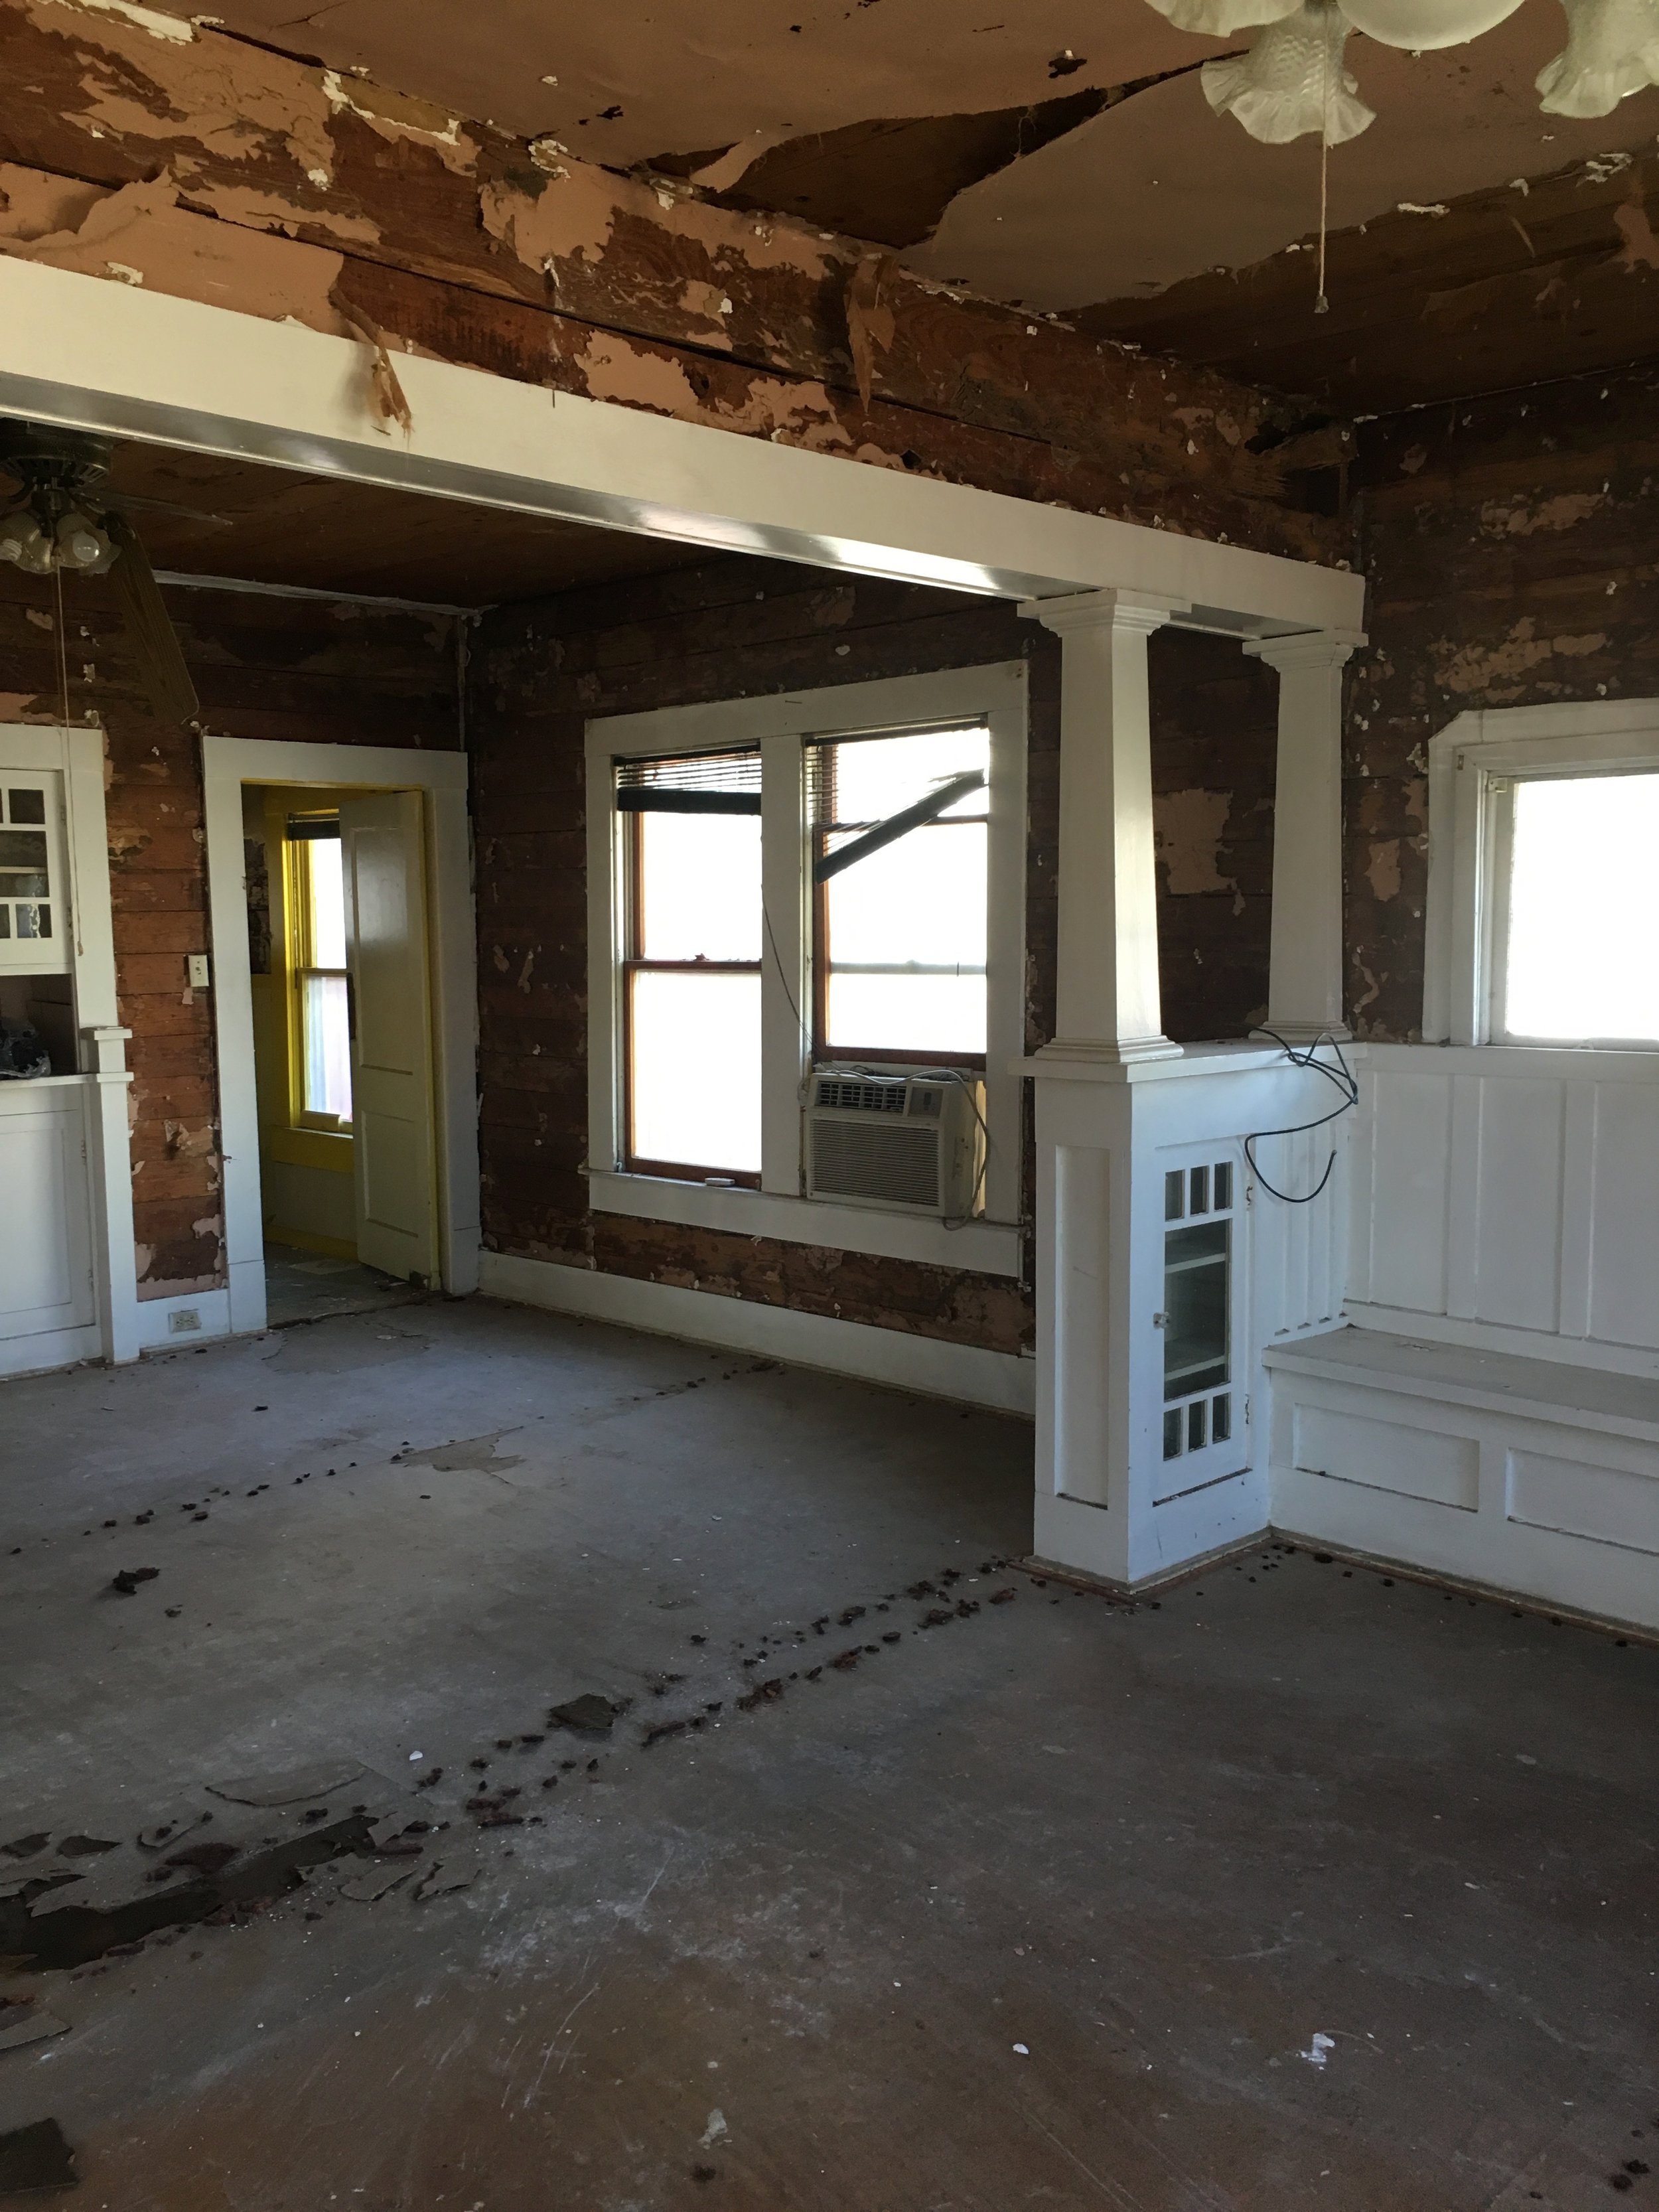
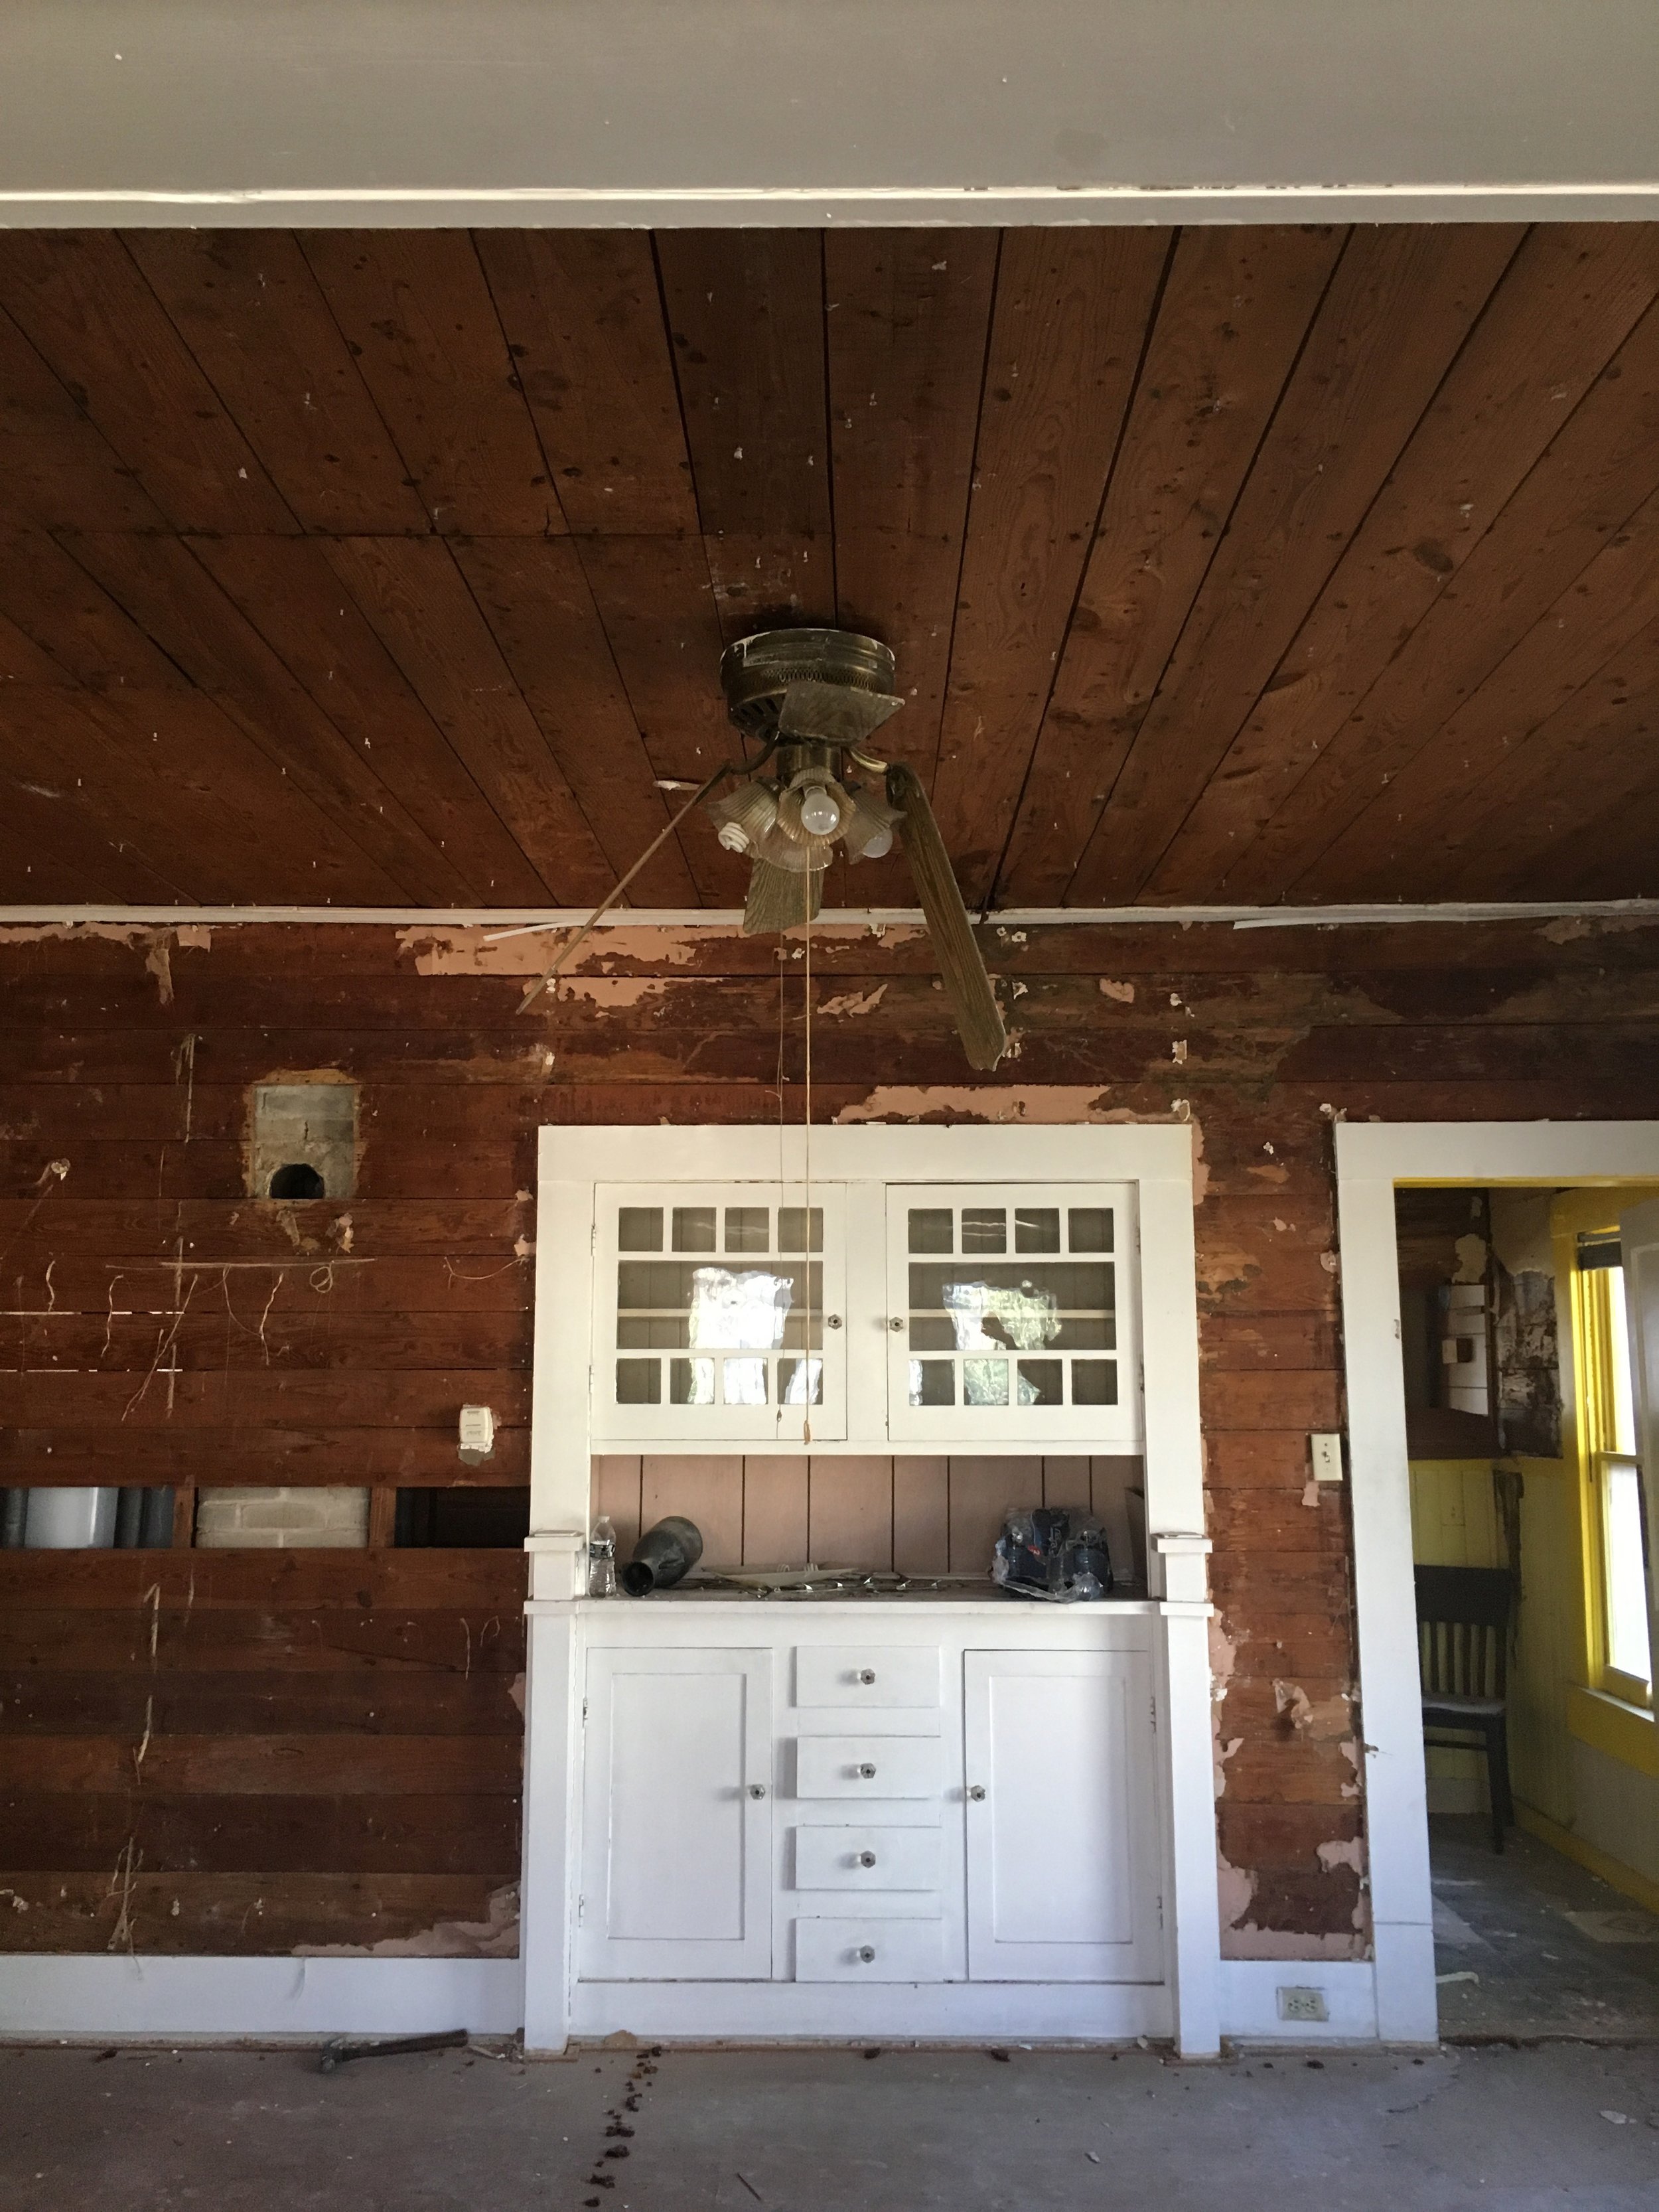
These photos were taken in the existing dining room. In the first image, we are standing in the dining room, with the kitchen wall to the left (the wall with the yellow door). The second image is taken standing in the dining room looking into the existing kitchen. The wall with the yellow door is the wall we removed to open up the kitchen and dining room.
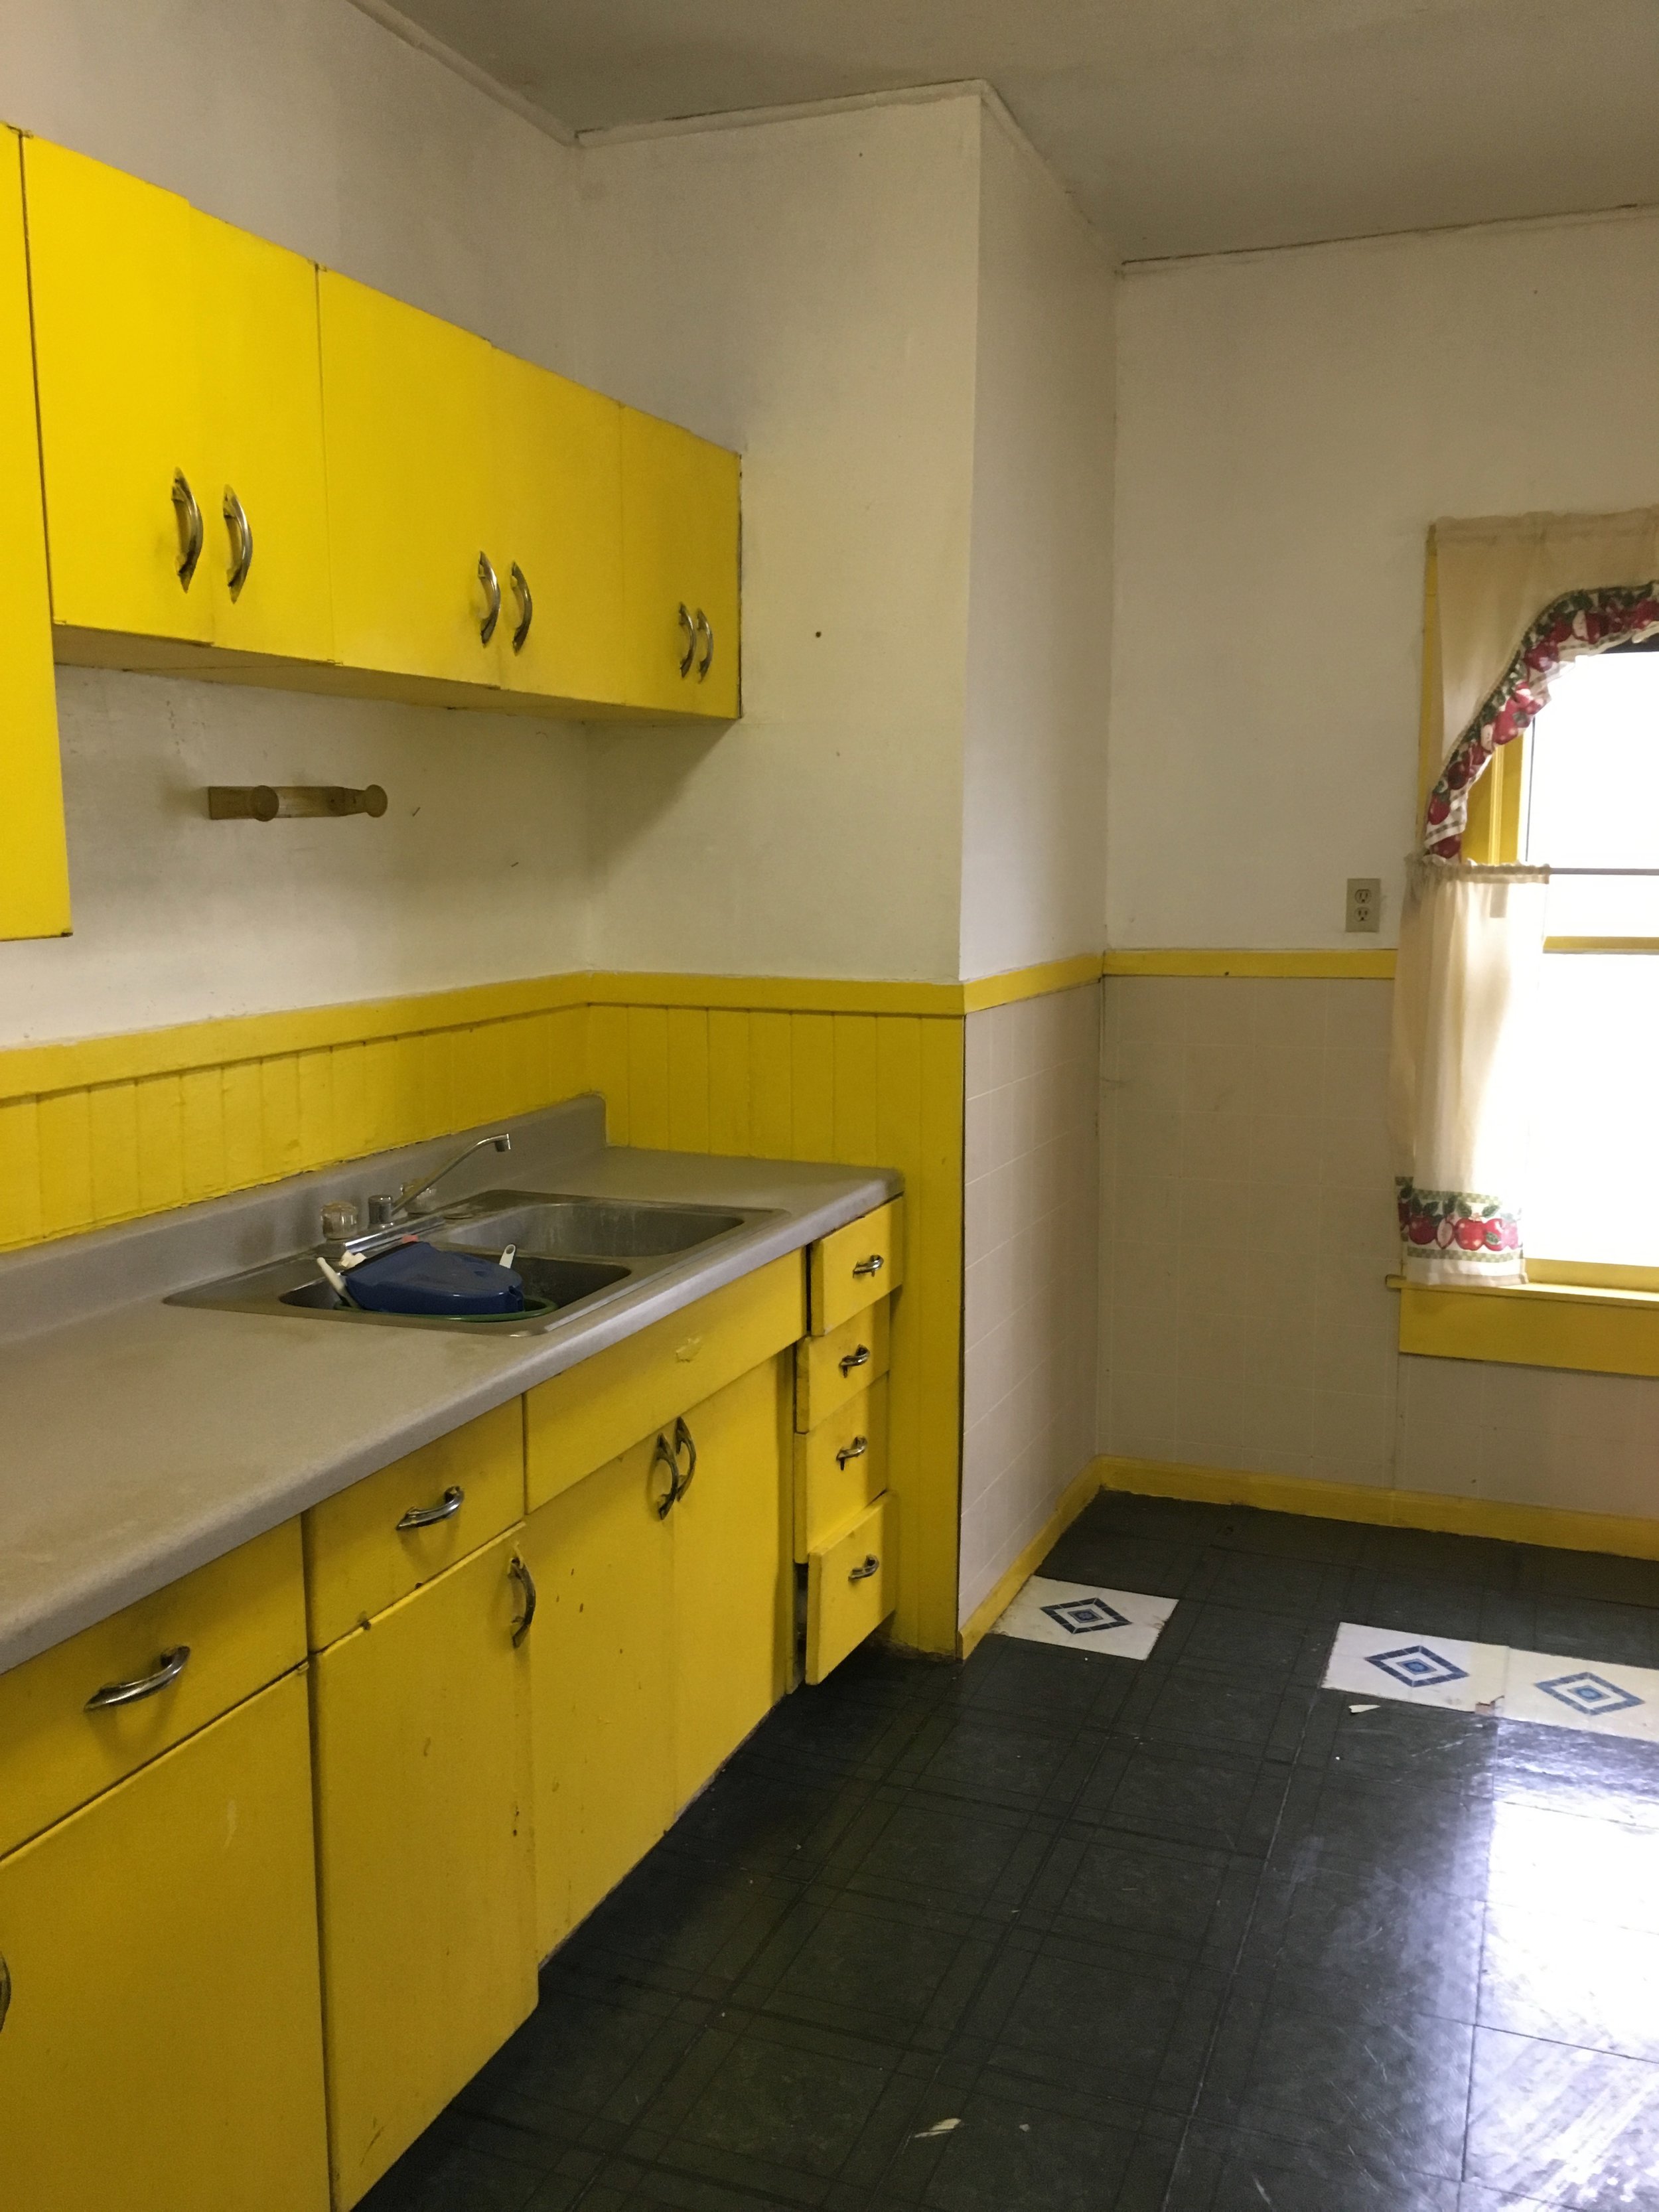

The kitchen!! How about those yellow metal cabinets! If you look closely through the kitchen images you will notice there are many important items missing, i.e. refrigerator, range, dishwasher, with no obvious place to put them.
The middle image, is showing you the wall between the kitchen and the dining room. This is the wall we will eventually take out.
Admittedly, these photos are terrible, however, I wanted to include the picture on the far right to give some perspective of just how small the kitchen was, with no space for very important appliances.
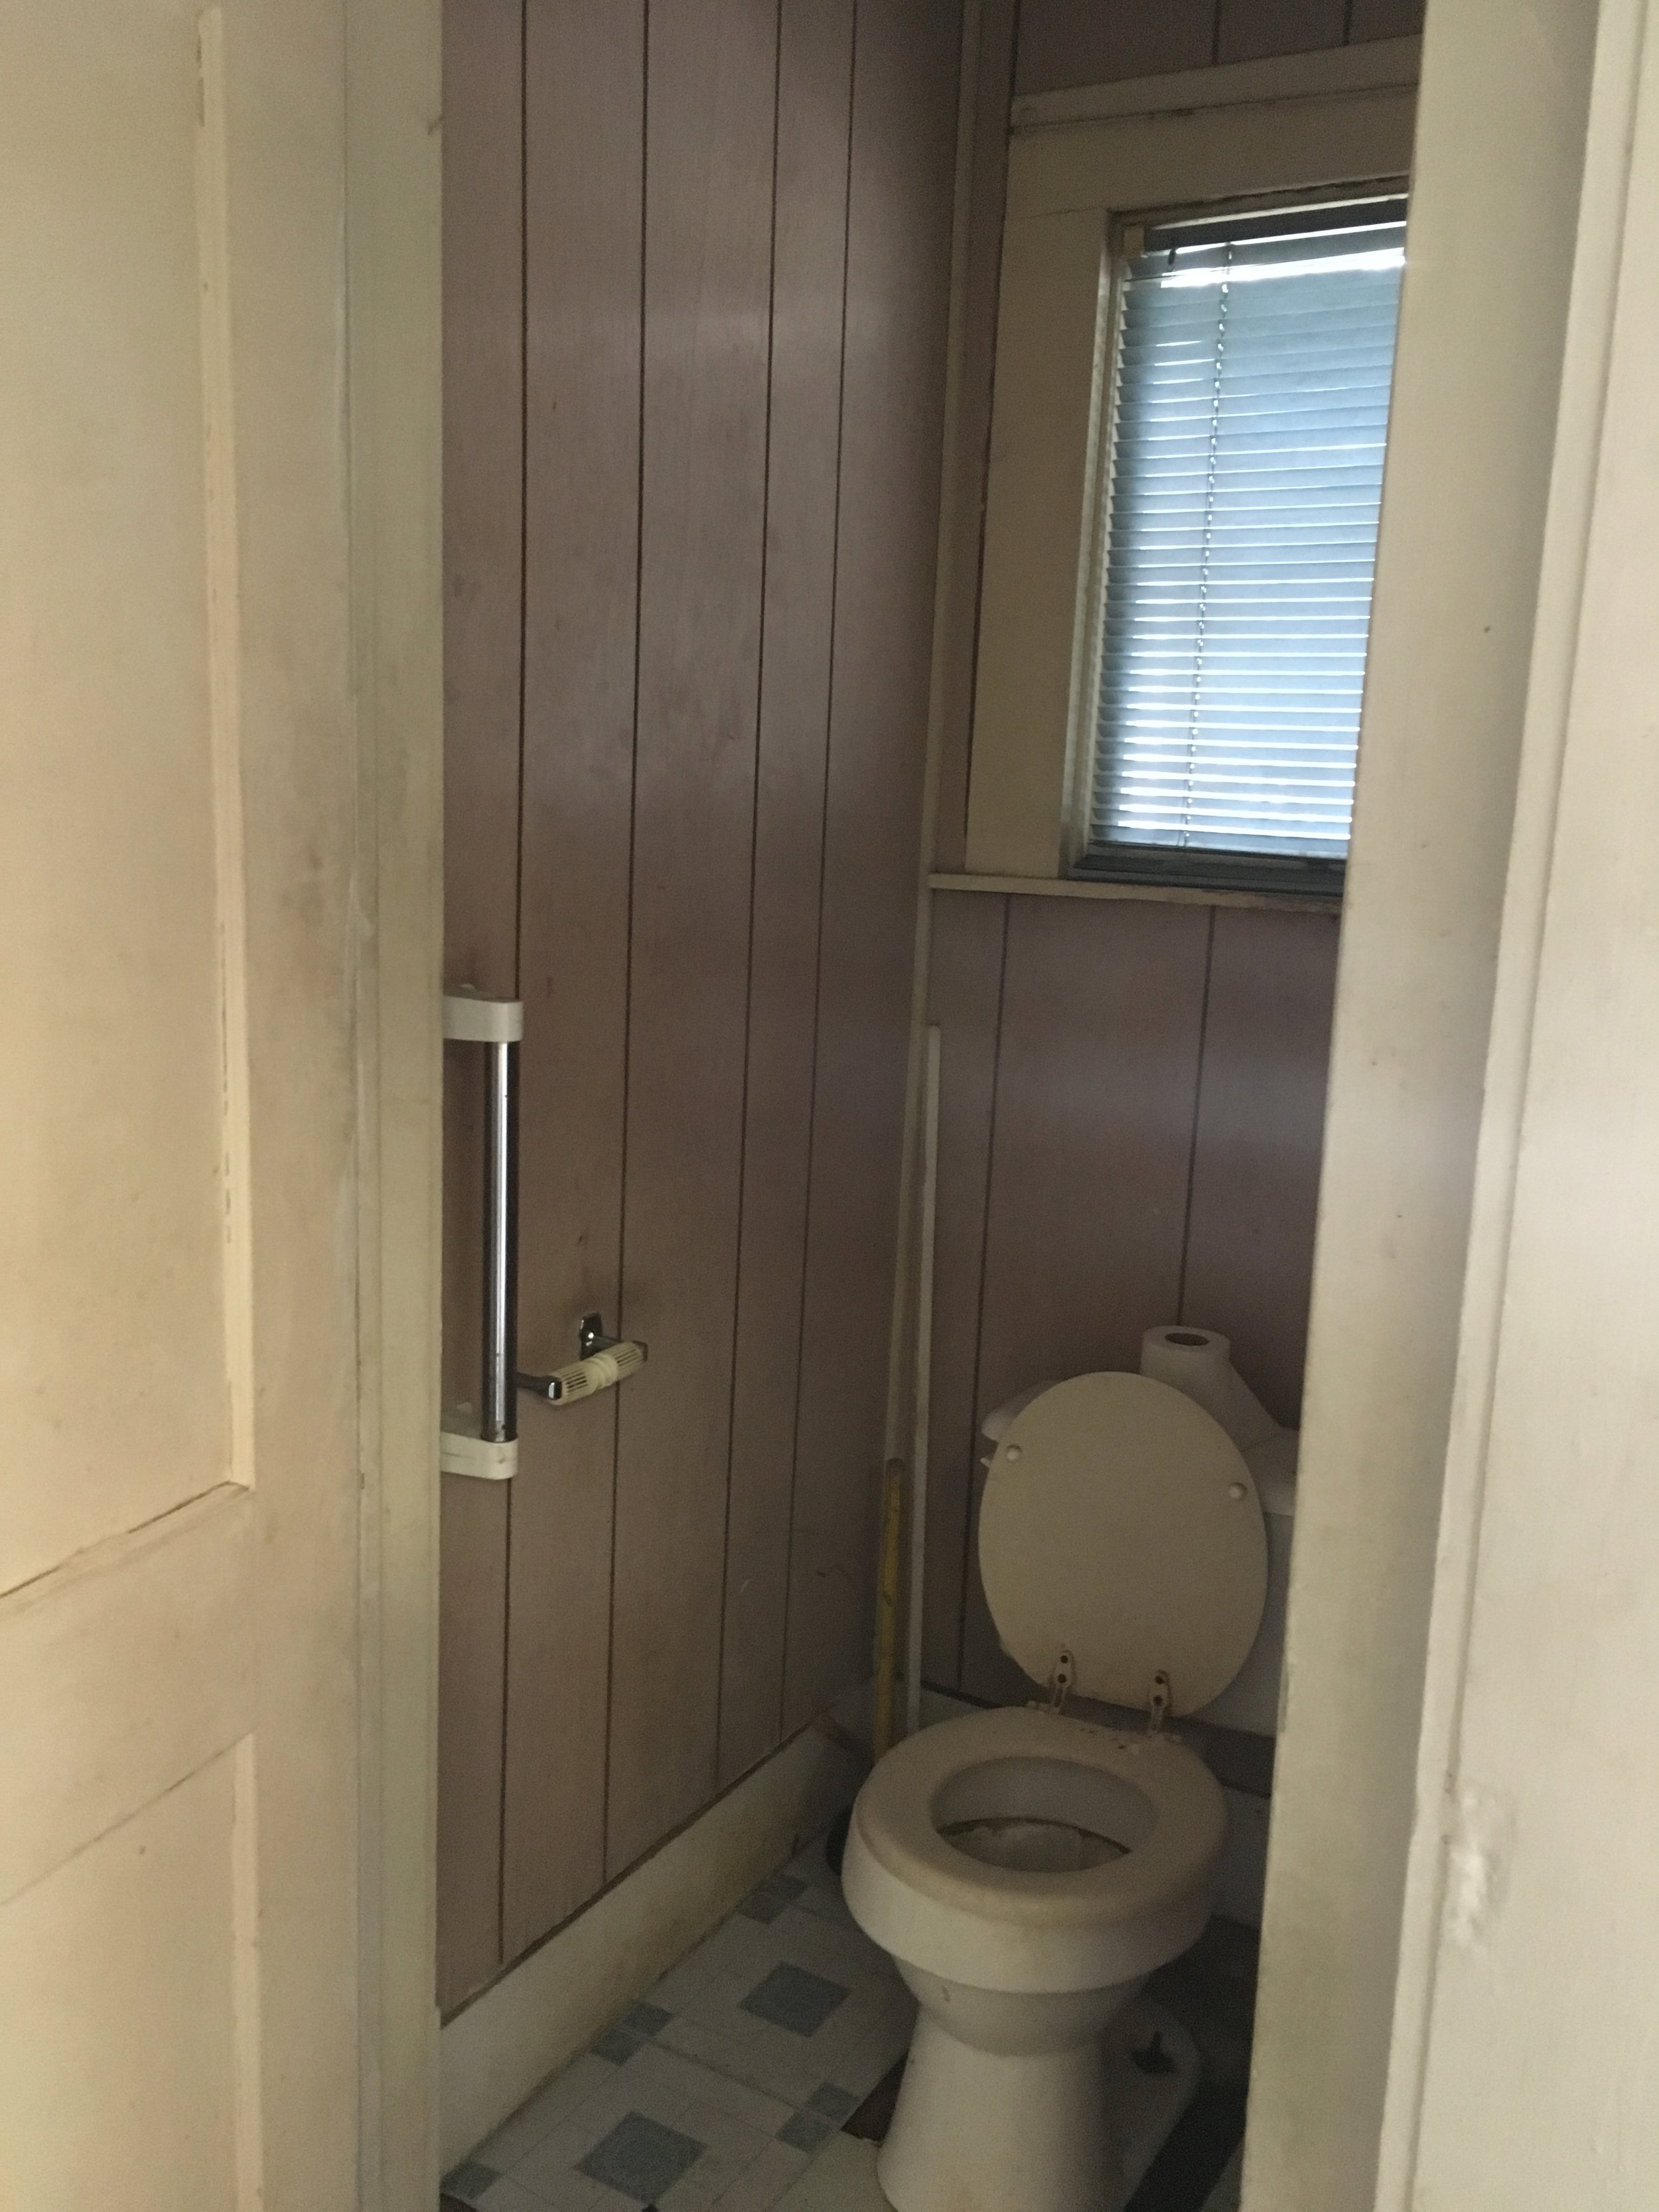
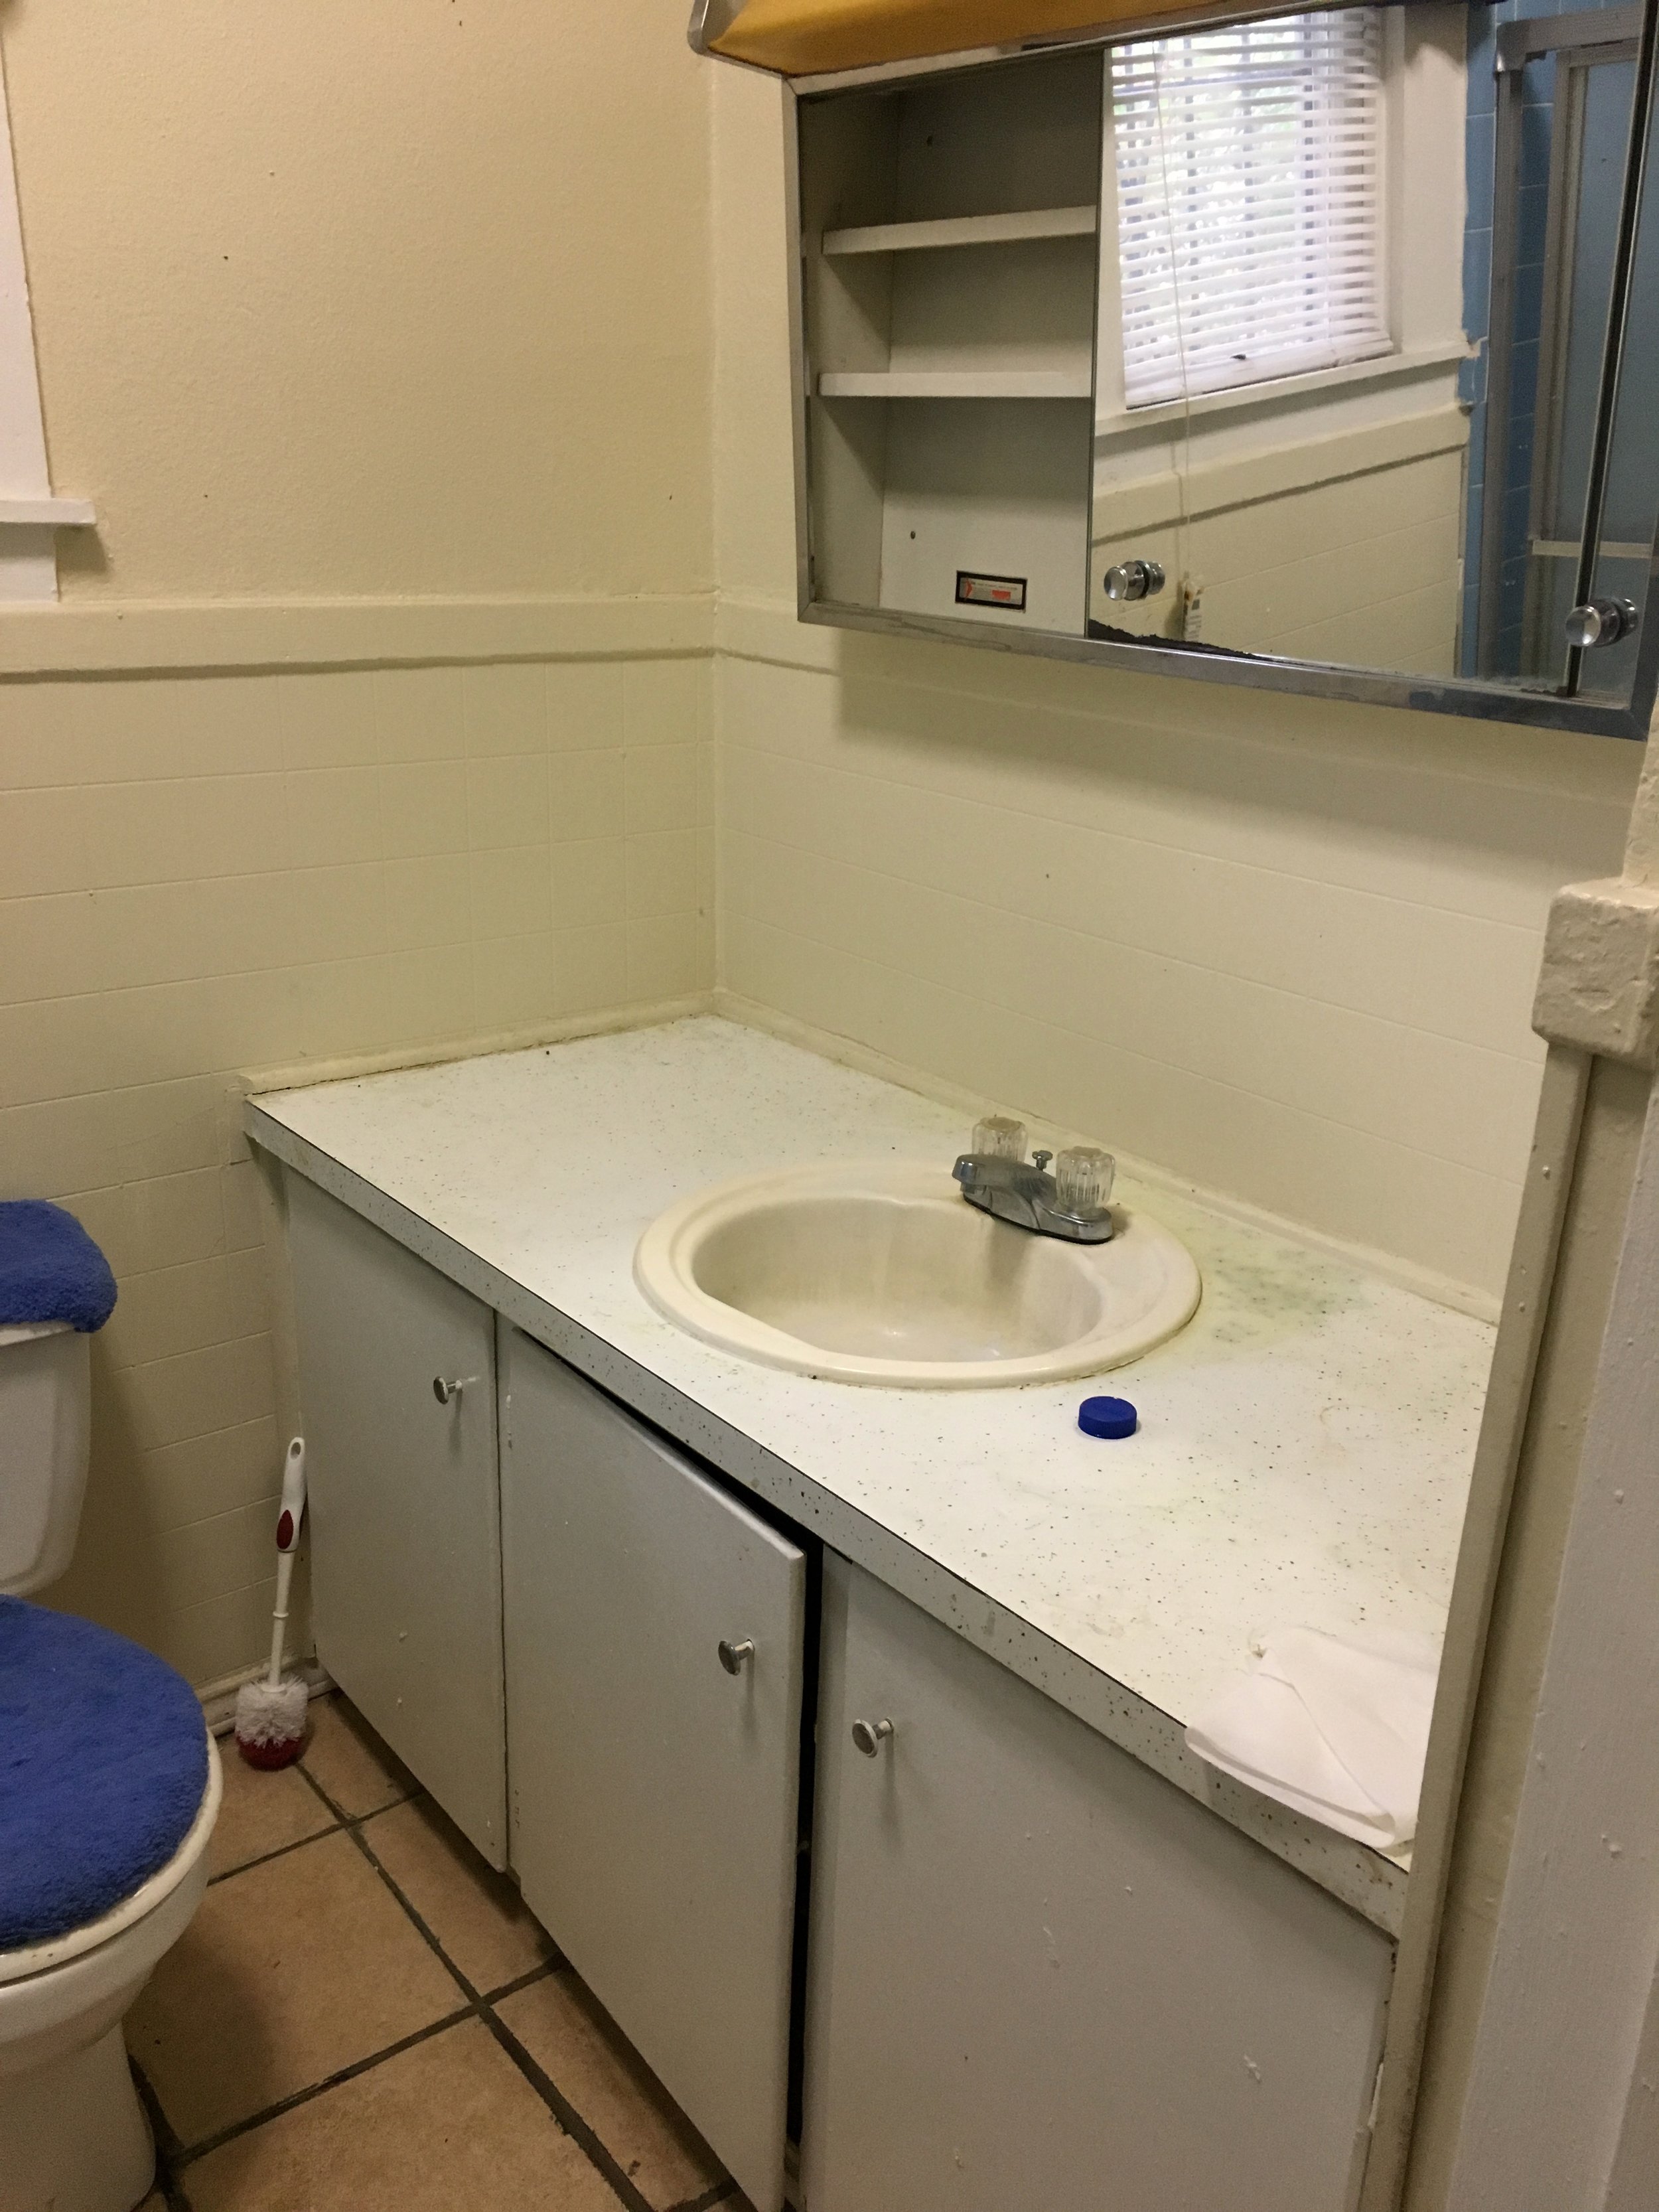
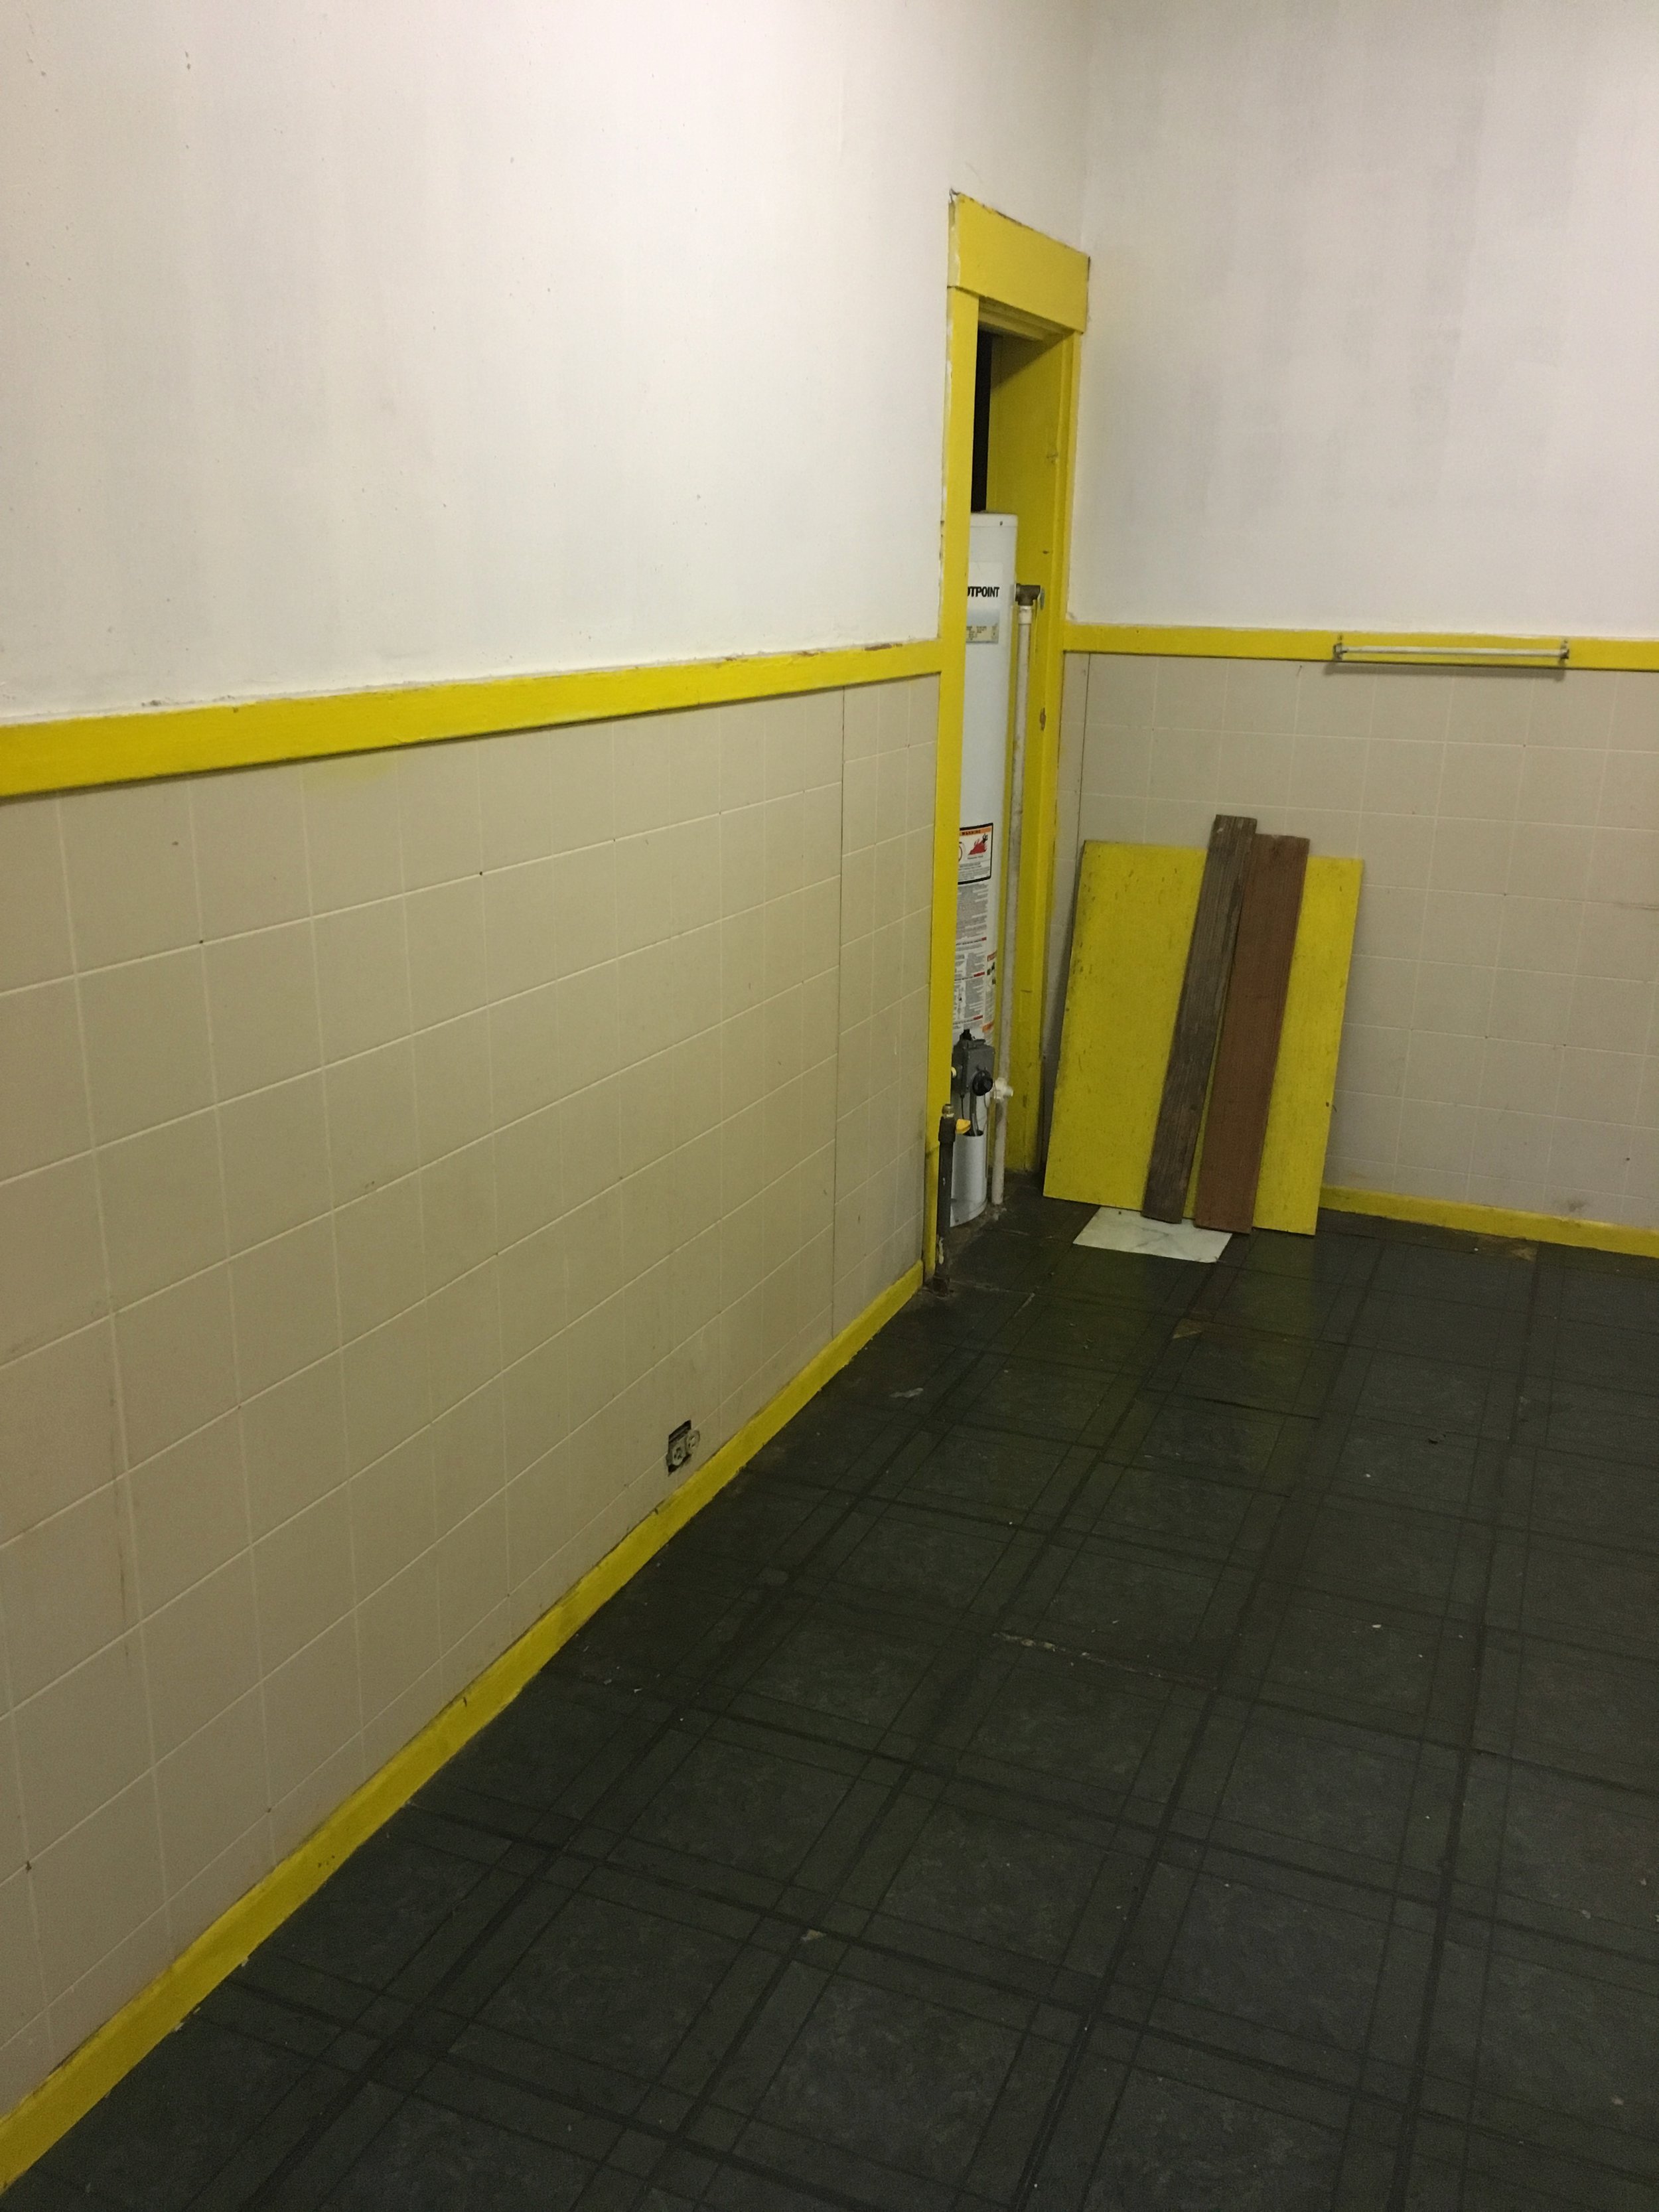
The house was listed as a 3 bedroom, 2 bathroom. Hilarious, as the picture on the left is showing the second bathroom. It is merely a toilet in a closet. But this will later become a perfect spot for a washer and dryer.
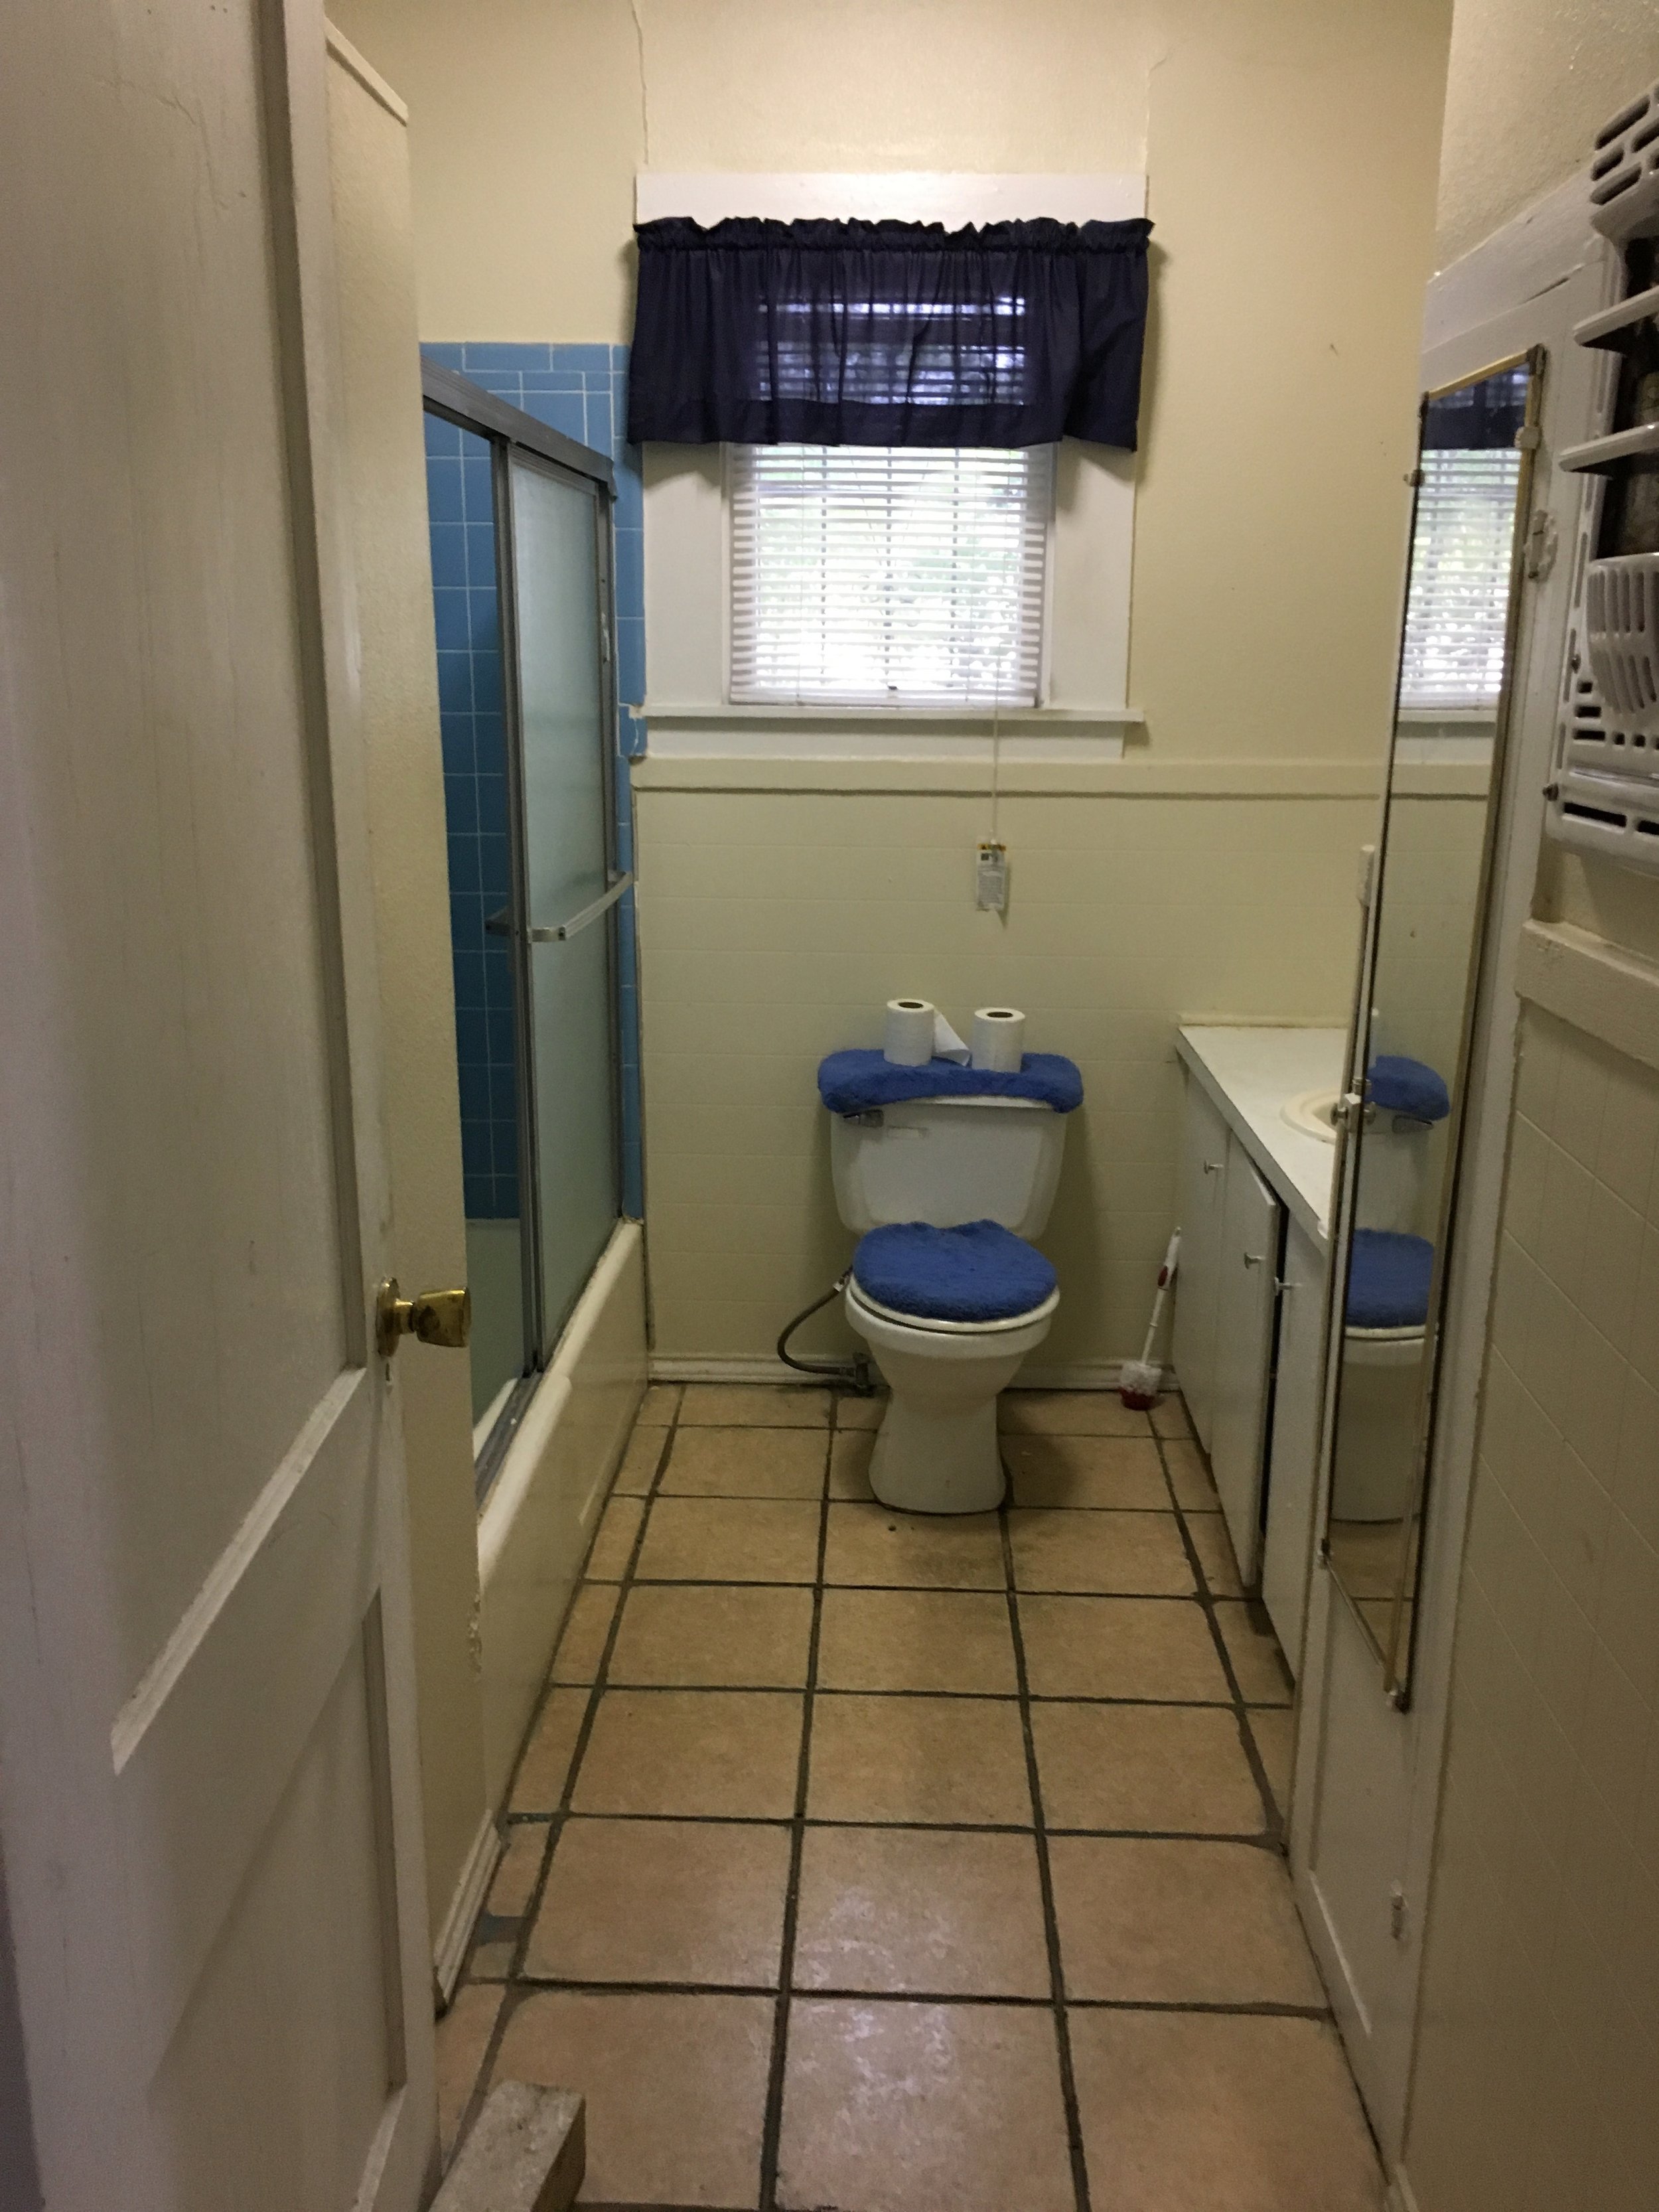
The second and third pictures are showing the main bathroom. We reconfigure this bathroom to feel more open.
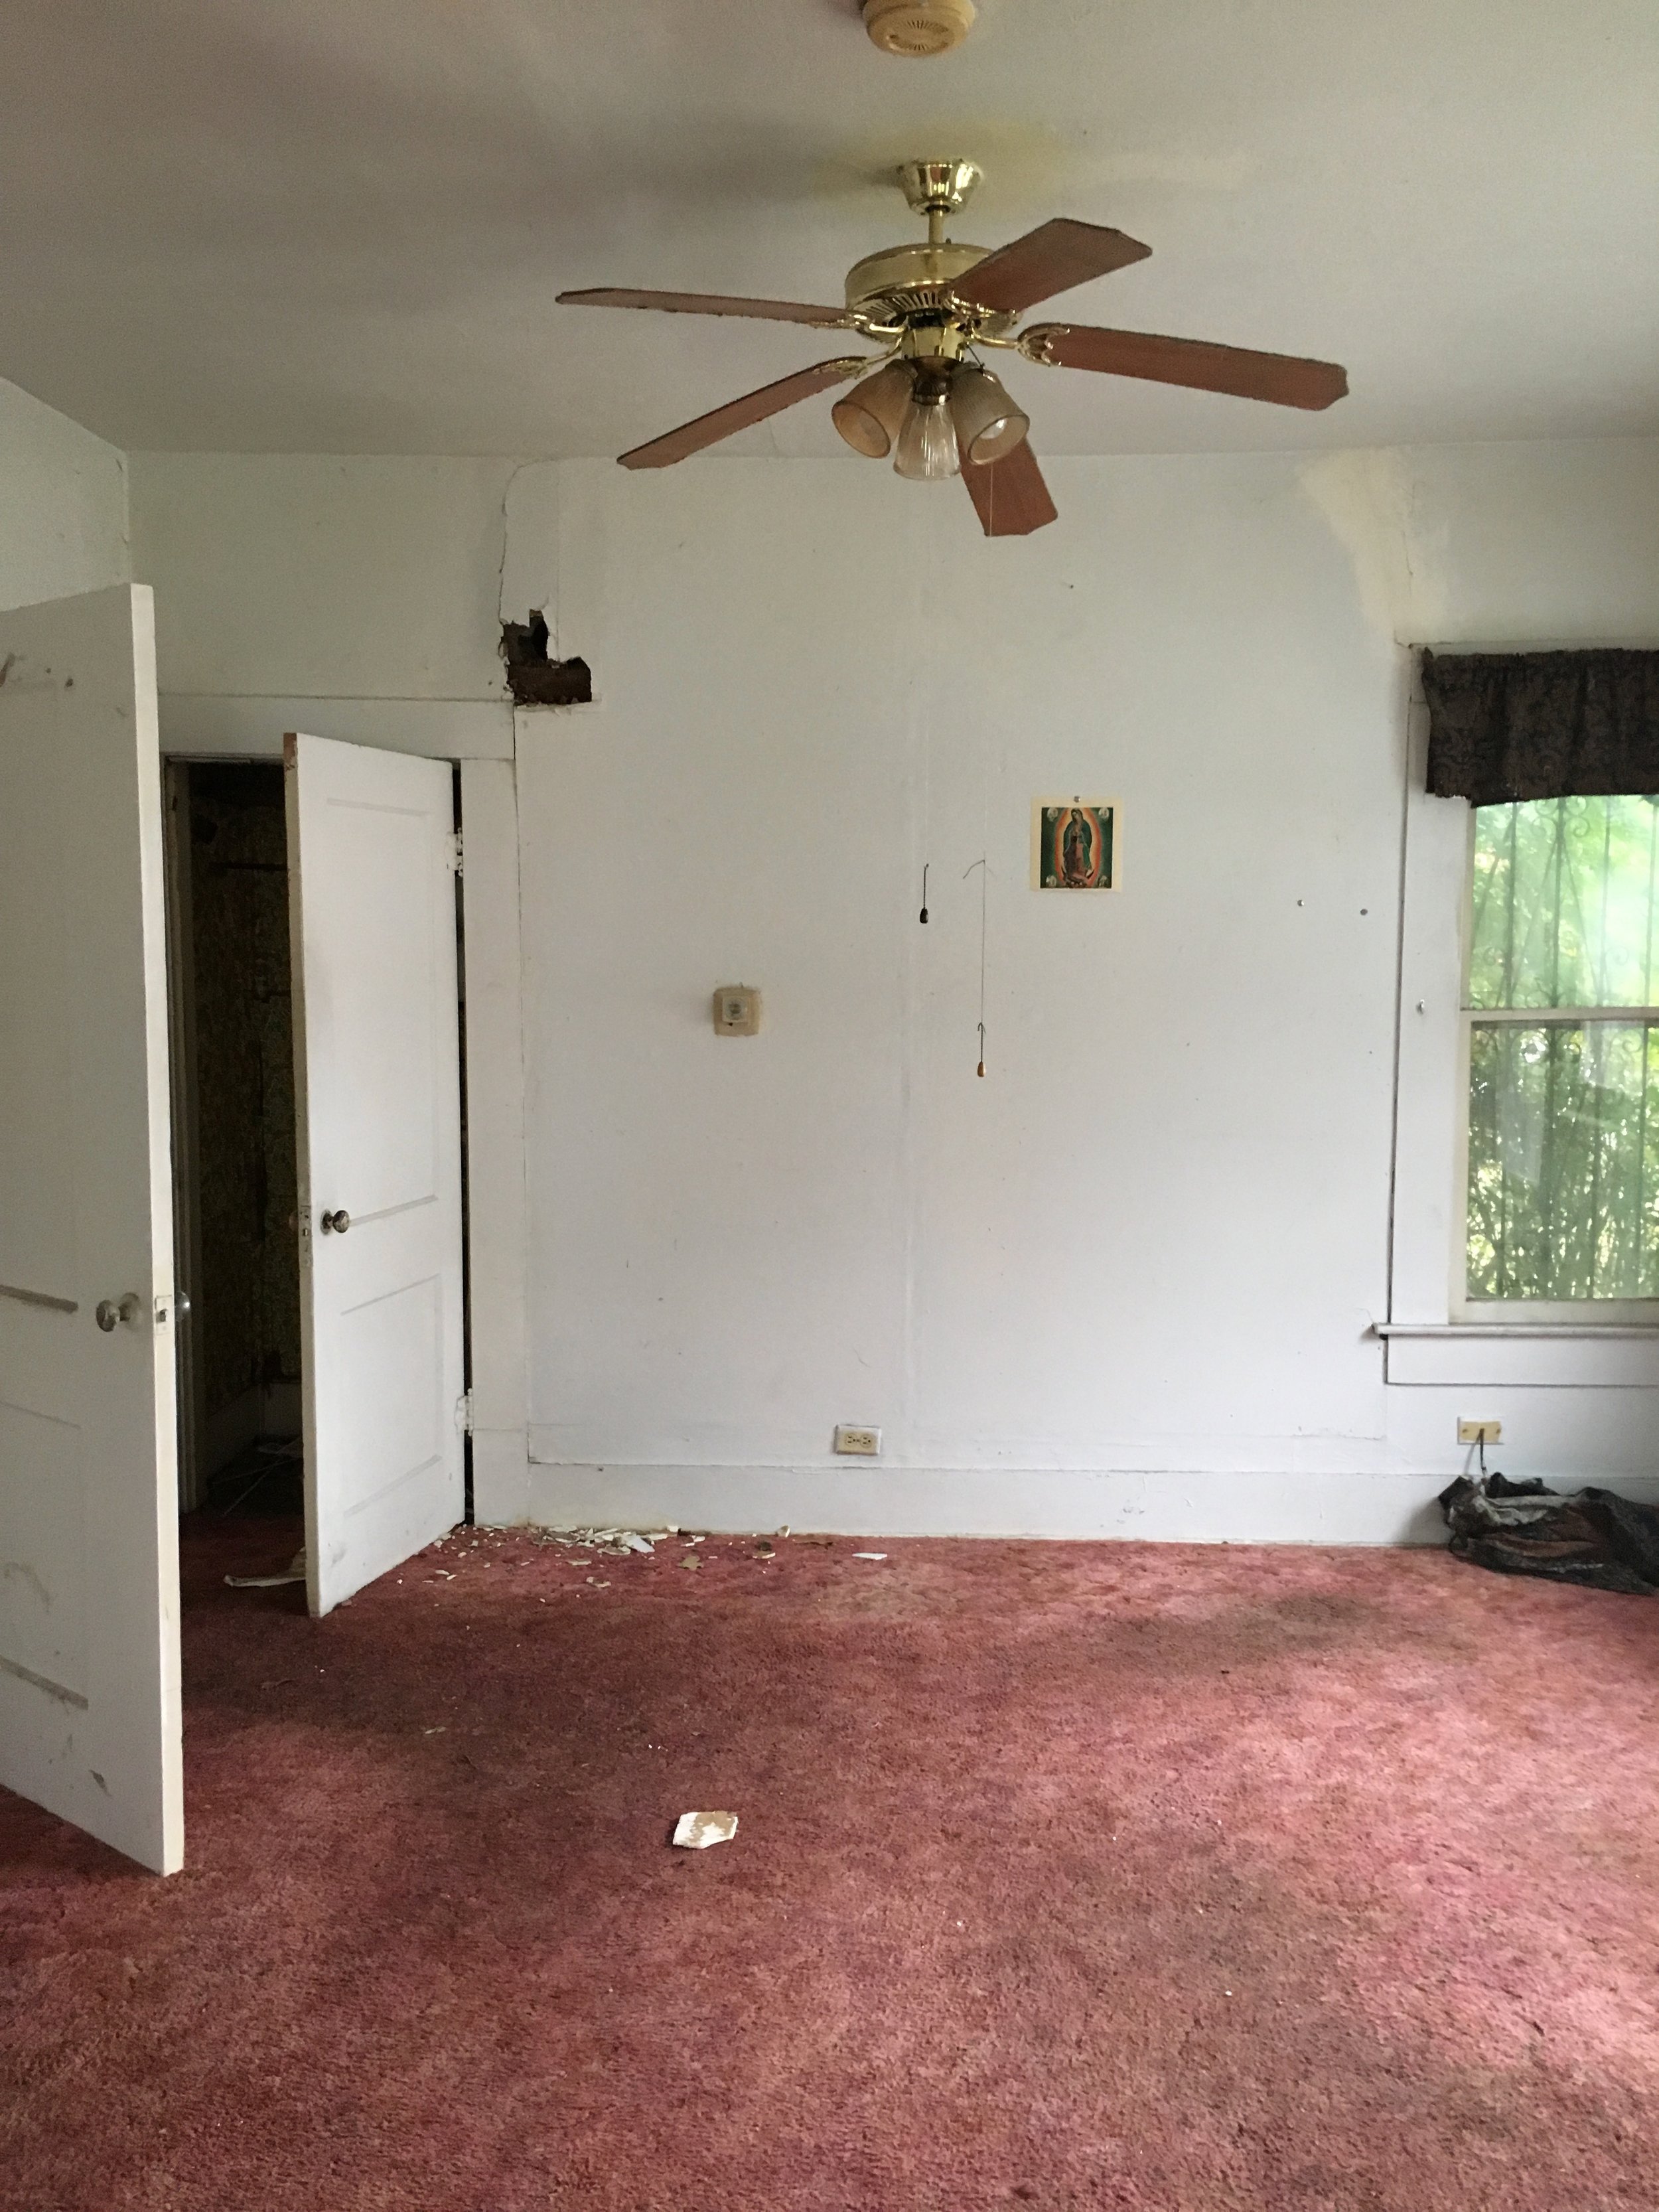
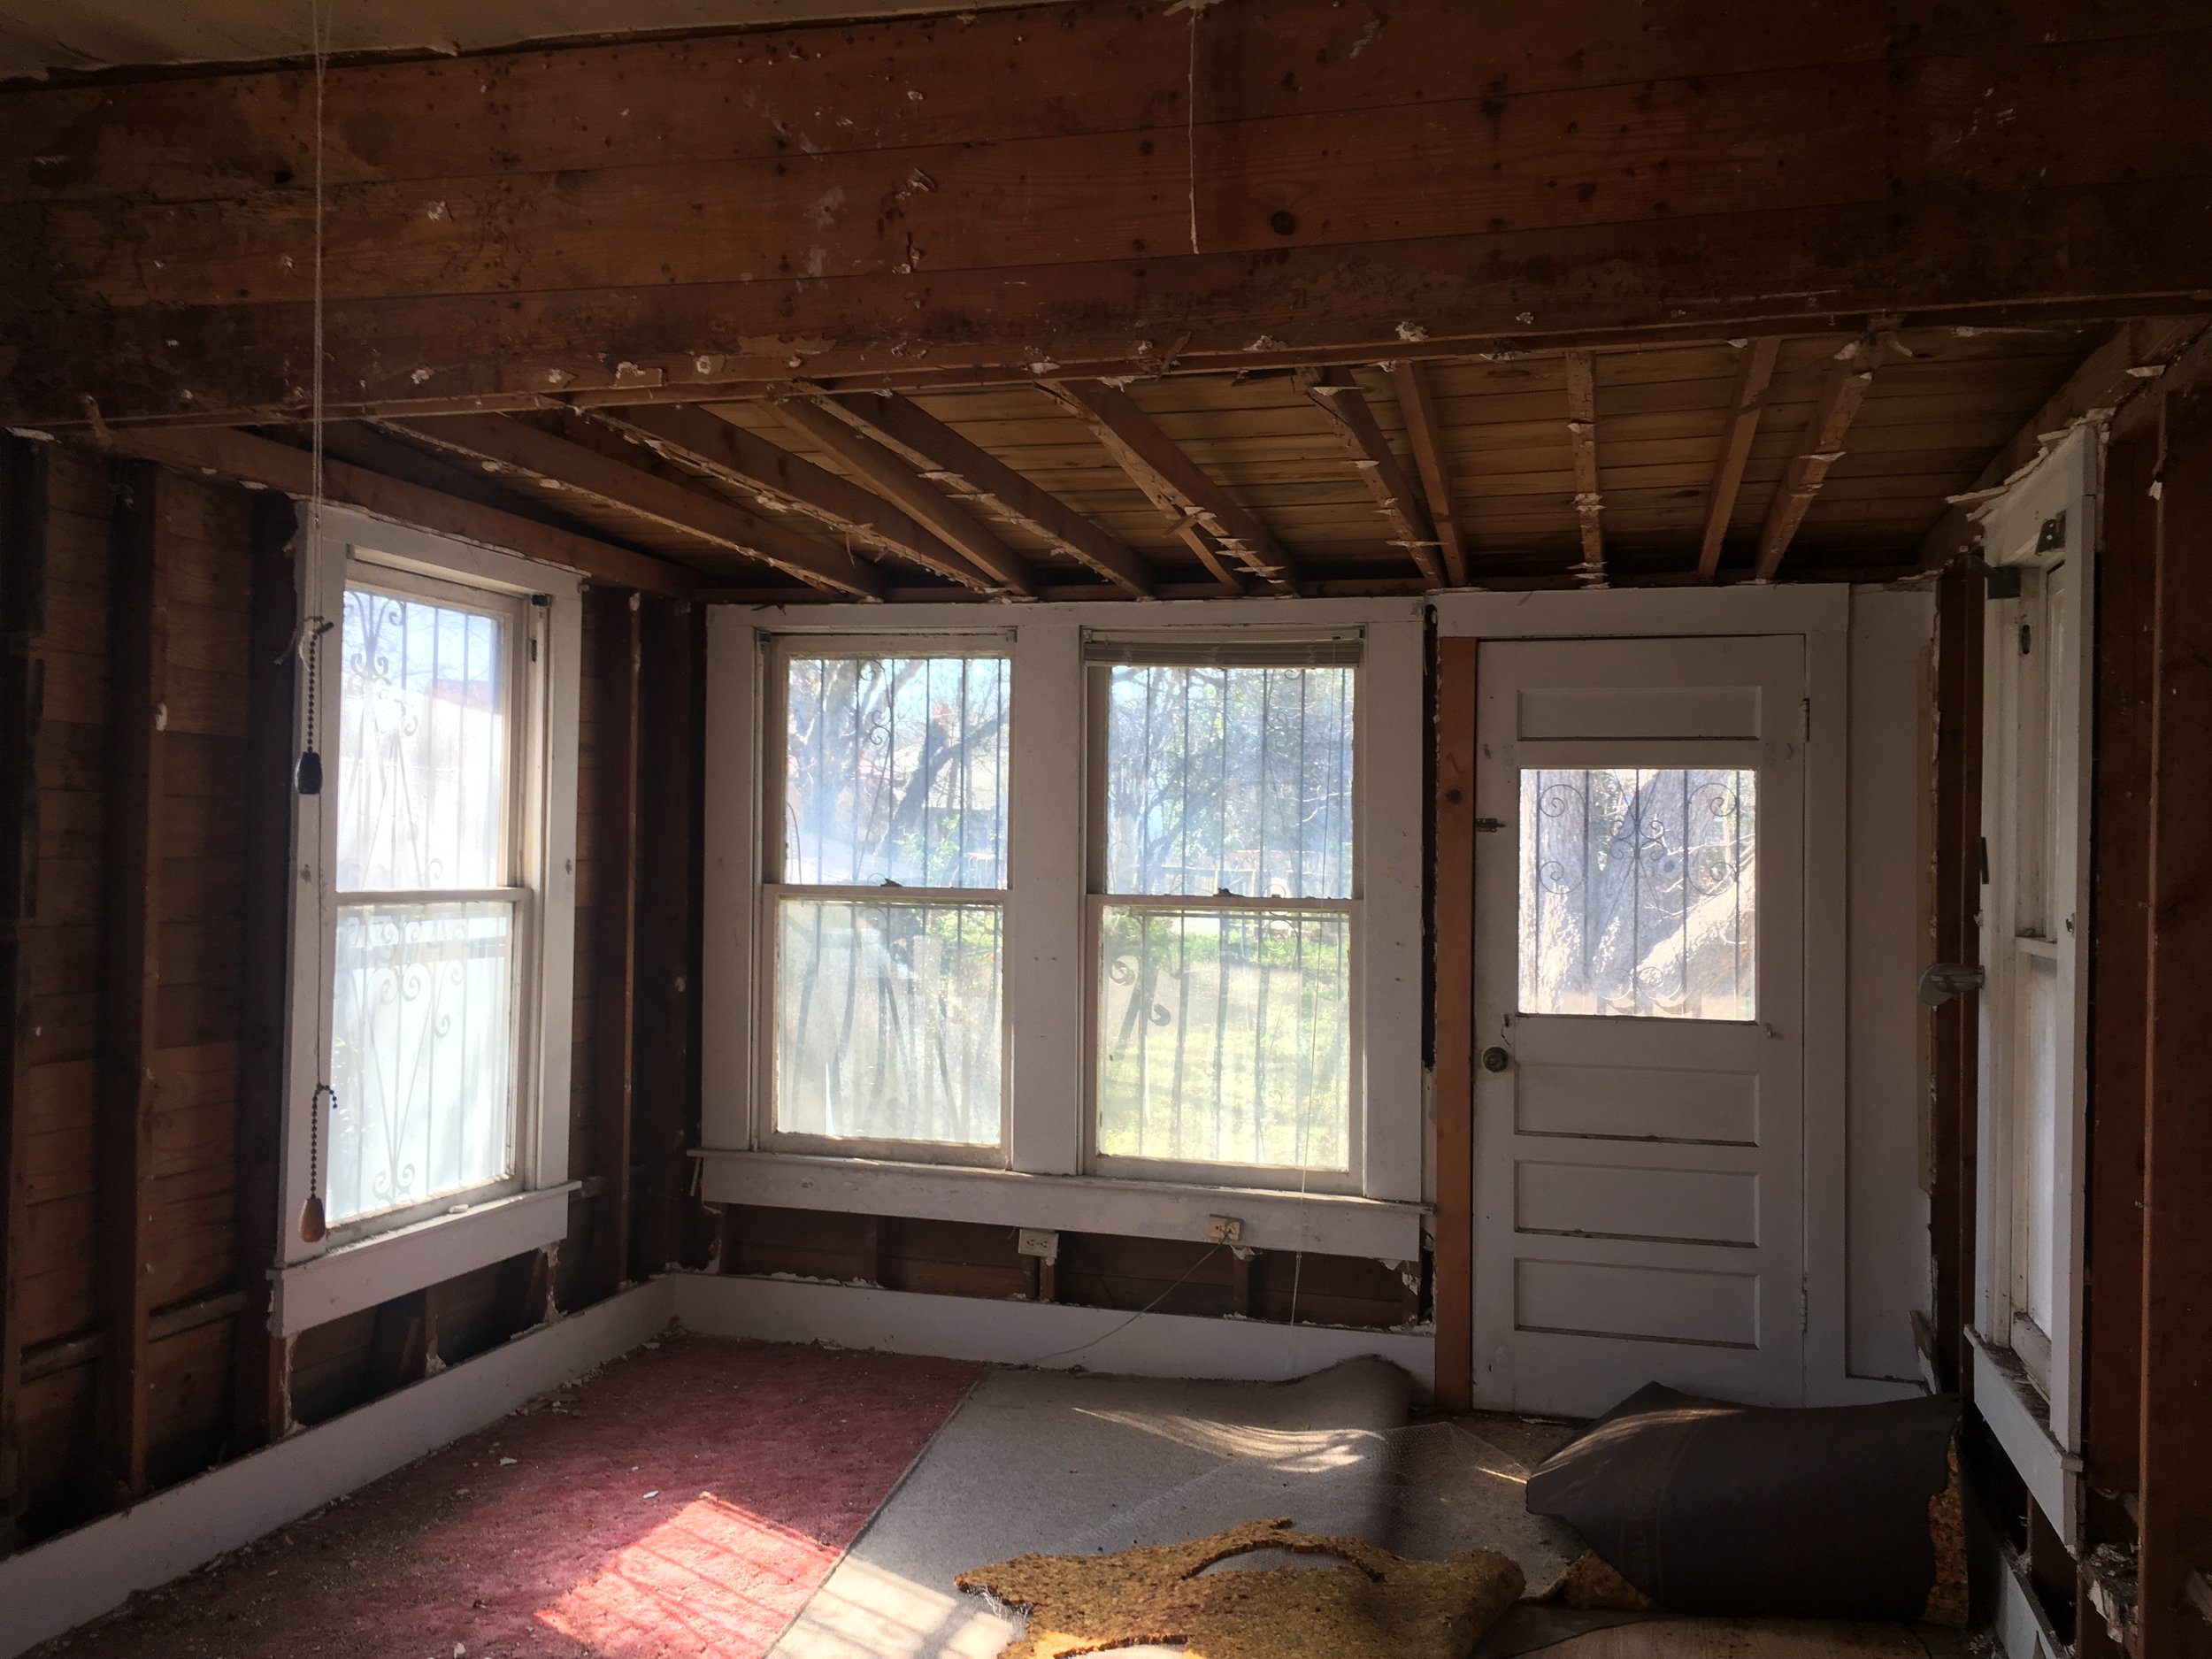
The master bedroom. The door to the left went to the hallway. The door on the back wall was the very small closet. This wall backs up to the main bathroom. We take this closet out and utilize the space in the main bathroom. One of the only things this space has going for it at this point is the massive amounts of light!
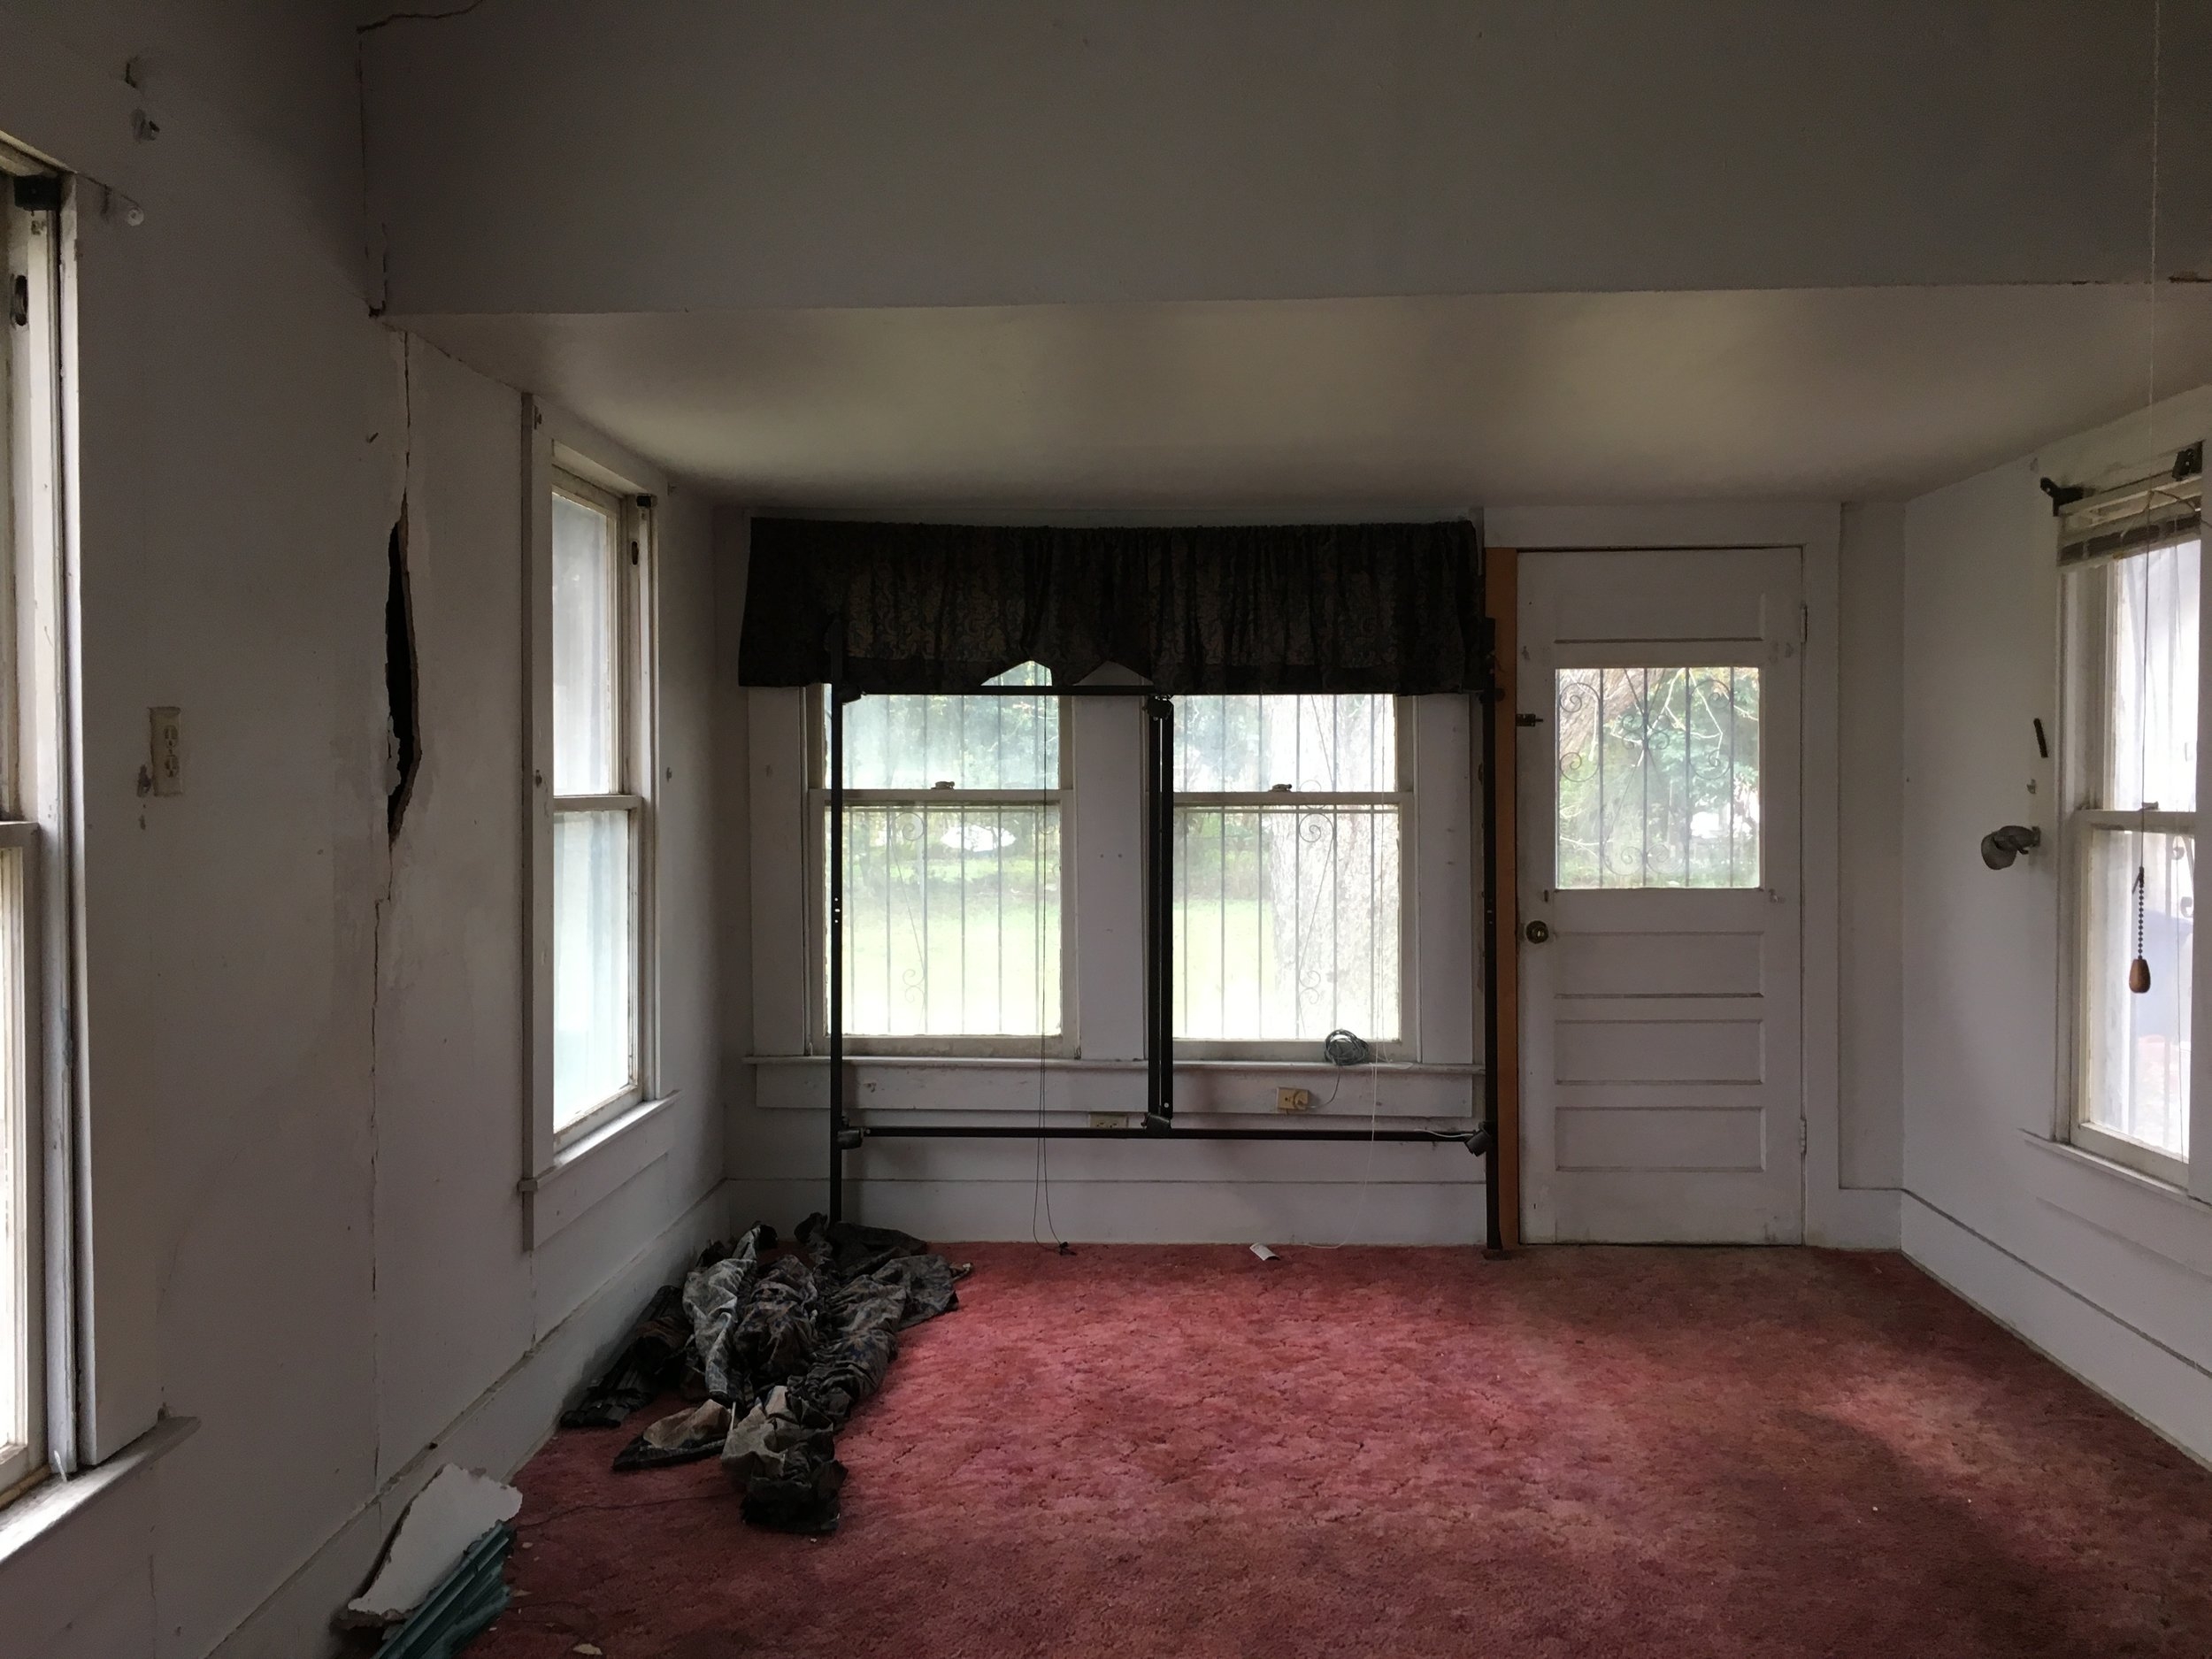
The image on the right is the other half of the master bedroom. You are looking at what we think was a converted porch at one time. Obvious reasons behind that would be the lower ceiling height and the exterior door. This are will become the master bath.
The Demolition
The demolition phase was fast and painless and the design of the space came very naturally to me. With a few modifications to the floor plan, we were off and running. There were a few gems discovered during demolition. The first being hardwood floors throughout the house. The second, all walls and ceilings were covered in shiplap. Neither were perfect but over time we were able to salvage most of the flooring. The shiplap was utilized on the ceiling in both the Living Room and Dining Room. We were also able to salvage some of the shiplap waste to use as an accent for the kitchen island.

The top two images are taken in the living room. Shiplap was on the walls and ceilings. The hardwood was still somewhere buried under a few layers of linoleum and adhesive. There were two built-ins dividing the living room and dining room, which we all agreed were lovely. You can see in the second and third images, the wall dividing the dining room and living room was not down yet. The fourth image is showing a quick pick of the master bedroom, soon to be master bathroom.
The Design and Construction Phases
The interior design of this sweet home came quickly. I’ve included some fun sketches and finishes because, they are just fun to look at!
The construction phase did not move half as quickly as the demolition, it never does!
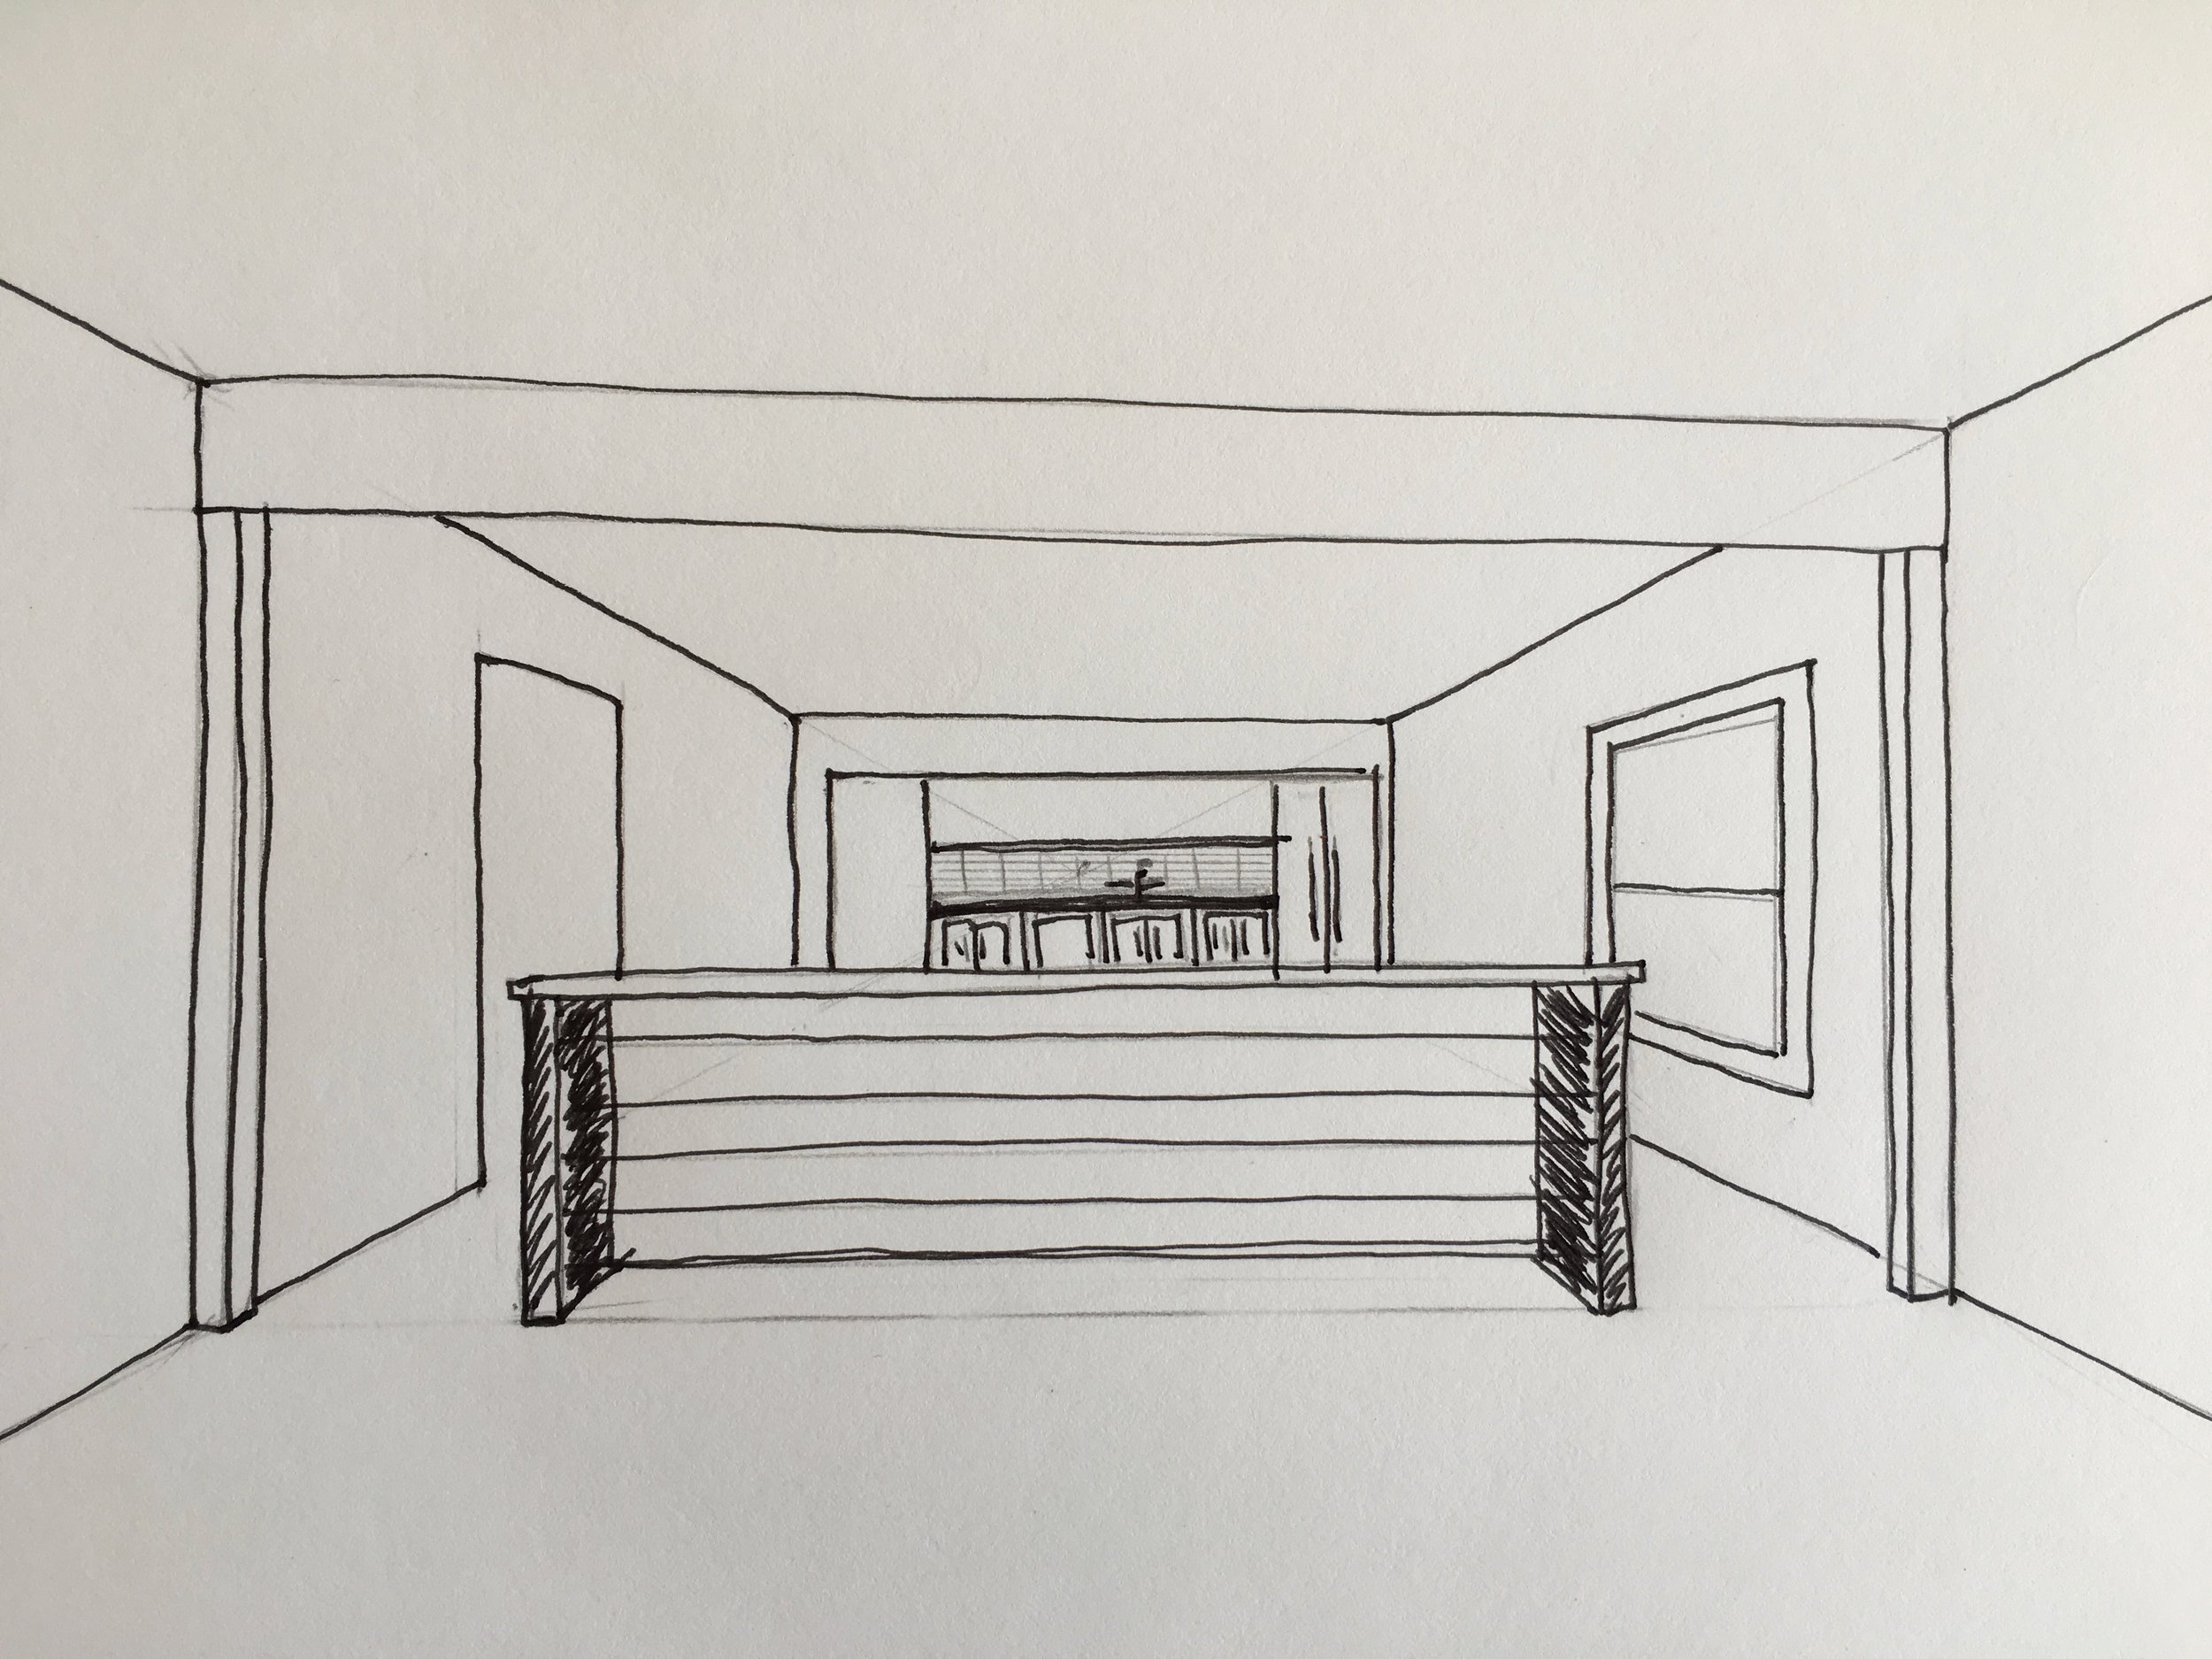
I did a quick sketch showing the open plan concept for the kitchen/dining room. A few details were tweaked and changed from this design but for the most part, this was it!
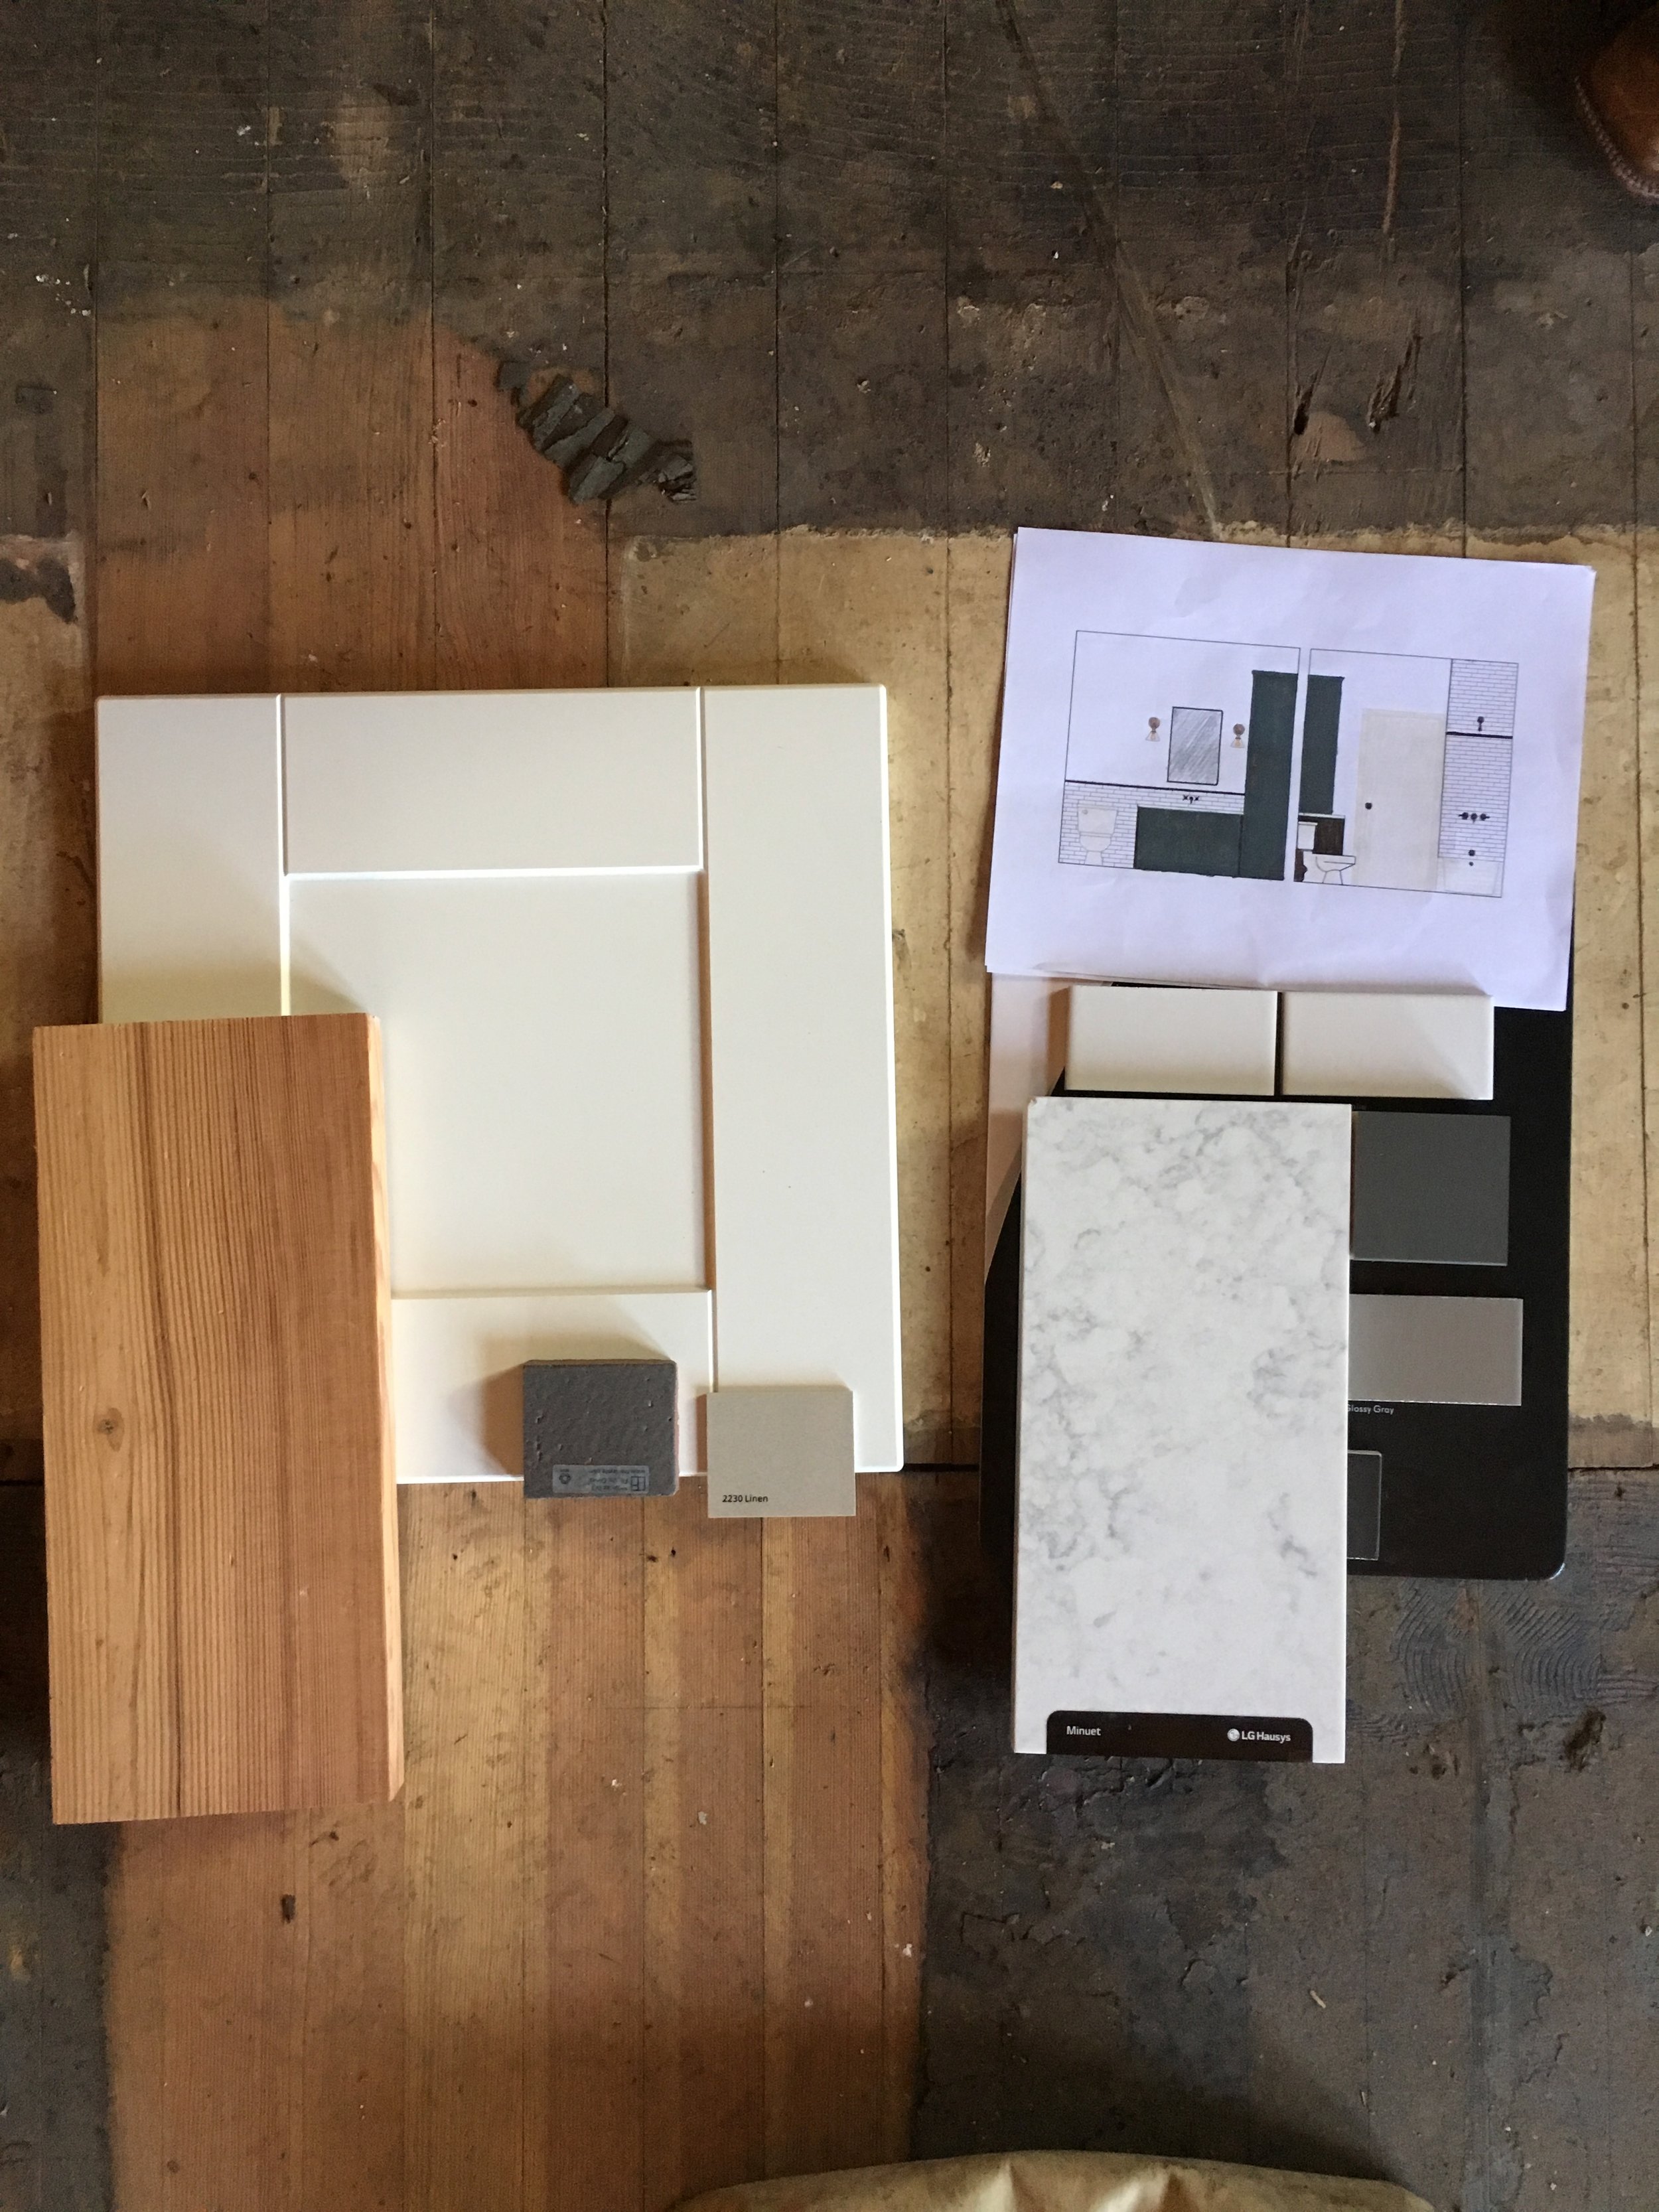
The finishes were coming together! The murky grey that surrounded the finish samples was the grime that was on the original hardwood flooring. You can see directly behind the finishes where they sanded off the grime and the original long leaf pine flooring was revealed!!! Also, shown here are the quartz countertops, long leaf pine countertop, cabinet door and tile backsplash.
The Reveal
Alright, alright, enough of the details. Let's get to the good part! The reveal!
The kitchen!!! I am so happy with how beautiful the kitchen turned out. The panels on the kitchen island are reclaimed shiplap from the walls and/or ceilings in the house. The wood island top is made from reclaimed long leaf pine flooring and could not be more beautiful! Oh and the floors!!! They turned out so beautifully!
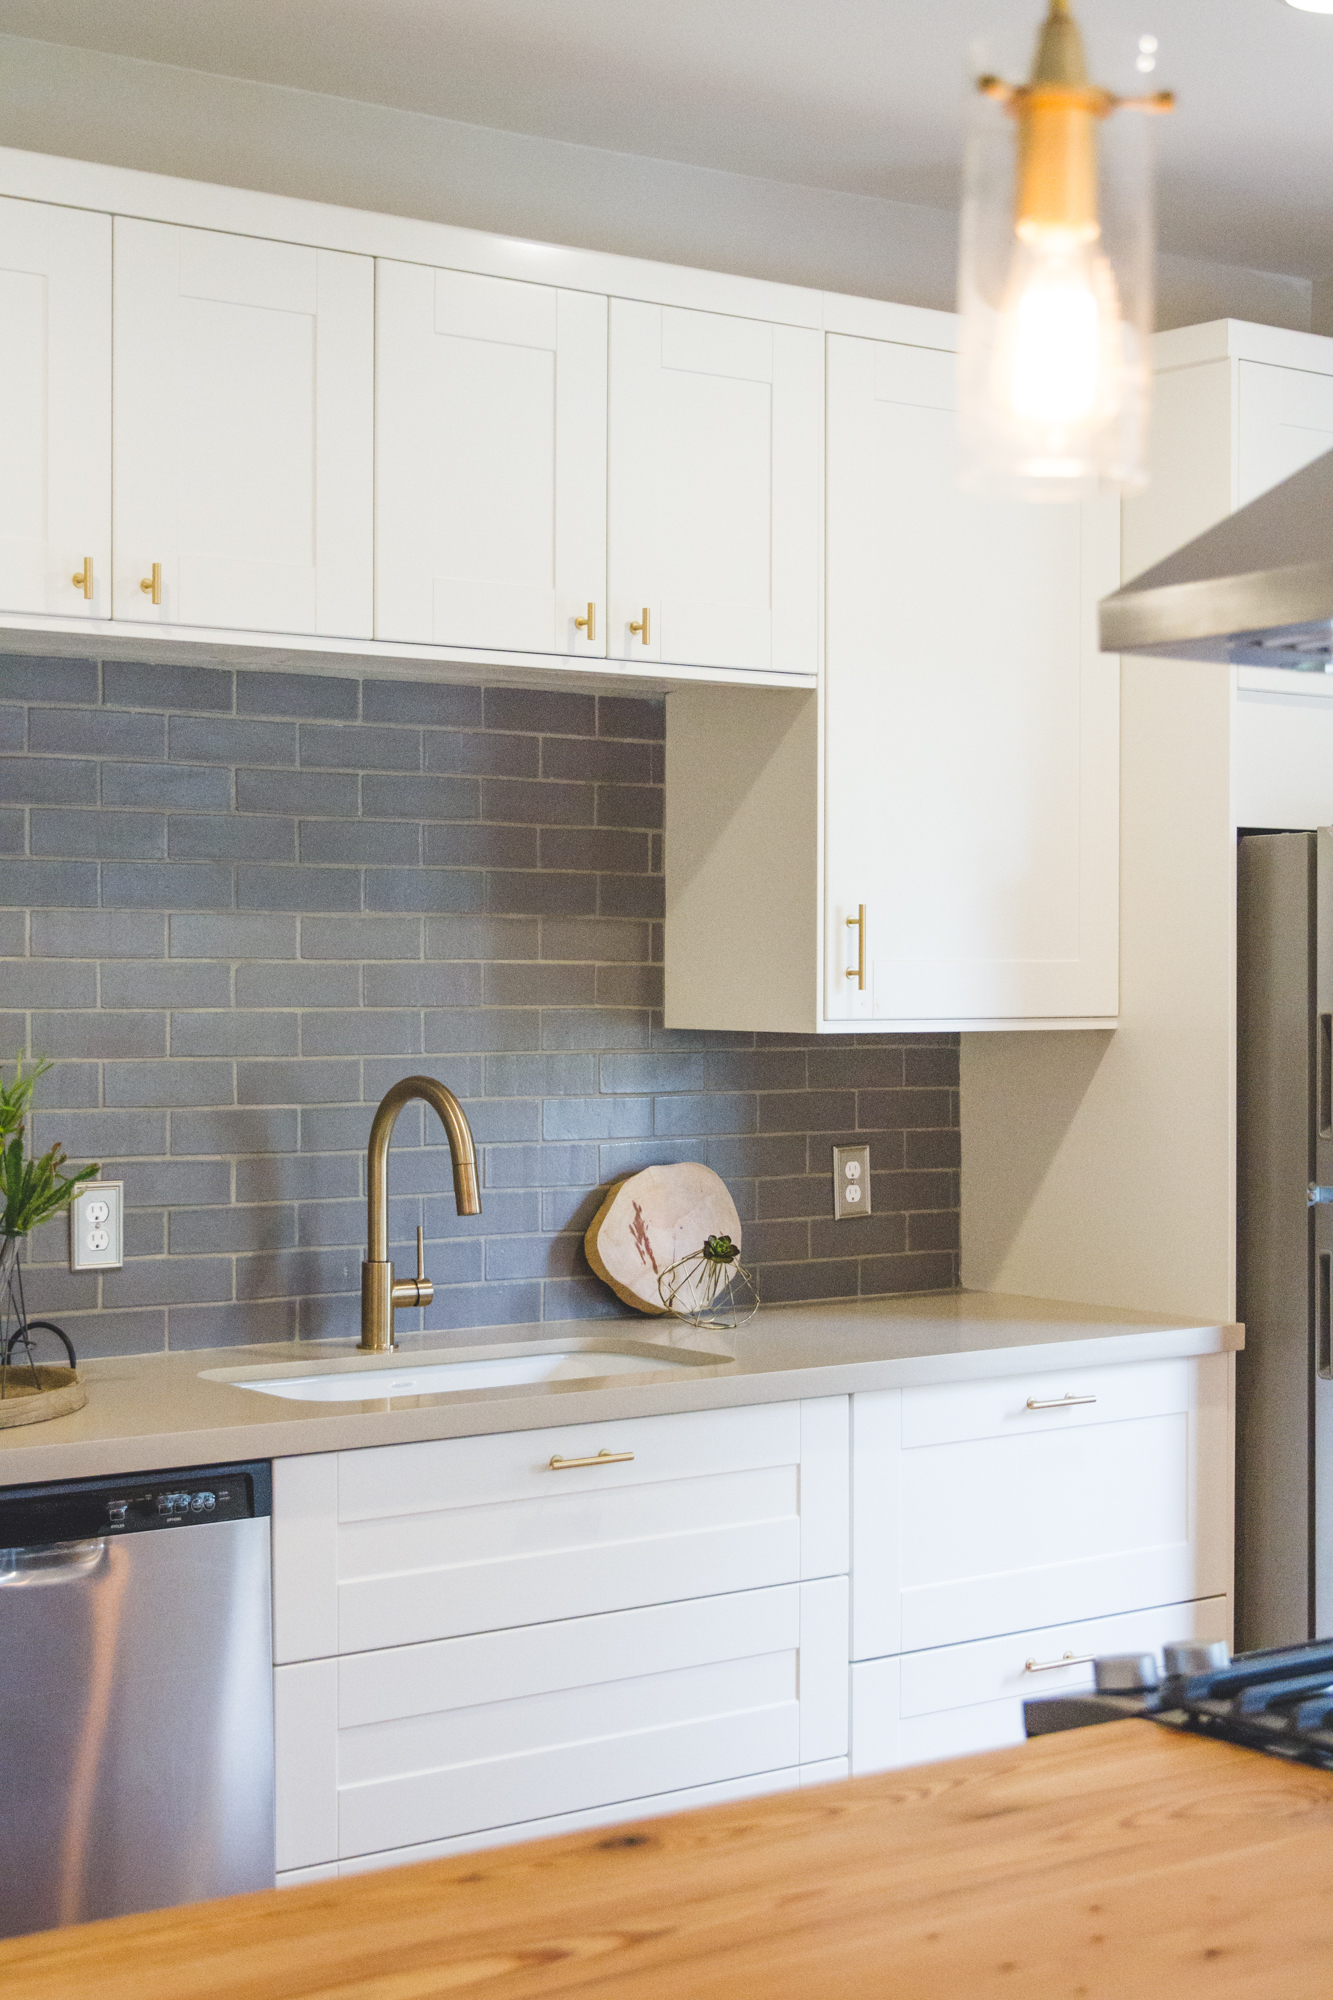

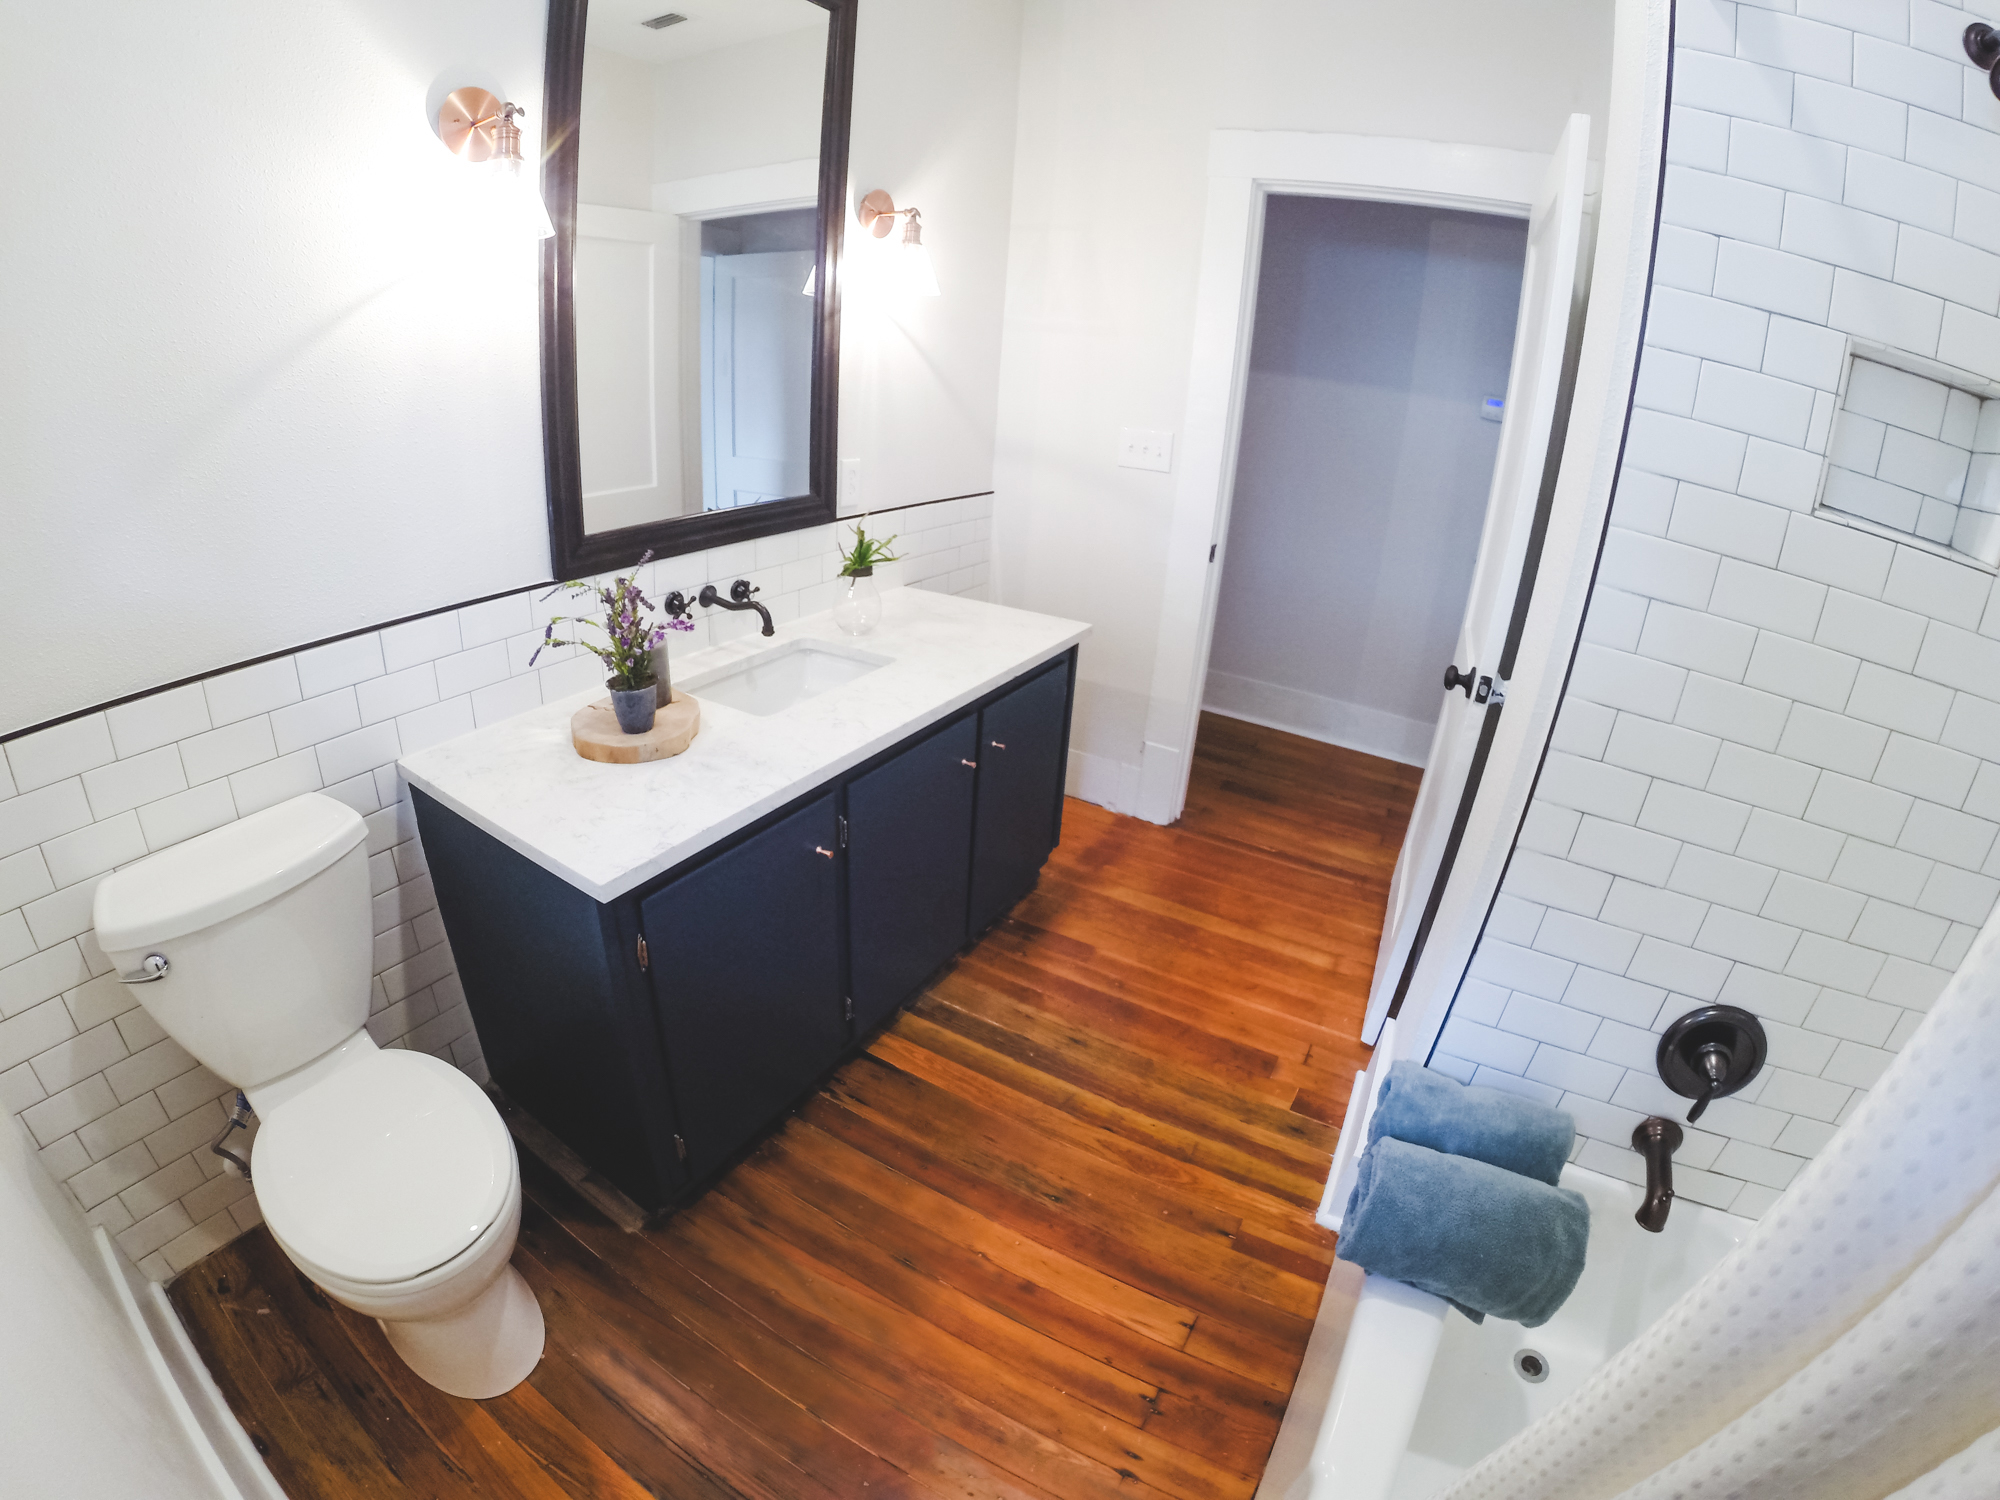
Hallway Bathroom: This bathroom is now very open with a beautiful quartz countertop and wall mounted faucet. The oil rubbed bronze paired perfectly with the copper accents.
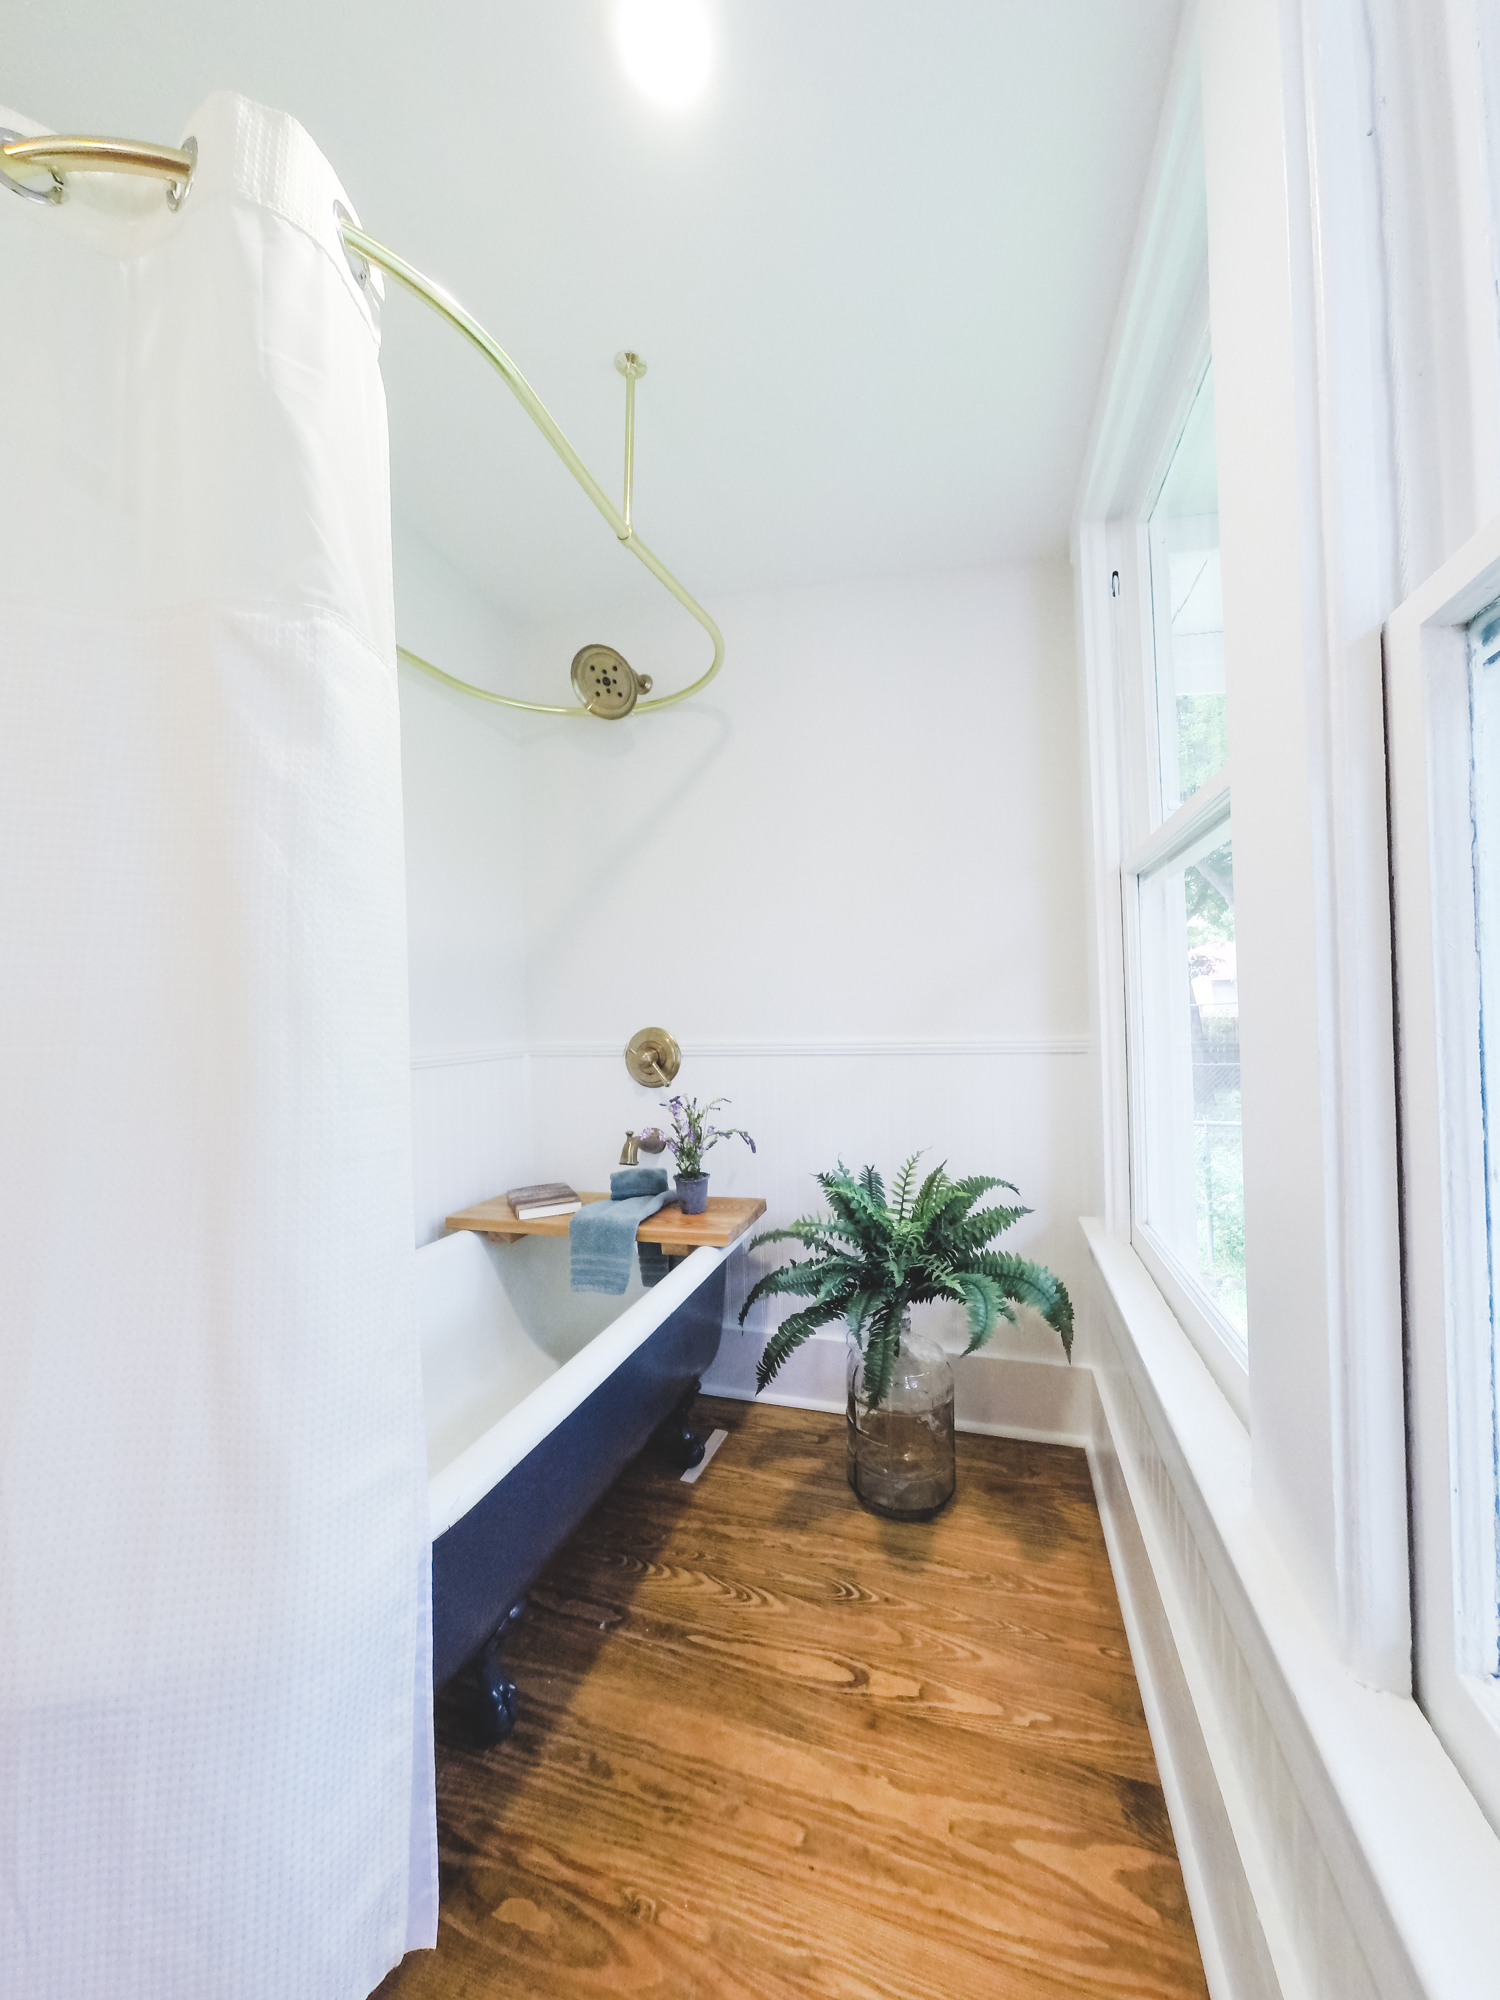
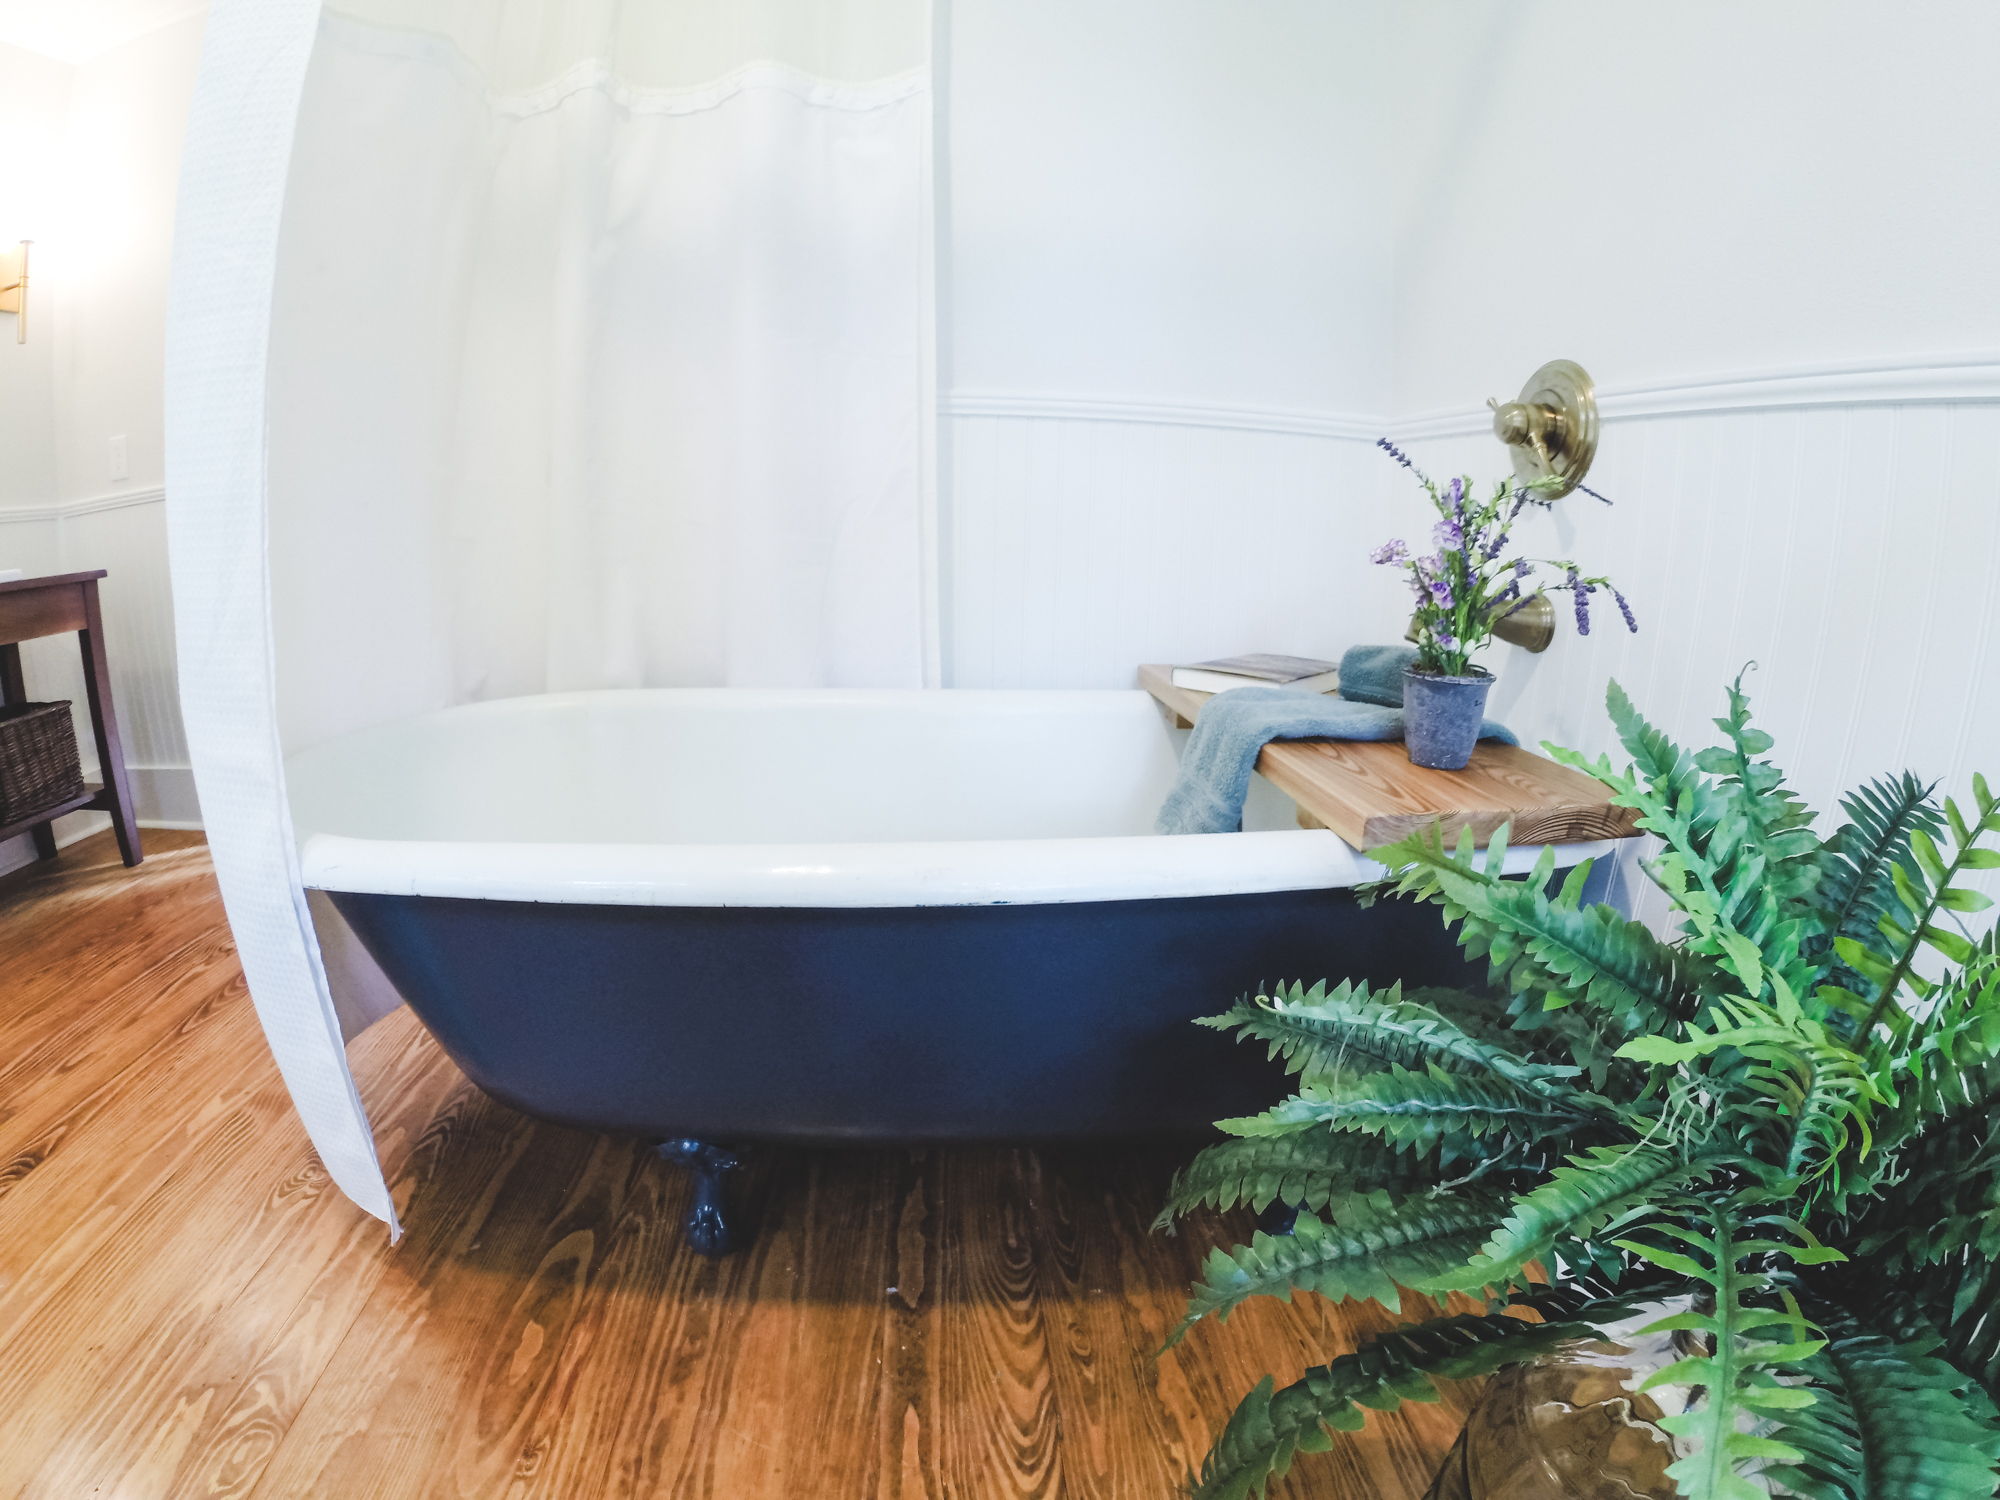
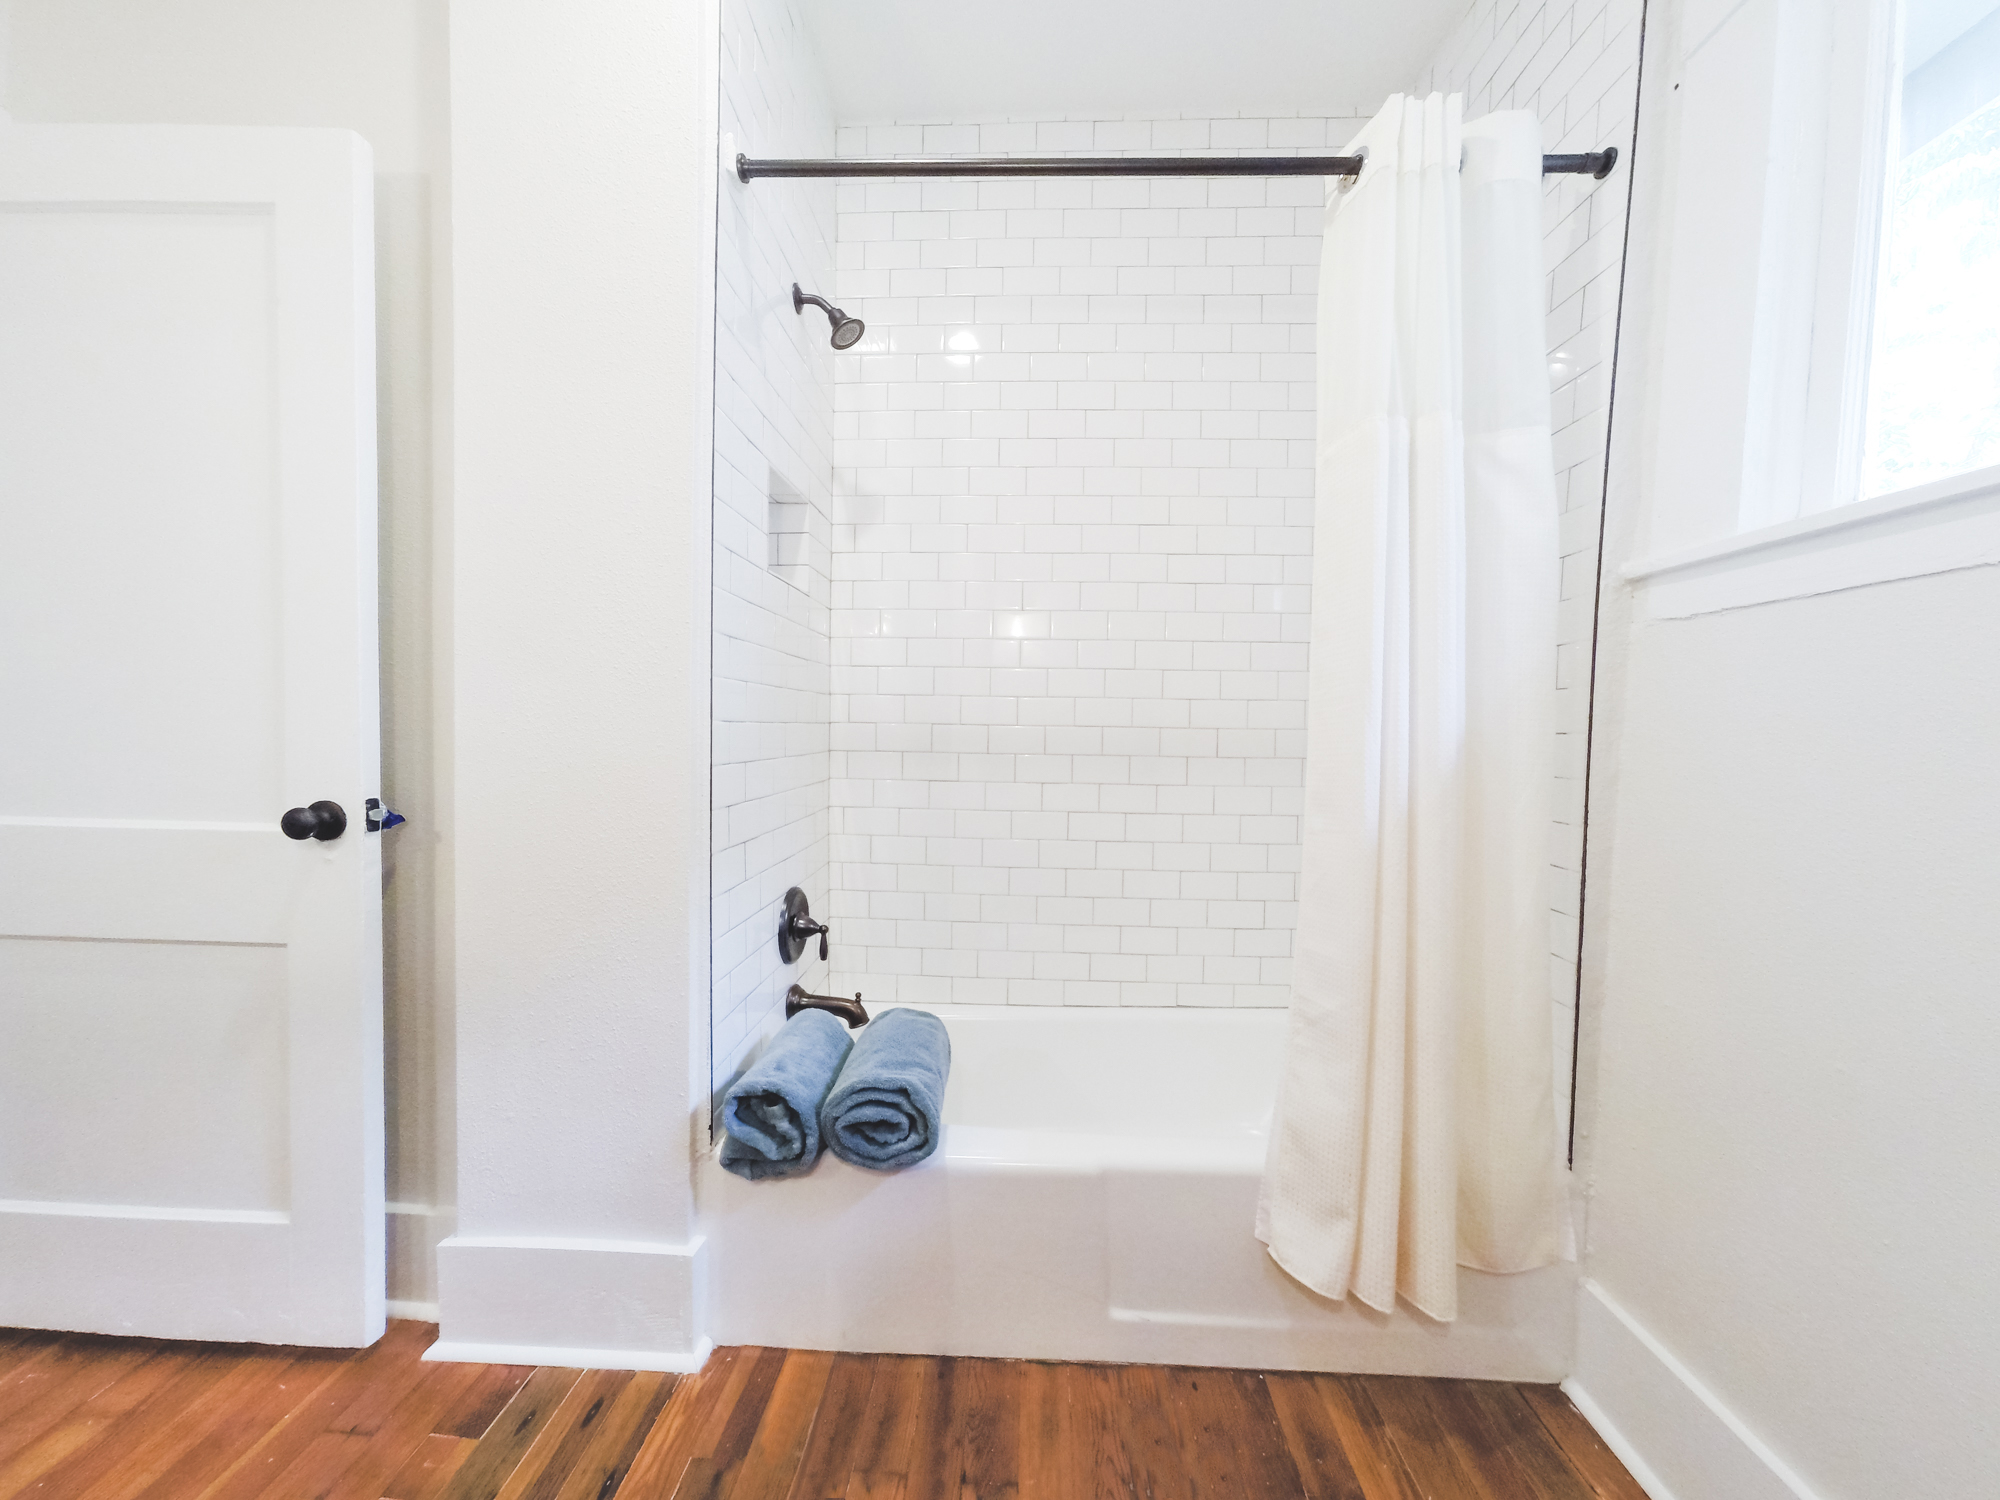
Master Bath: This was the enclosed porch in the master bedroom. We decided to convert it to a Master Bath. It is a sweet bathroom filled with lovely accents of brushed brass and a claw foot tub.
This house was a joy to work on. We are so pleased with the final results!